实验环境:Centos7
1.关闭selinux:
[root@centos7 ~]# vim /etc/sysconfig/selinux

=后面改为disabled
:wq保存并退出
把机器重启:[root@centos7 ~]# reboot
2.安装LAMP环境并启动相关服务
[root@centos7 ~]# yum -y install httpd php php-mysql php-gd mariadb-server

[root@centos7 ~]# systemctl start httpd         #启动http 服务。

[root@centos7 ~]# systemctl enable httpd     #设置 http 服务开机自启。

[root@centos7 ~]# systemctl start mariadb     #启动 mariadb 服务。

[root@centos7 ~]# systemctl enable mariadb    #设置 mariadb 服务开机自启。

[root@centos7 ~]# systemctl disable firewalld && systemctl stop firewalld &&

systemctl status firewalld                    #关闭防火墙
3.设置MySQL的root用户密码
[root@centos7 ~]# mysqladmin -u root password "123456"
验证一下能不能进去:
[root@centos7 ~]# mysql -u root -p123456

MariaDB [(none)]> \q
4.把 DVWA 程序包上传到 centos7 主机上并配置相关文件
解压 DVWA-master.zip 程序包,并指定解压后存放路径为/var/www/html/
[root@centos7 ~]# unzip -d /var/www/html/ DVWA-master.zip

[root@centos7 ~]# cd /var/www/html/

[root@centos7 ~]# mv DVWA-master dvwa #修改名称 DVWA-master 为 dvwa

[root@centos7 ~]# chown -R apache. /var/www/html/dvwa/ #修改文件主、组为 apache 用户

[root@centos7 ~]# cd dvwa/config/
#切换到 dvwa/config/目录下
复制 config.inc.php.dist 文件,并命令为 config.inc.php:
[root@centos7config]# cp config.inc.php.dist config.inc.php
[root@centos7config]# vim config.inc.php #编辑 config.inc.php 文件,修改如下:
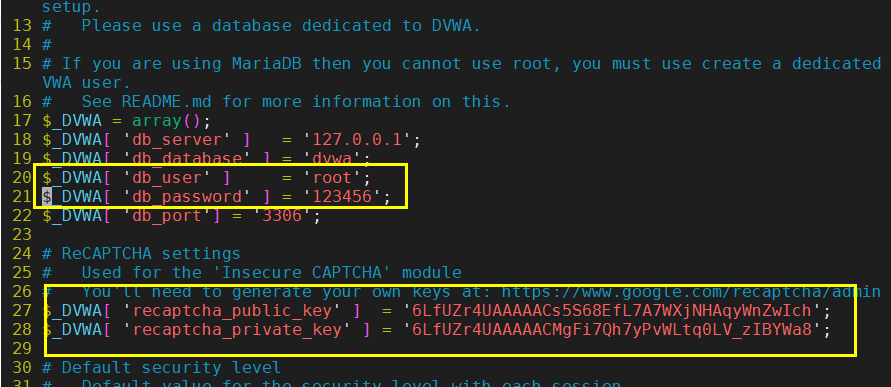
修改第 21 行内容,改成自己的 mysql 的 root 用户密码
$_DVWA[ ‘db_password’ ] = ‘p@ssw0rd’;
修改为:
$_DVWA[ ‘db_password’ ] = ‘123456’;
(用户也建议改成root)
修改第 29、30 行内容:
$_DVWA[ 'recaptcha_public_key' ] = '';

$_DVWA[ 'recaptcha_private_key' ] = '';
添加上谷歌开源免费验证码 reCAPTCHA 的公钥和私钥
$_DVWA[ 'recaptcha_public_key' ] = '6LfUZr4UAAAAACs5S68EfL7A7WXjNHAqyWnZwIch';

$_DVWA[ 'recaptcha_private_key' ] = '6LfUZr4UAAAAACMgFi7Qh7yPvWLtq0LV_zIBYWa8';
[root@centos7config]# vim /etc/php.ini
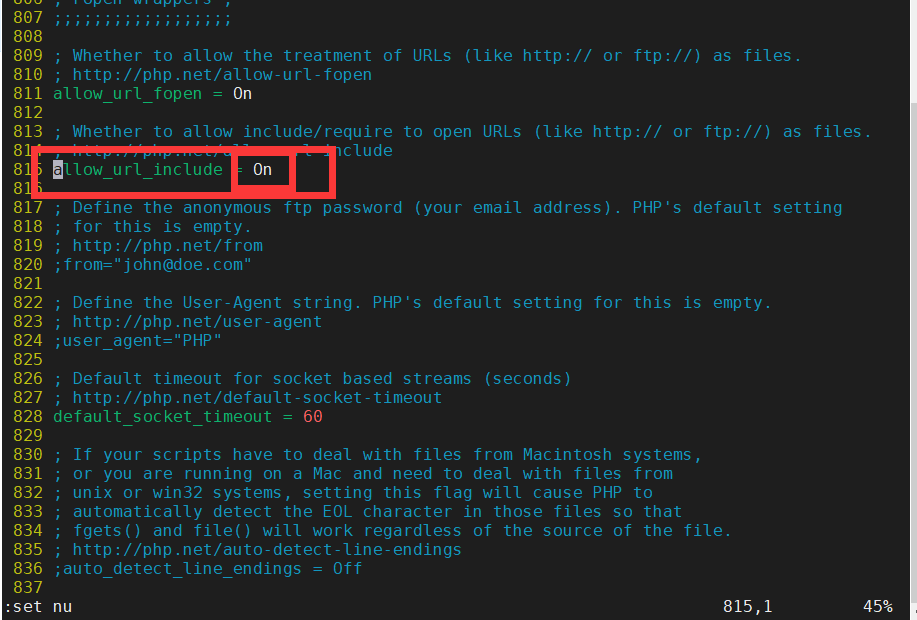
末行模式下输入:set nu显示行数,跳转到815行(命令行模式按815,再按G就可以跳转),修改文件中的第 815 行的内容,原 Off,改为 On:
allow_url_include = Off
改为:
allow_url_include = On

[root@centos7config]# systemctl restart httpd
5.打开浏览器进入web界面
http://********/dvwa/setup.php(此处的*****为你的centos7的IP地址)
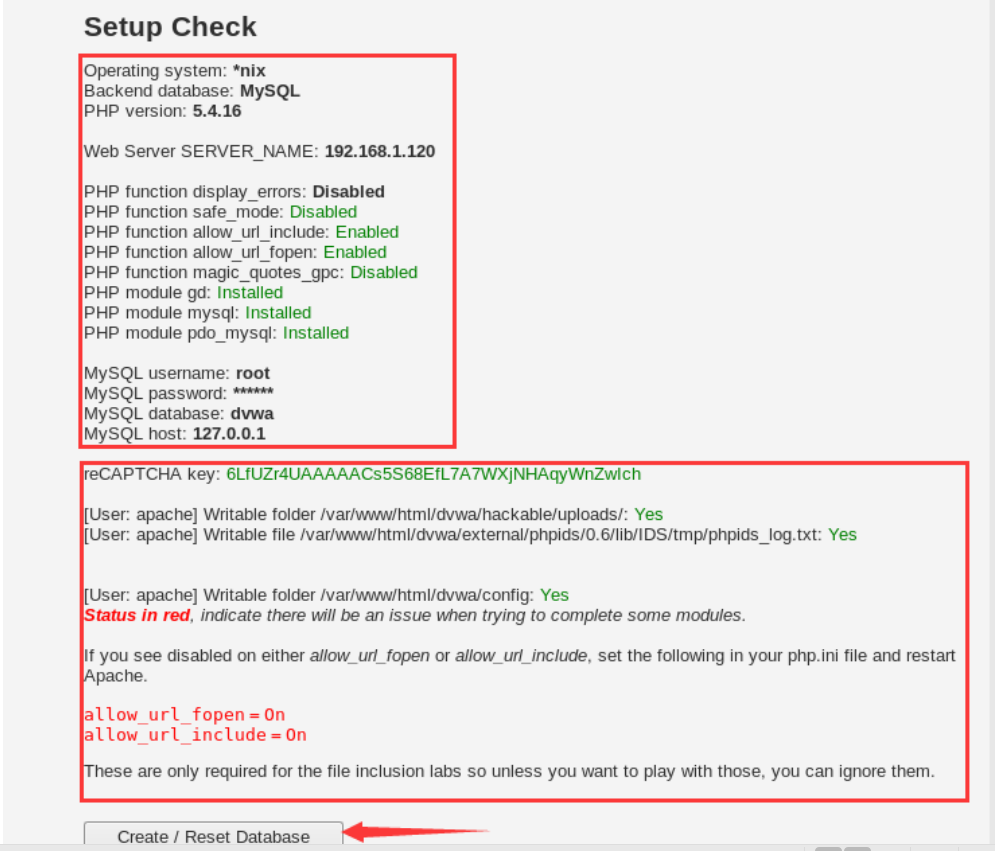
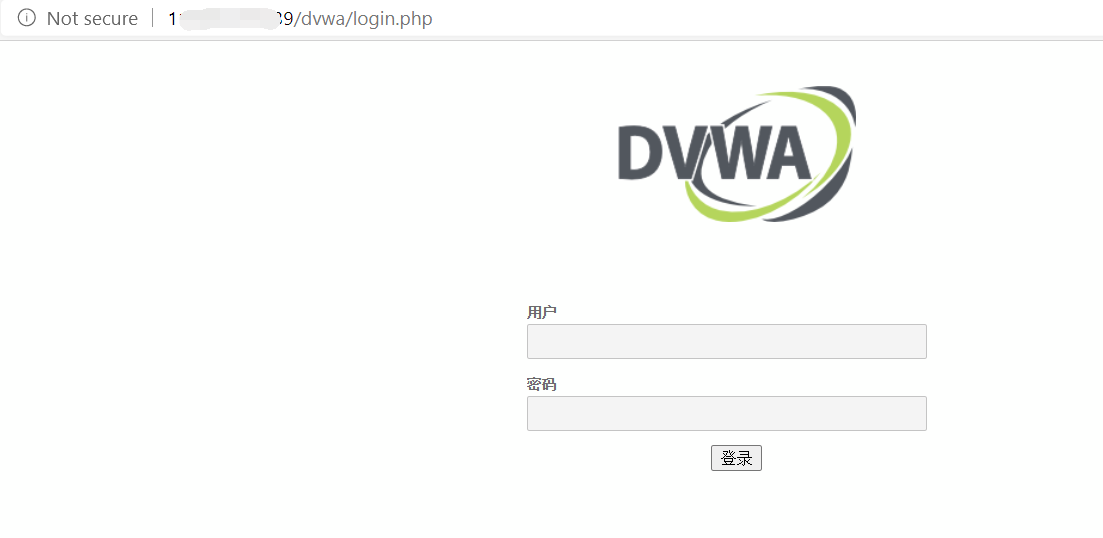
跳到登录页面。
登录:用户为:admin 密码:password
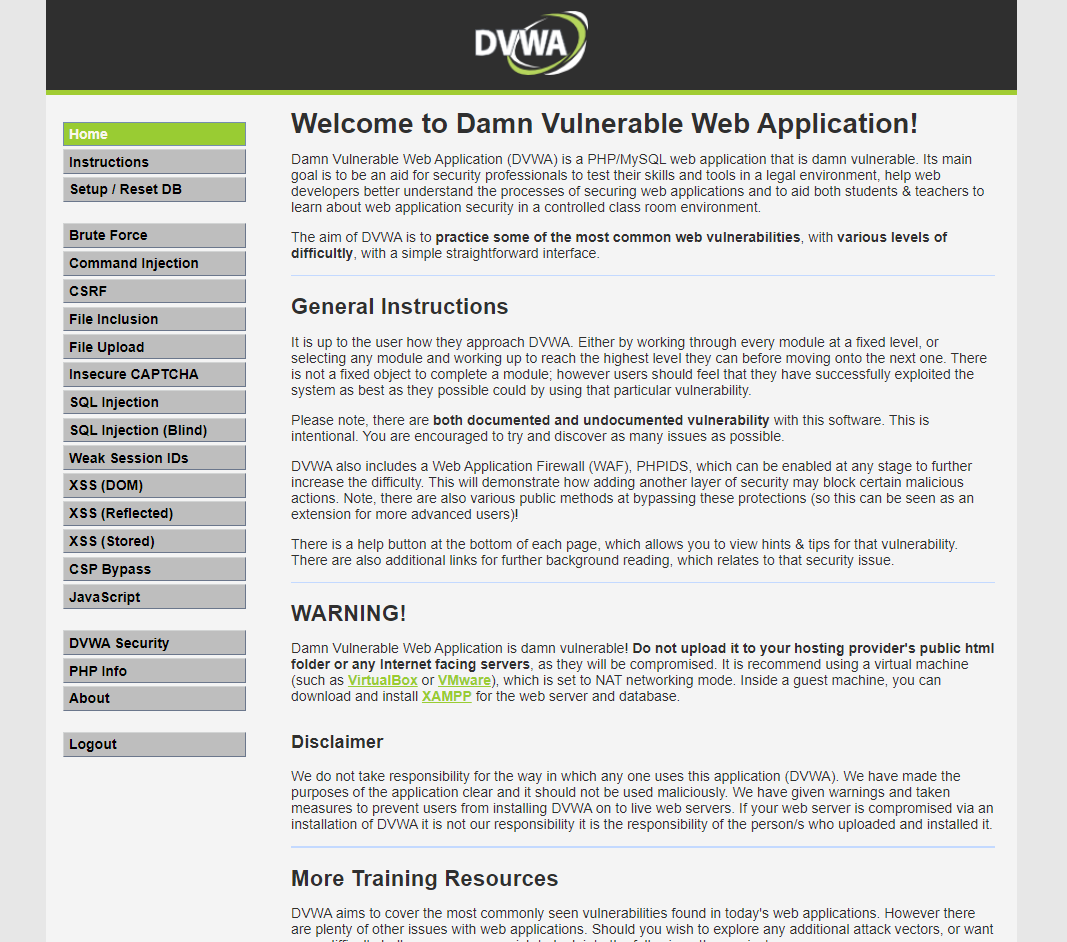
登录进去,看到这样的界面,说明搭建好了!大功告成!可以开始练习web渗透了!!!!
来源:freebuf.com 2021-01-05 19:49:22 by: bennieDaniel
© 版权声明
文章版权归作者所有,未经允许请勿转载。
THE END
喜欢就支持一下吧









请登录后发表评论
注册