最近琢磨frida Hook,好难,想走个捷径都不行,看了酒仙桥的文章《酒仙桥第六部队 hook从未如此丝滑》,其中提到了httpDecrypt ,t00ls,大概是看文章走马观花了,绕了弯路,避免后续踩坑记录如下:
1.安装MUMU模拟器,默认监听端口7555,
adb connect 127.0.0.1:7555
检测是否连接
adb devices
MUMU模拟器是x86架构,在frida网站上下载对应frida-server,通过命令
adb push frida-server /data/local/tmp
传输到MUMU
chmod -R 777 frida-server
./frida-server
注意:mumu模拟器自带木有wifi功能,下载getWifiSetting.apk
(链接: https://pan.baidu.com/s/1oXA1I9D3ZqdyfY4R_0nLlA 提取码: jbzy )
安装后,在wan中设置本地网络代理即可:

2.运行httpDecrypt:
需要在python3环境下,直接 python3 app.py即可
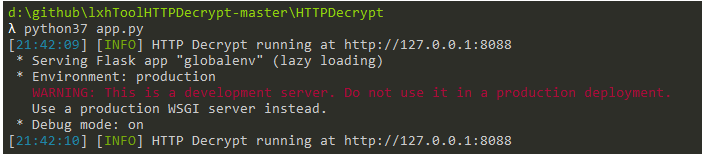
访问url:(如果没有应用信息,建议多刷新几次,或者修改项目文件中的时间,具体可百度)
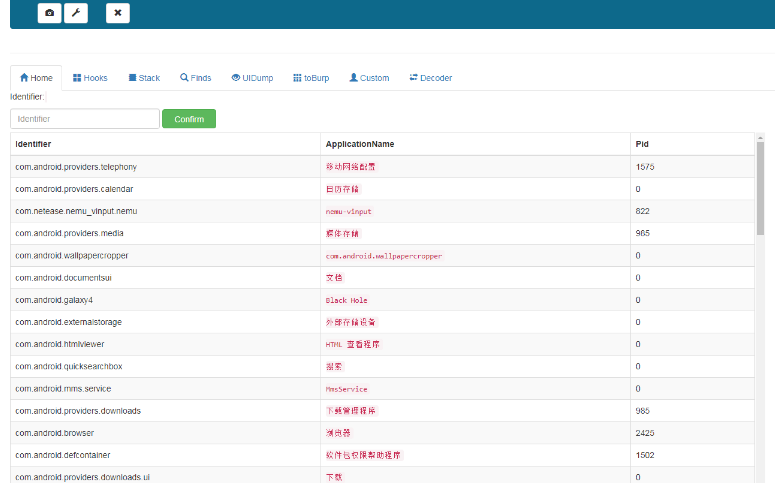
3.开启httpdecrypt之旅
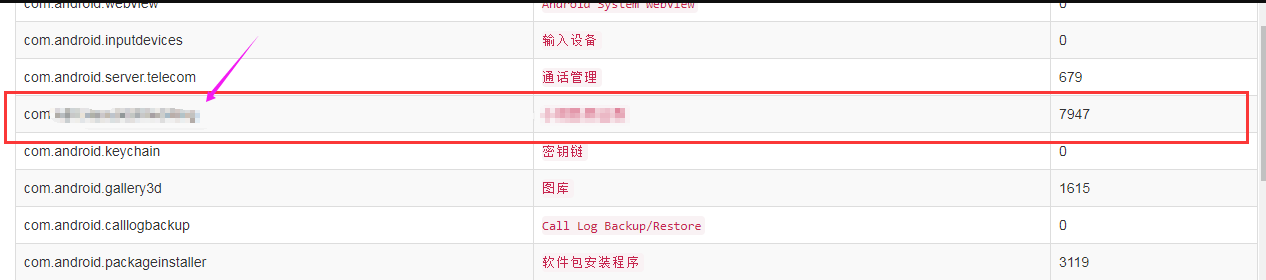
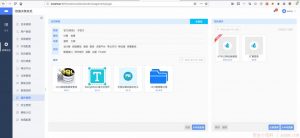
(1)选中需要操作的apk,并复制包名:
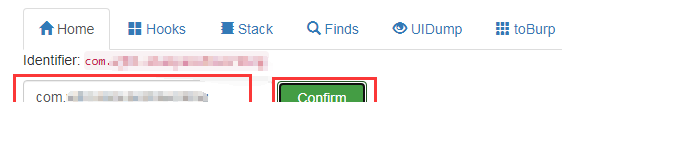
(2)填入包名至Identifier:,点击confirm
(3)点击Hooks,在match中填入包名,并点击confirm
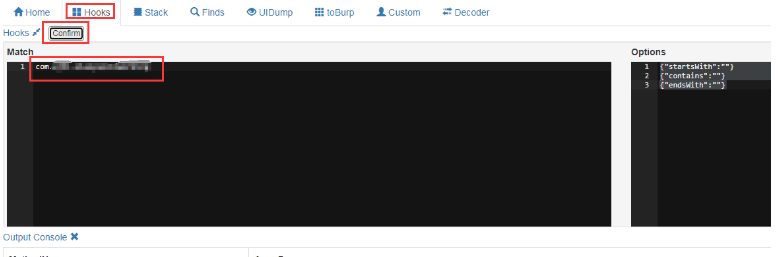
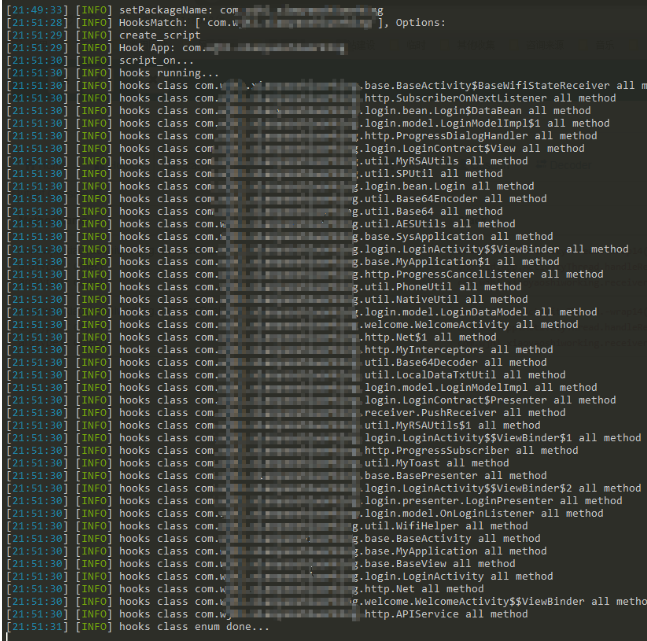
此时已经hooks,查看cmd下的httpdecrypt,已经hook的所有方法:
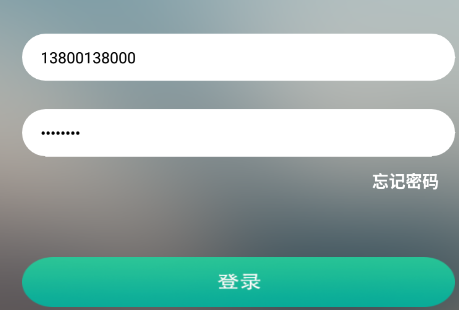
(4)运行apk,进行功能(登录)操作:
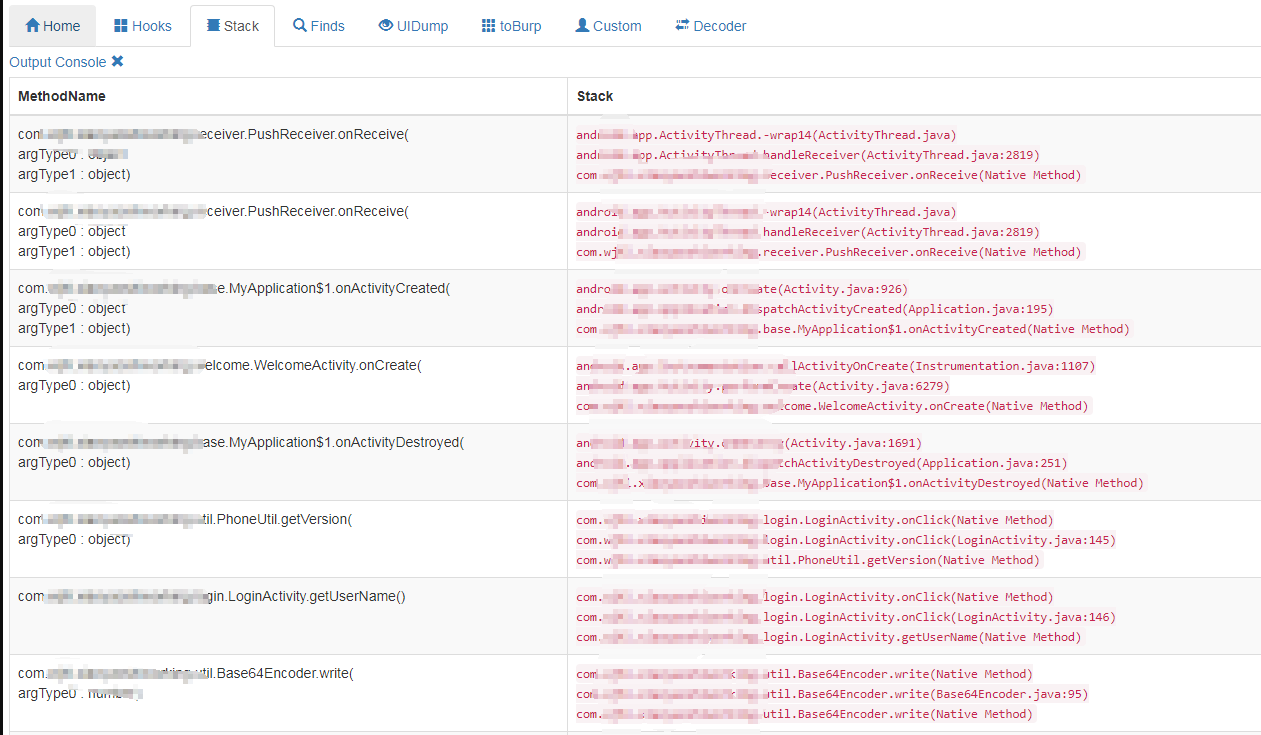
在stack中,可以看到相关数据:
返回hook界面,能看到我们的输入数据,已经加密后的数据,可以看到进行了base64以及ase加密:


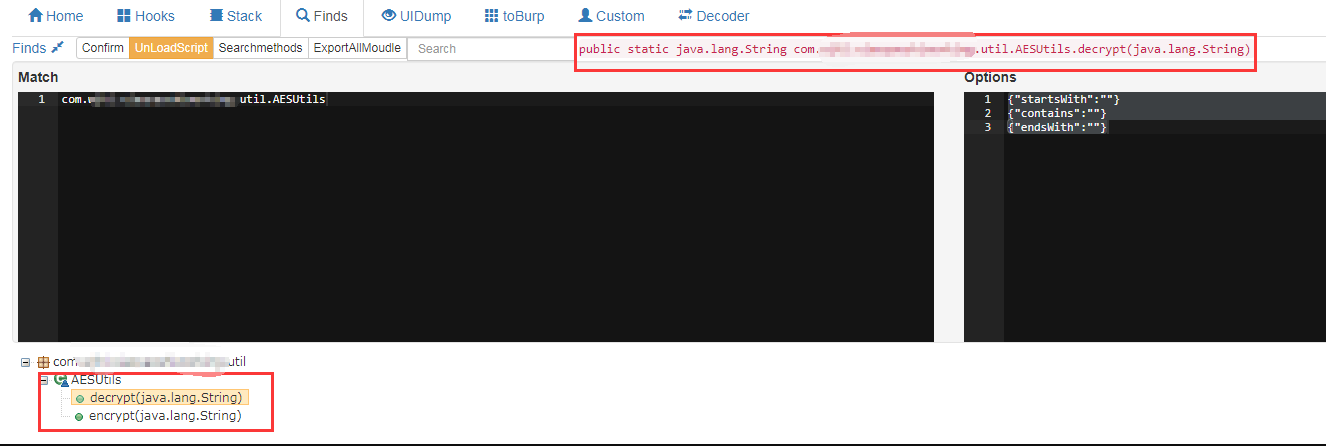
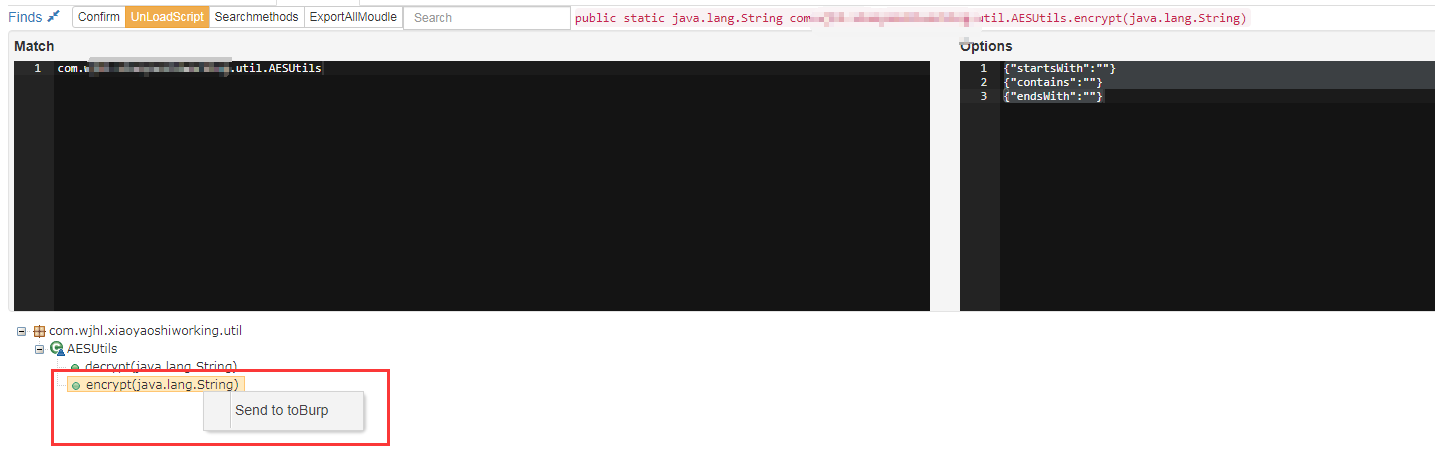
(5)在finds功能中,输入刚刚找到的方法名:com.*.***.util.AESUtils:
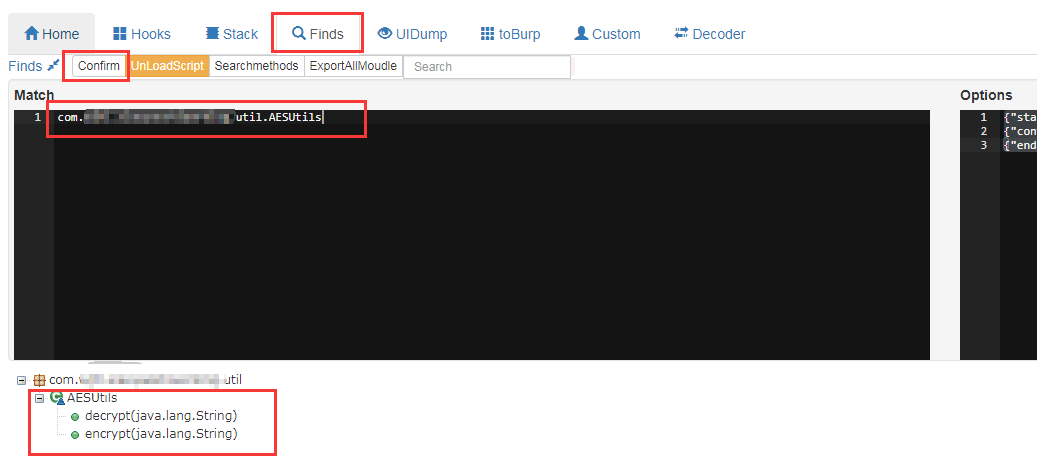
可以看到加密函数参数中,对象类型的参数具体类型为static,选择到encrypt,然后右键发送到toBurp功能:
<特别注意:这里的toburp功能并不是在burp中查看,而是当前web页面中的“toBurp”,之前一直以为是直接发到了burp中,知道详细看了酒仙桥的文章才发现理解错了>
继续在toBurp功能处 点击confirm-再点击add


此处对象参数类型为static,所以我们选择Generate export static script。
如果参数为动态,那我们选择Generate export instance script。
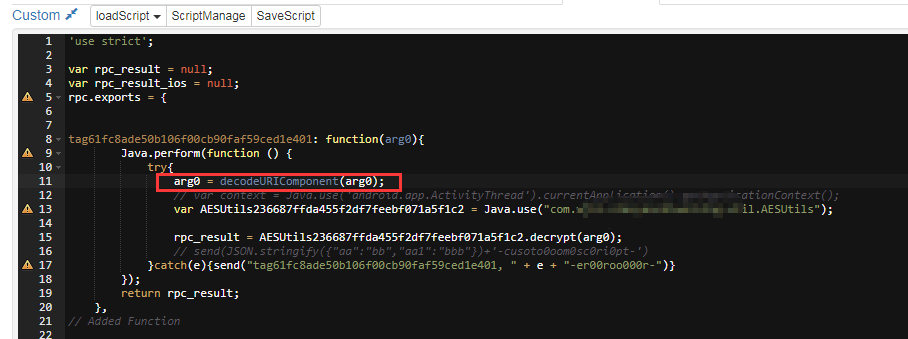
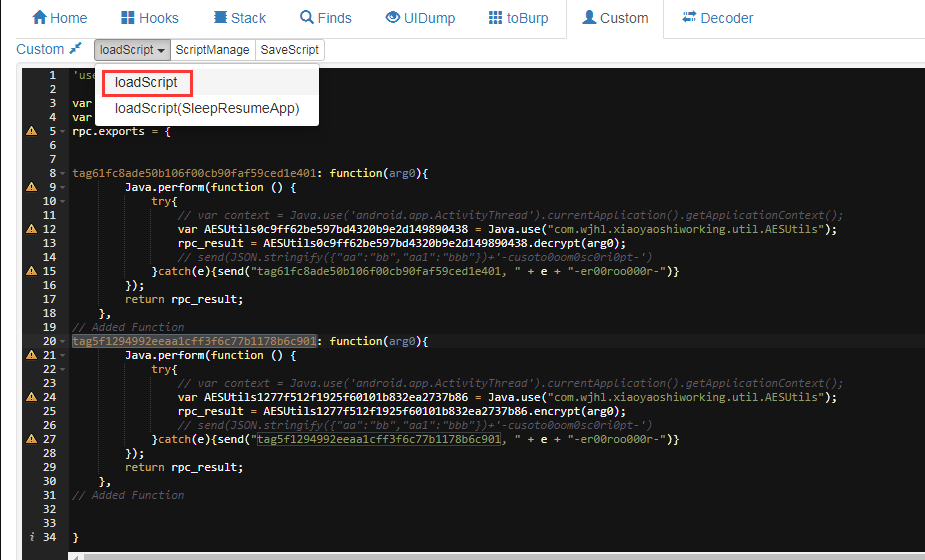
现在可以看到,在custom中会生成代码。
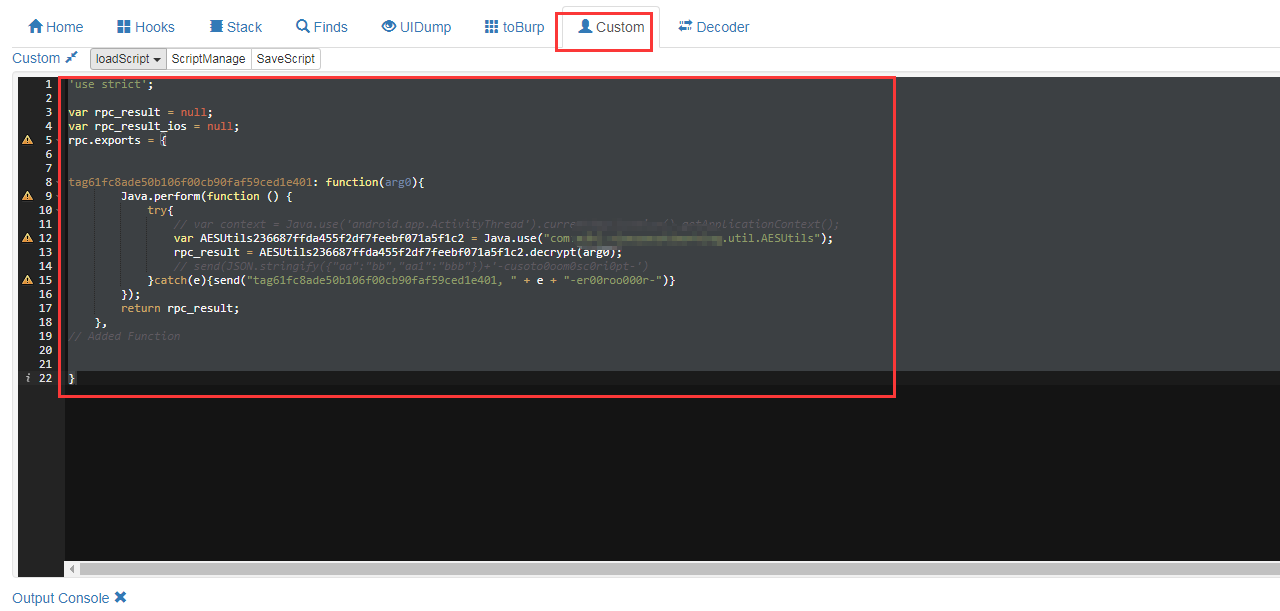
代码中,arg0是传过来的加密字符串。
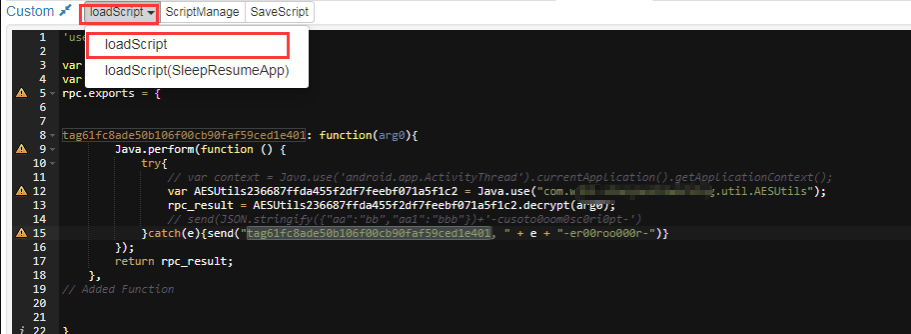
点击左上角loadScript 将脚本发送到burp:
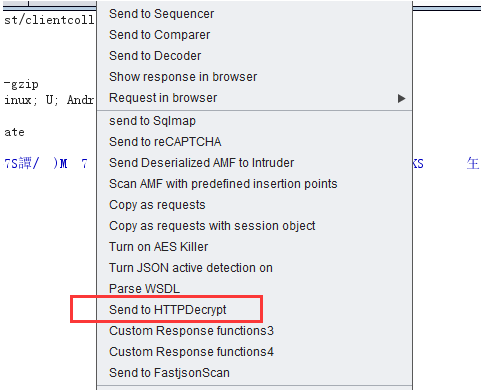
现在切换至我们常用的burp,右键选择send to httpDecrypr:
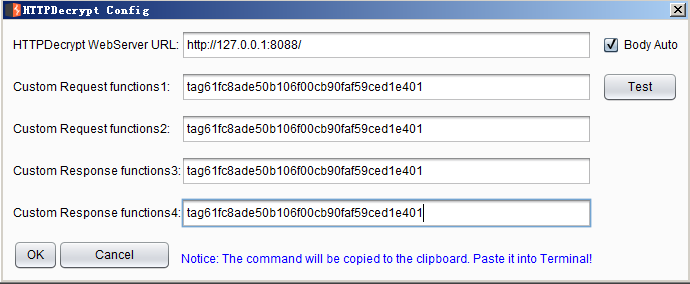
进行配置:
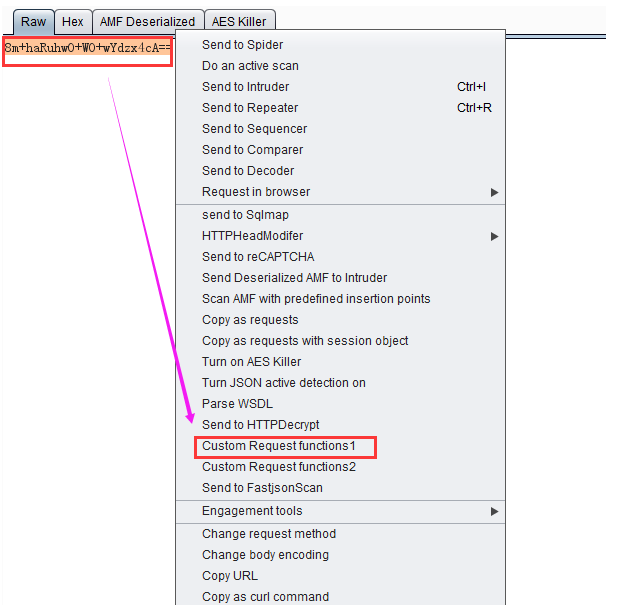
选择需要解密的字符:
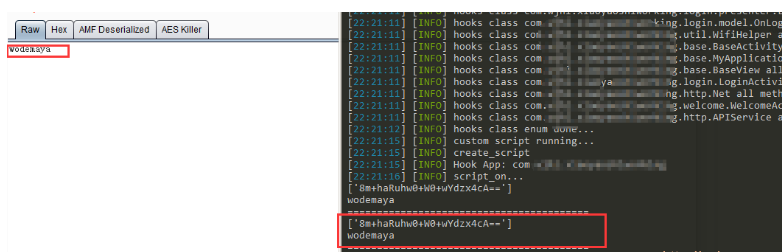
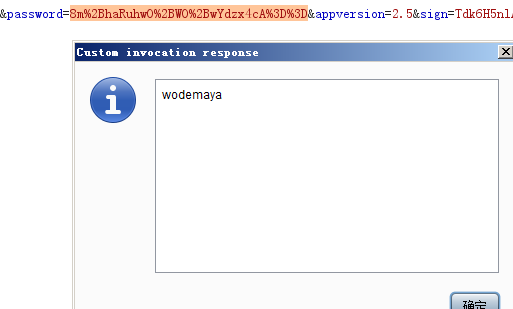
已经成功解密:
由于该apk传输中,password字段进行了url编码,需要在代码中进行一次编码还原:
arg0 = decodeURIComponent(arg0);

扩展:
既然可以在burp中加解密,那么是否可以在实战中,直接通过python进行密码的加密传输?所幸,在作者的项目下面有个demo文件夹,下面有三个文件:
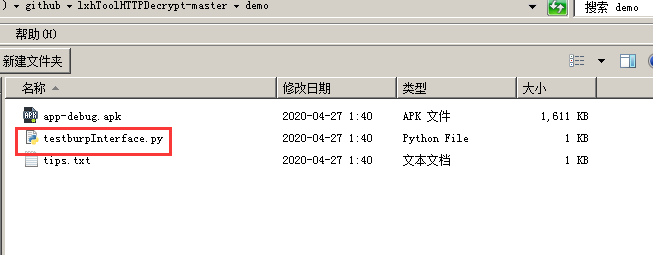
打开testburpInterface.py:
# coding:utf-8
import requests
import base64
import json

def main():
    url = "http://127.0.0.1:8088/bcall"
    methodtag = "tag94323745d0c8a4c174e41081bd50002301"
    valuse = 'HTTPDecrypt'
    print("values: {}".format(valuse))
    argsinfo = base64.b64encode(valuse.encode("utf-8")).decode("utf-8")
    argsinfo = json.dumps({"0":argsinfo})

    data = {"methodtag":base64.b64encode(methodtag.encode("utf-8")).decode("utf-8"),"argsinfo":argsinfo}
    print("argsinfo:{}".format(json.dumps(data)))
    result = requests.post(url=url,data=data)
    print("result: {}".format(result.text))

if __name__ == '__main__':
    main()
也不知道是什么(后来翻看到对应说明手册,见下面链接),起码知道methodtag 对应着刚刚的js函数:本地调试下:
(https://github.com/lyxhh/lxhToolHTTPDecrypt/blob/master/docs/HDPlugin.md)
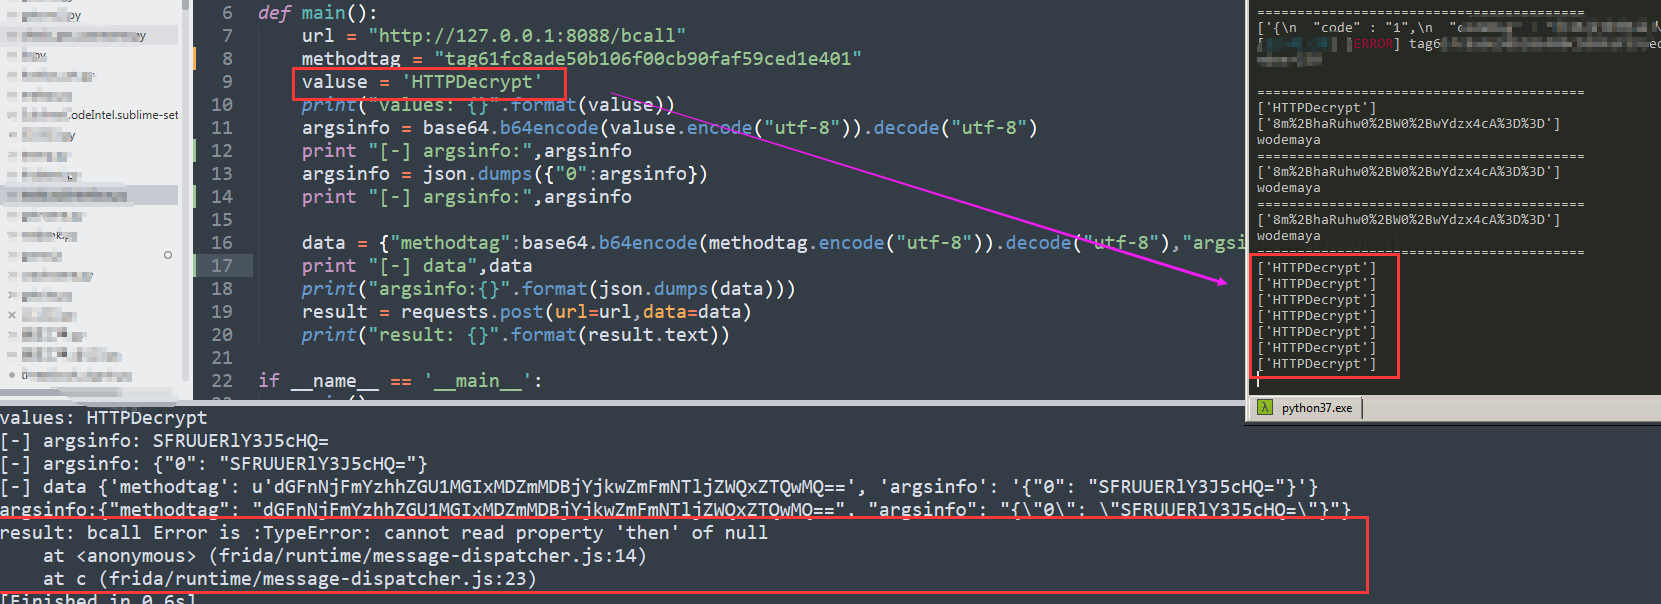
报错了,看着cmd中界面中“httpdecrypt”应该是进行操作的字符串,那就修改成刚刚apk中被加密的字符串试试:
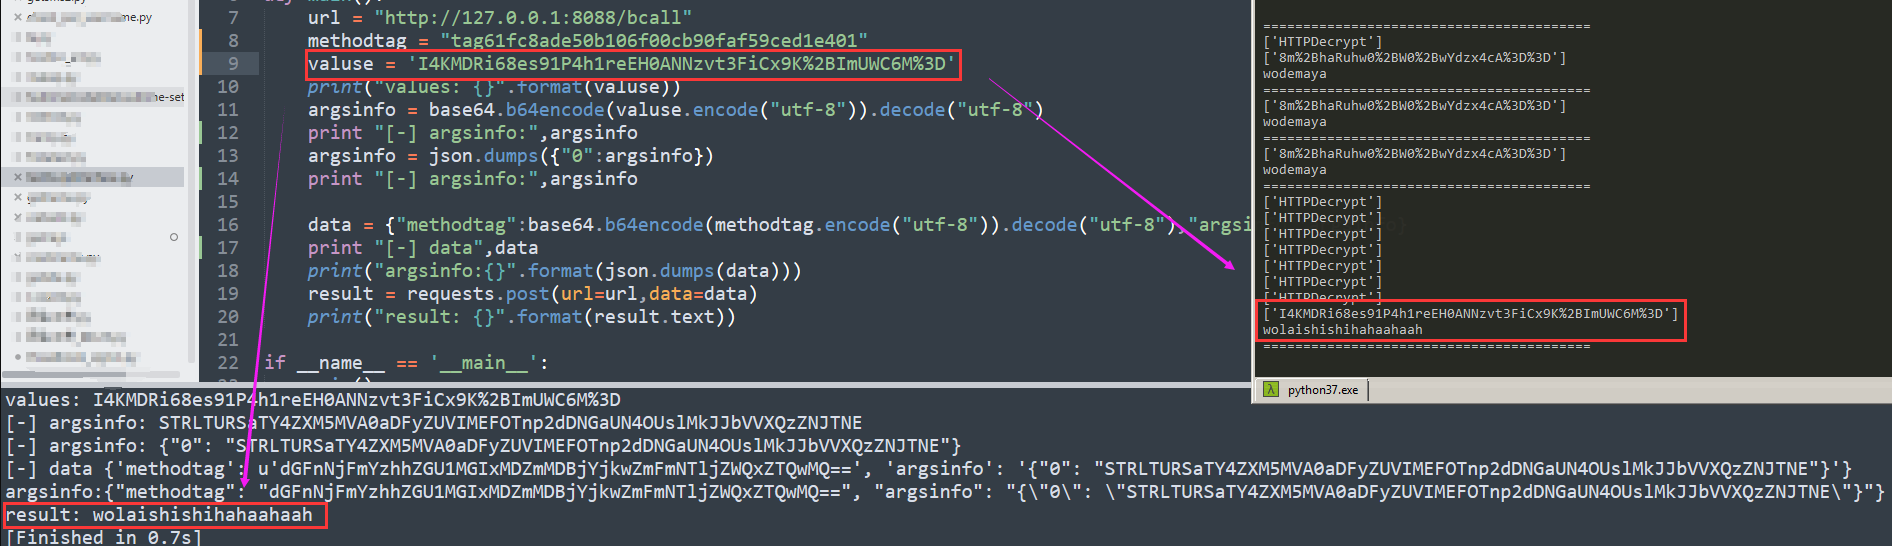
果不其然,解密是成功的,那再回头试试加密函数,毕竟在实战中,用户密码是明文,在post数据时需要加密:
回头在finds中将encrypt发送至toburp中:
依旧confrim,然后add一下:

此时info中存在两个记录,选择Generate export instance script
custom中代码:
'use strict';

var rpc_result = null;
var rpc_result_ios = null;
rpc.exports = {


tag61fc8ade50b106f00cb90faf59ced1e401: function(arg0){
        Java.perform(function () {
            try{
				// var context = Java.use('android.app.ActivityThread').currentApplication().getApplicationContext();
                var AESUtils0c9ff62be597bd4320b9e2d149890438 = Java.use("com.***.***.util.AESUtils");
                rpc_result = AESUtils0c9ff62be597bd4320b9e2d149890438.decrypt(arg0);
                // send(JSON.stringify({"aa":"bb","aa1":"bbb"})+'-cusoto0oom0sc0ri0pt-')
            }catch(e){send("tag61fc8ade50b106f00cb90faf59ced1e401, " + e + "-er00roo000r-")}
        });
        return rpc_result;
    },
// Added Function
tag5f1294992eeaa1cff3f6c77b1178b6c901: function(arg0){
        Java.perform(function () {
            try{
				// var context = Java.use('android.app.ActivityThread').currentApplication().getApplicationContext();
                var AESUtils1277f512f1925f60101b832ea2737b86 = Java.use("com.**.**.util.AESUtils");
                rpc_result = AESUtils1277f512f1925f60101b832ea2737b86.encrypt(arg0);
                // send(JSON.stringify({"aa":"bb","aa1":"bbb"})+'-cusoto0oom0sc0ri0pt-')
            }catch(e){send("tag5f1294992eeaa1cff3f6c77b1178b6c901, " + e + "-er00roo000r-")}
        });
        return rpc_result;
    },
// Added Function


}
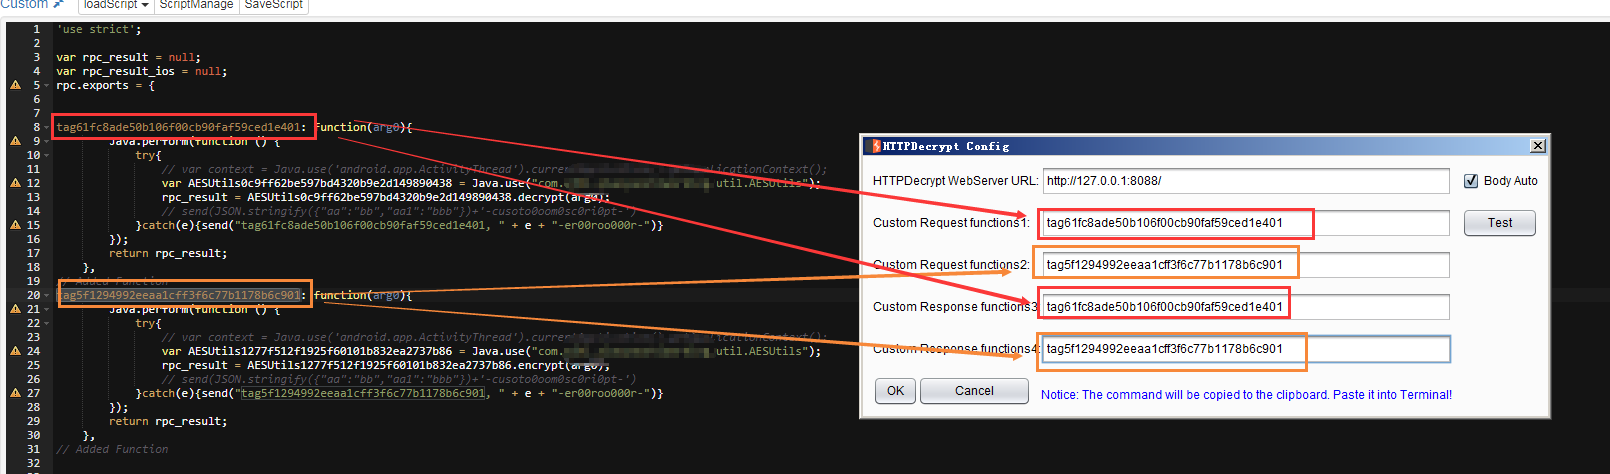
存在两个函数,一个加密,一个解密:

配置burp中的设置:
(httpdecrypt的burp插件在1.0之后已经不会在burp菜单栏显示,但不影响使用,若需显示在burp菜单栏,可以下载1.0之前的版本):
在可编辑区域调用的是Request function 1,2,不可编辑区域调用的是response function3 ,4;打开Auto后,Burp Scanner ,Intruder模块 也可以使用。 Auto功能 数据包加密调用的是 Request function 1,数据包解密调用的Request function 2,因此想要使用Auto功能,需要正确填写加解密函数位置,不要填反了。
依然需要记得添加:
arg0 = decodeURIComponent(arg0);
# coding:utf-8
import requests
import base64
import json

def msecret(methodtag,value):
    url = "http://127.0.0.1:8088/bcall"
    argsinfo = base64.b64encode(value.encode("utf-8")).decode("utf-8")
    argsinfo = json.dumps({"0":argsinfo})
    data = {"methodtag":base64.b64encode(methodtag.encode("utf-8")).decode("utf-8"),"argsinfo":argsinfo}
    #print("argsinfo:{}".format(json.dumps(data)))
    result = requests.post(url=url,data=data)
    #print("result: {}".format(result.text))
    return result.text

def main():
    methodtag='tag5f1294992eeaa1cff3f6c77b1178b6c901'
    value="13800138000"
    password = msecret(methodtag,value)
    url='https://***************/login?phoneno=MTIz&password='+password+'&version=2.5&sign=/44YgDfbuIqfGgQT+ioYf+*******+pX8hbmDjFw='

    html=requests.get(url).json()
    print value,password,html["codeMsg"]

if __name__ == '__main__':
    main()

来源:freebuf.com 2021-01-28 23:57:27 by: lab


请登录后发表评论
注册