
JNDI数据源配置是一种常用的数据源配置方法,代码审计中可作为一种修复建议,渗透测试时则需要拨开迷雾。
一、写在前面
文章主要介绍了JNDI数据源配置和找回密码的方法,只叹范围太大只能写下冰山一角,如有错误还请指出。
如需了解配置:Tomcat请看2.1,WebLogic请看2.2,WebSphere请看2.3。
如需找回数据库连接、用户名和密码:Tomcat请看2.1,WebLogic请看3.1,WebSphere请看3.2。
二、JNDI数据源
JNDI(Java Naming and Directory Interface,Java命名和目录接口)是SUN公司提供的一种标准的Java命名系统接口,JNDI提供统一的客户端API,通过不同的访问提供者接口JNDI服务供应接口(SPI)的实现,由管理者将JNDI API映射为特定的命名服务和目录系统,使得Java应用程序可以和这些命名服务和目录服务之间进行交互。[1]
JNDI数据源则是JNDI常见的应用形式,将数据源交由应用服务器托管不再由应用程序创建,只需在应用程序中设置正确的JNDI名称,即可进行数据操作。
三、常见应用服务器配置
2.1 Tomcat 8.5
Tomcat应是非常常见的Web应用容器,其配置的关键点包括文件:context.xml、server.xml、\conf\Catalina\{servername}\{appname}.xml。({servername}指tomcat中应用的服务器名称,{appname}指tomcat中应用的名称。)
1)根据数据库类型,在{tomcat}\lib下放入对应数据库的jdbc包,我这里演示用的是mysql。({tomcat}指tomcat安装目录。)

2)方法一:配置server.xml和context.xml。在{tomcat}\conf下编辑server.xml,在GlobalNamingResources中写入Resource配置

<Resource
name="jdbc/example"
auth="Container"
type="javax.sql.DataSource"
maxActive="100"
maxIdle="30"
maxWait="10000"
username="root"
password="root"
driverClassName="com.mysql.jc.jdbc.Driver"
url="jdbc:mysql://localhost:3306/test?useUnicode=true&characterEncoding=utf-8&serverTimezone=UTC"/>3)在context.xml中写配置,将servers中的配置引用
<ResourceLink name="jdbc/example" global="jdbc/example" type="javax.sql.DataSource"/>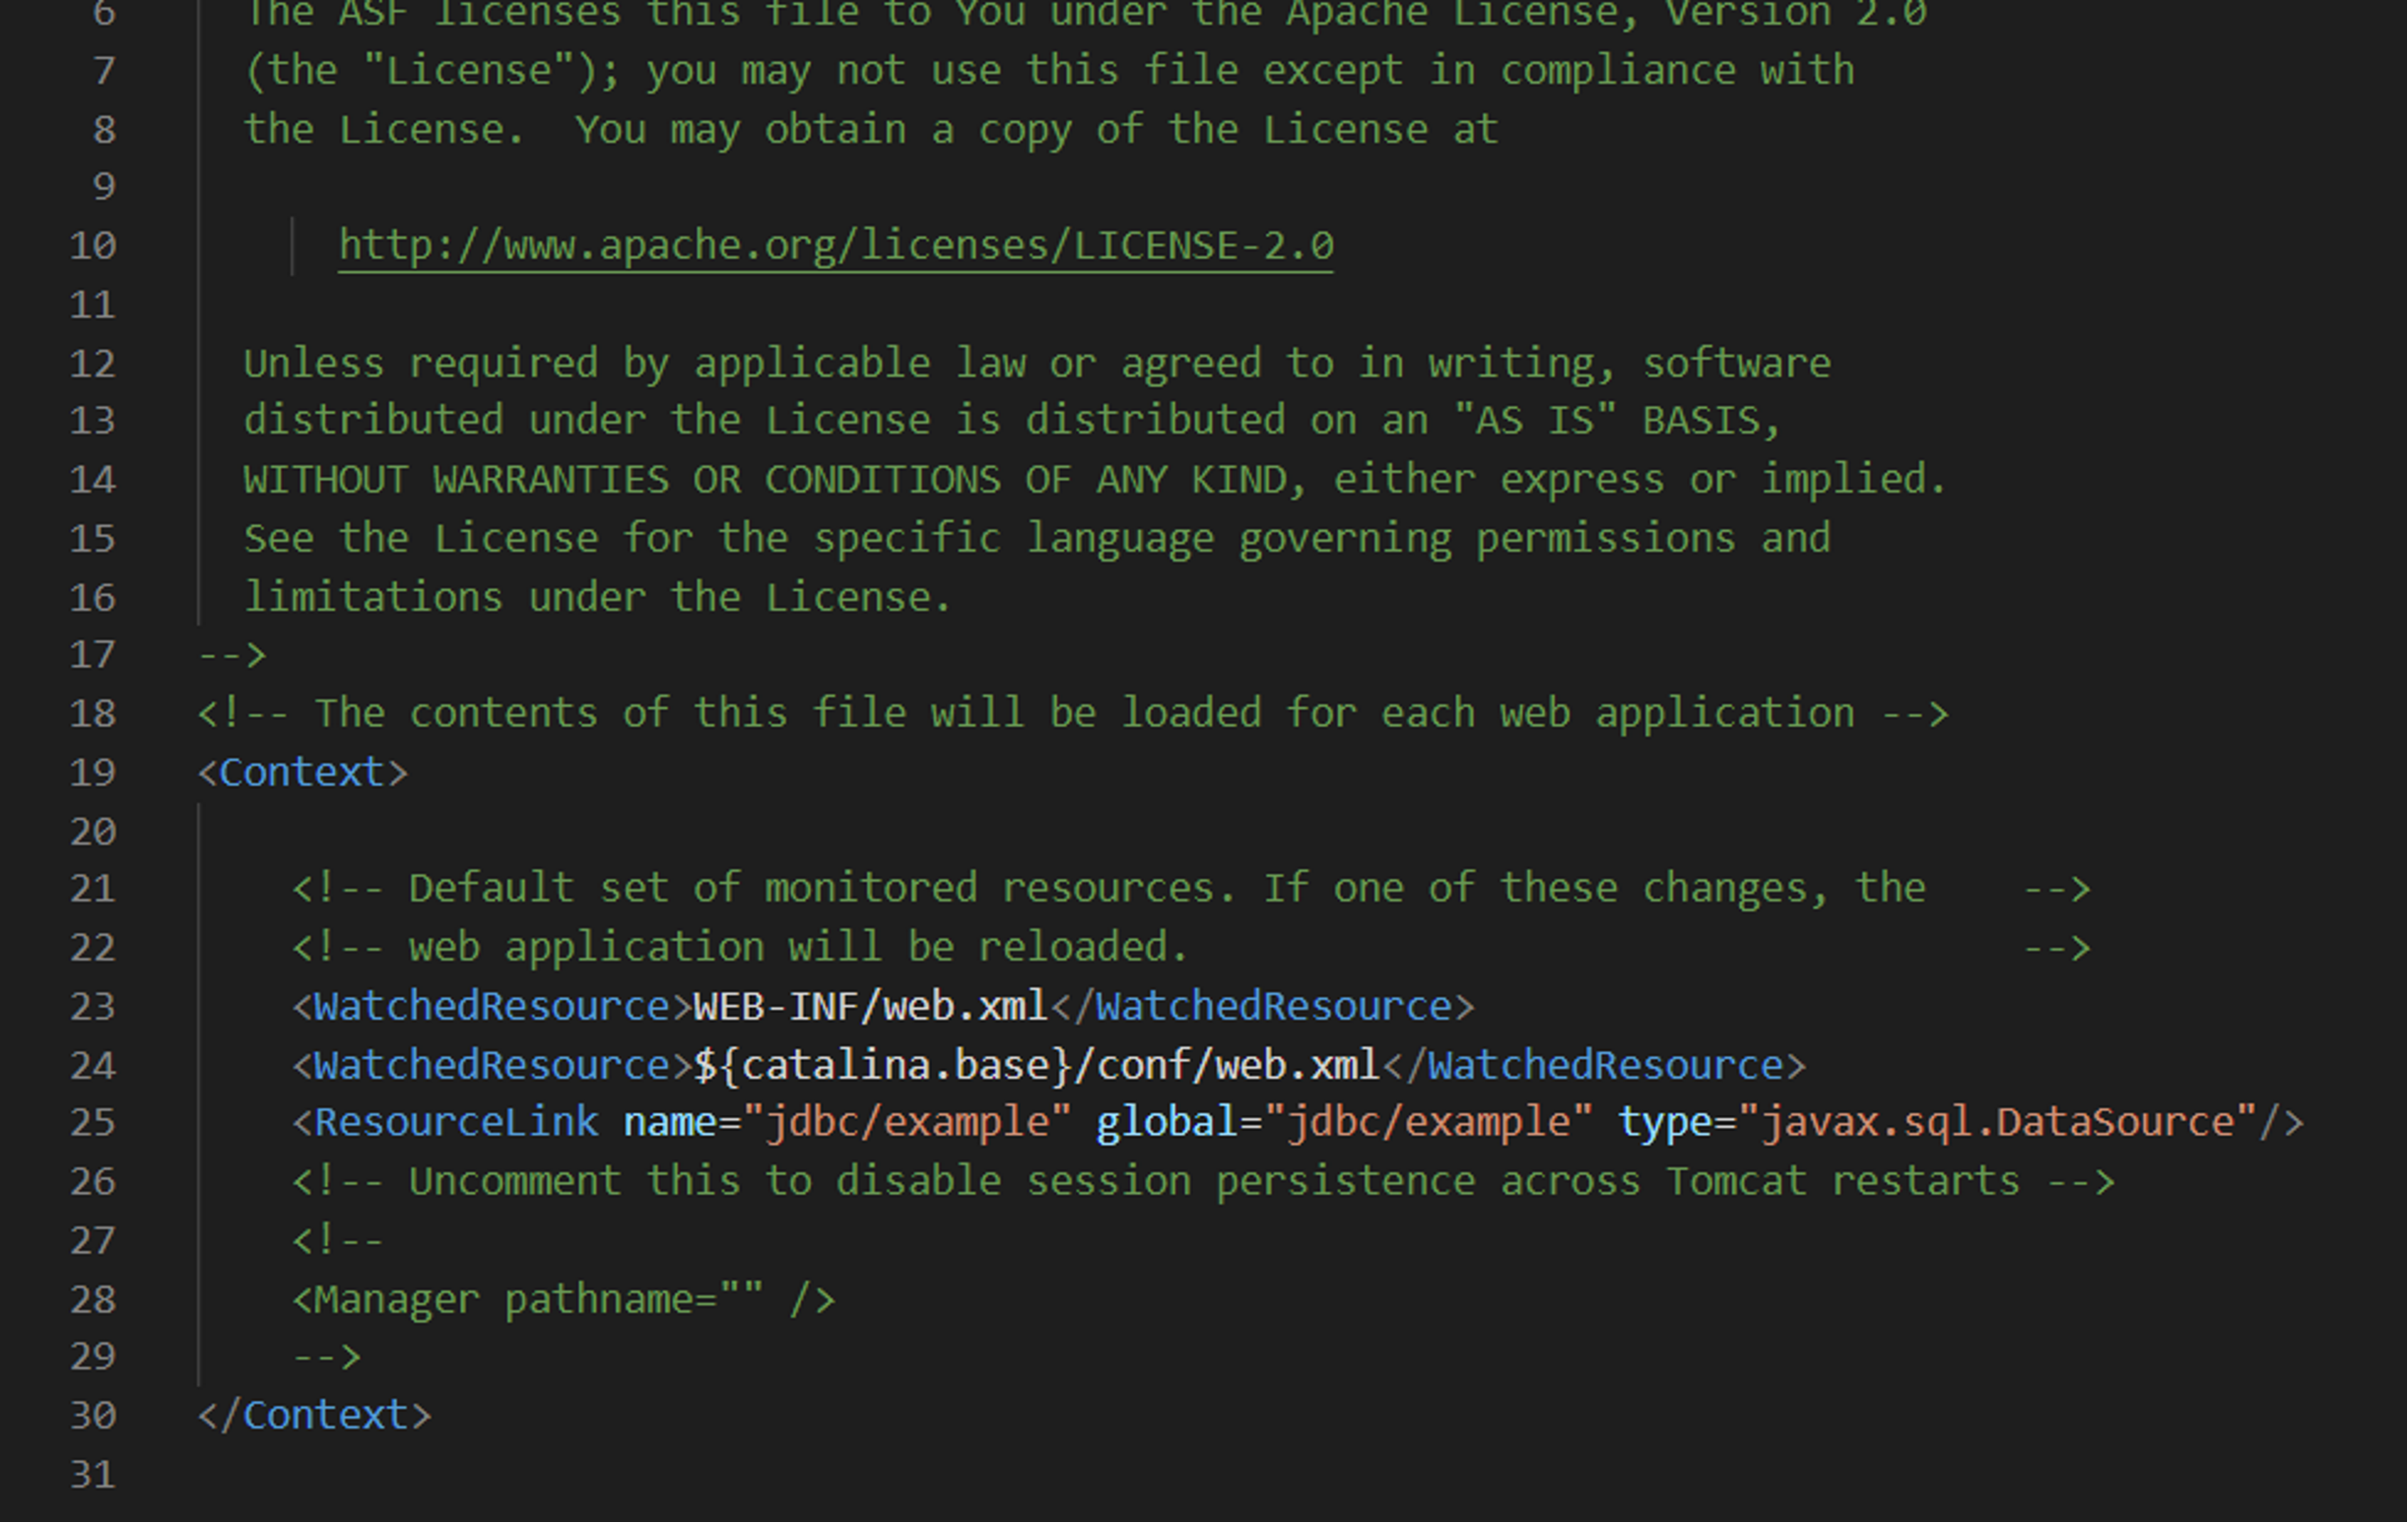 4)那接下来新建一个JavaWeb项目,由三个文件组成:index.jsp,web.xml,ConnExample.java。
index.jsp
<%@page import="jdbc.ConnExample"%>
<%@page import="java.sql.ResultSet"%>
<%@page language="java" contentType="text/html; charset=utf-8"
    pageEncoding="utf-8"%>
<!DOCTYPE html>
<html>
<head>
<meta charset="utf-8">
<title>JNDI测试页面</title>
</head>
<body>
<%
	ResultSet resultSet = ConnExample.doSelect();
out.print("<table>");
int colcount = resultSet.getMetaData().getColumnCount();
out.print("<tr><td>ID</td><td>用户名</td><td>年龄</td></tr>");
while (resultSet.next()) {
	out.print("<tr>");
	for (int i = 1; i <= colcount; i++) {
		out.print("<td>" + resultSet.getString(i) + "</td>");
	}
	out.print("</tr>");
}
out.print("</table>");
%>
</body>
</html>
web.xml
<?xml version="1.0" encoding="UTF-8"?>
<web-app xmlns:xsi="http://www.w3.org/2001/XMLSchema-instance"
	xmlns="http://java.sun.com/xml/ns/javaee"
	xsi:schemaLocation="http://java.sun.com/xml/ns/javaee http://java.sun.com/xml/ns/javaee/web-app_3_0.xsd"
	id="WebApp_ID" version="3.0">
	<display-name>TMP</display-name>
	<welcome-file-list>
		<welcome-file>index.html</welcome-file>
		<welcome-file>index.htm</welcome-file>
		<welcome-file>index.jsp</welcome-file>
		<welcome-file>default.html</welcome-file>
		<welcome-file>default.htm</welcome-file>
		<welcome-file>default.jsp</welcome-file>
	</welcome-file-list>
	<resource-ref>
		<description>DB Connection</description>
		<res-ref-name>jdbc/example</res-ref-name>
		<res-type>javax.sql.DataSource</res-type>
		<res-auth>Container</res-auth>
	</resource-ref>
</web-app>
ConnExample.java
package jdbc;

import java.sql.Connection;
import java.sql.ResultSet;
import java.sql.SQLException;
import java.sql.Statement;

import javax.naming.Context;
import javax.naming.InitialContext;
import javax.naming.NamingException;
import javax.sql.DataSource;

public class ConnExample {
	public static ResultSet doSelect() throws NamingException, SQLException {
		Context context = new InitialContext();
		DataSource dataSource = (DataSource) context.lookup("java:comp/env/jdbc/example");
		Connection connection = dataSource.getConnection();
		Statement statement = connection.createStatement();
		String sql = "select * from users";
		ResultSet resultSet = statement.executeQuery(sql);
		return resultSet;
	}
}
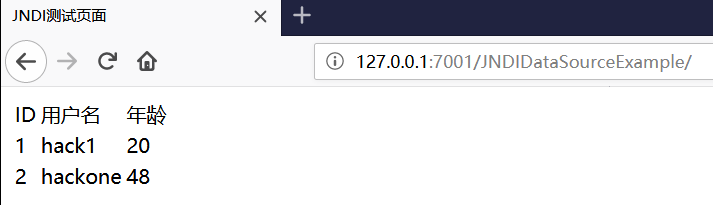
5)组建项目,打包成war部署一下就好了。
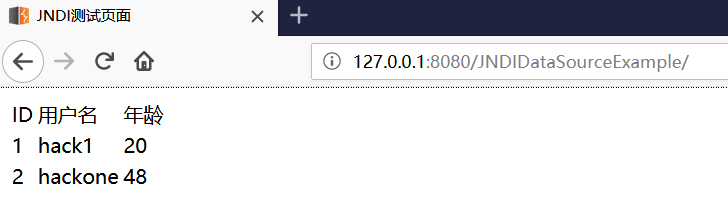
6)方法二:当然还有更弱化的,就是直接在context.xml中写入配置即可。
<Resource
name="jdbc/example"
auth="Container"
type="javax.sql.DataSource"
maxActive="100"
maxIdle="30"
maxWait="10000"
username="root"
password="root"
driverClassName="com.mysql.jc.jdbc.Driver"
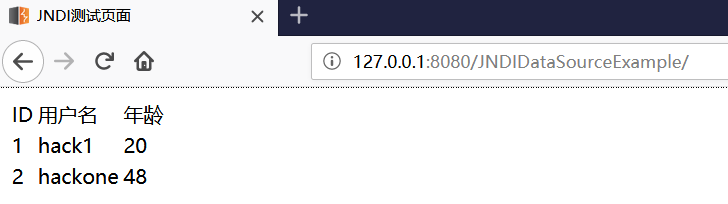
url="jdbc:mysql://localhost:3306/test?useUnicode=true&characterEncoding=utf-8&serverTimezone=UTC"/>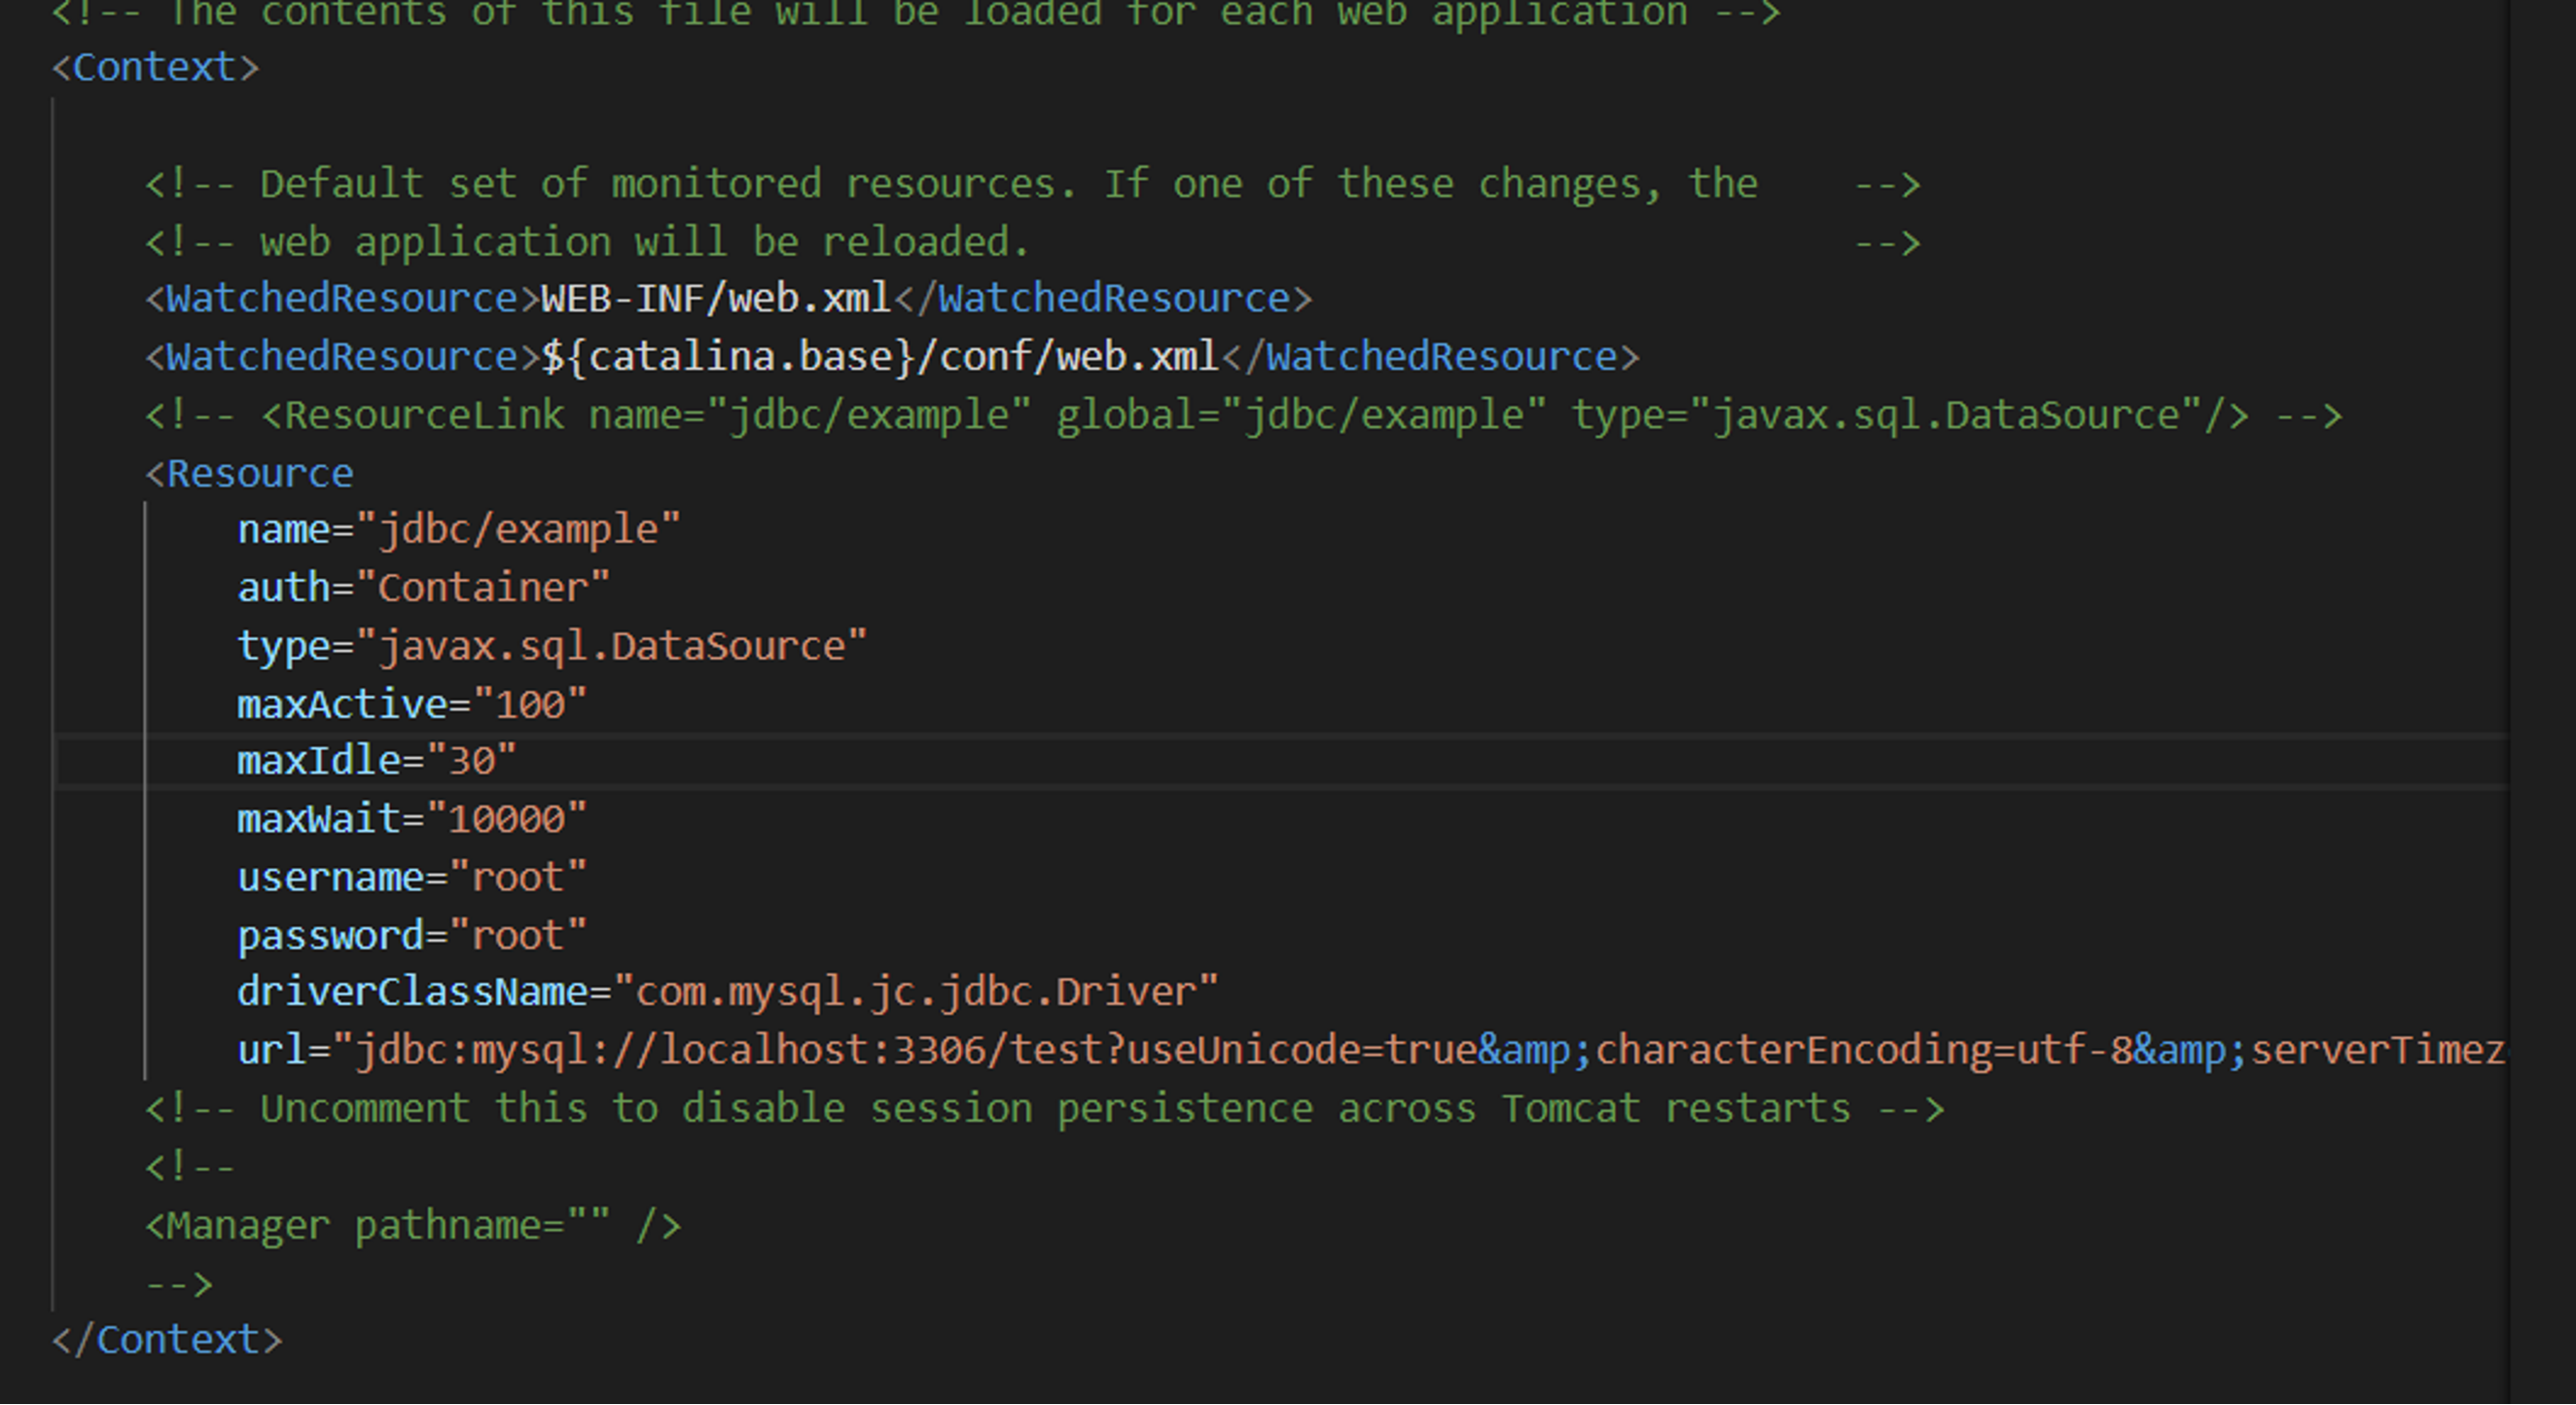 7)这样访问之前配置的应用即可使用。
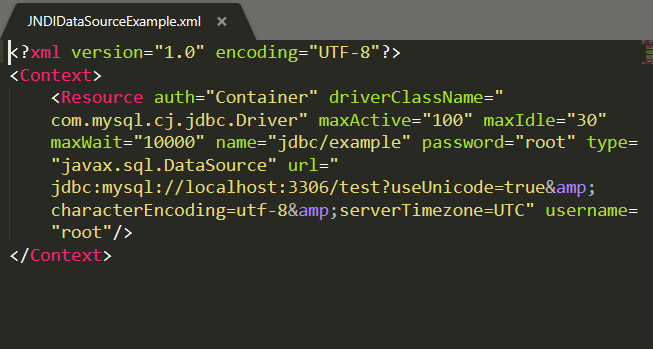
8)方法三:之前的配置的作用域是全局作用域,只要是tomcat下的应用都可以访问对应的数据源配置。如果需要针对单个应用配置数据源,可以根据应用项目名称在目录{tomcat}\conf\Catalina\{servername}下增加配置文件。比如我这个项目叫“JNDIDataSourceExample”,就新增文件JNDIDataSourceExample.xml。一一对应是必须的,不然找不到配置了。
 9)在JNDIDataSourceExample中写入配置即可。
<?xml version="1.0" encoding="UTF-8"?>
<Context>
<Resource auth="Container" driverClassName="com.mysql.cj.jdbc.Driver" maxActive="100" maxIdle="30" maxWait="10000" name="jdbc/example" password="root" type="javax.sql.DataSource" url="jdbc:mysql://localhost:3306/test?useUnicode=true&characterEncoding=utf-8&serverTimezone=UTC" username="root"/>
</Context>
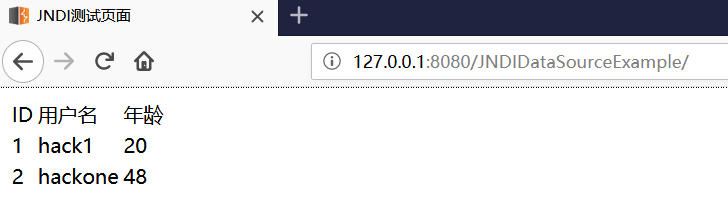
10)这样访问之前配置的应用即可使用。
2.2 WebLogic 12c
WebLogic应是非常常见的Web应用容器,其配置的主要通过WebLogic控制台完成,比tomcat容易的得多。
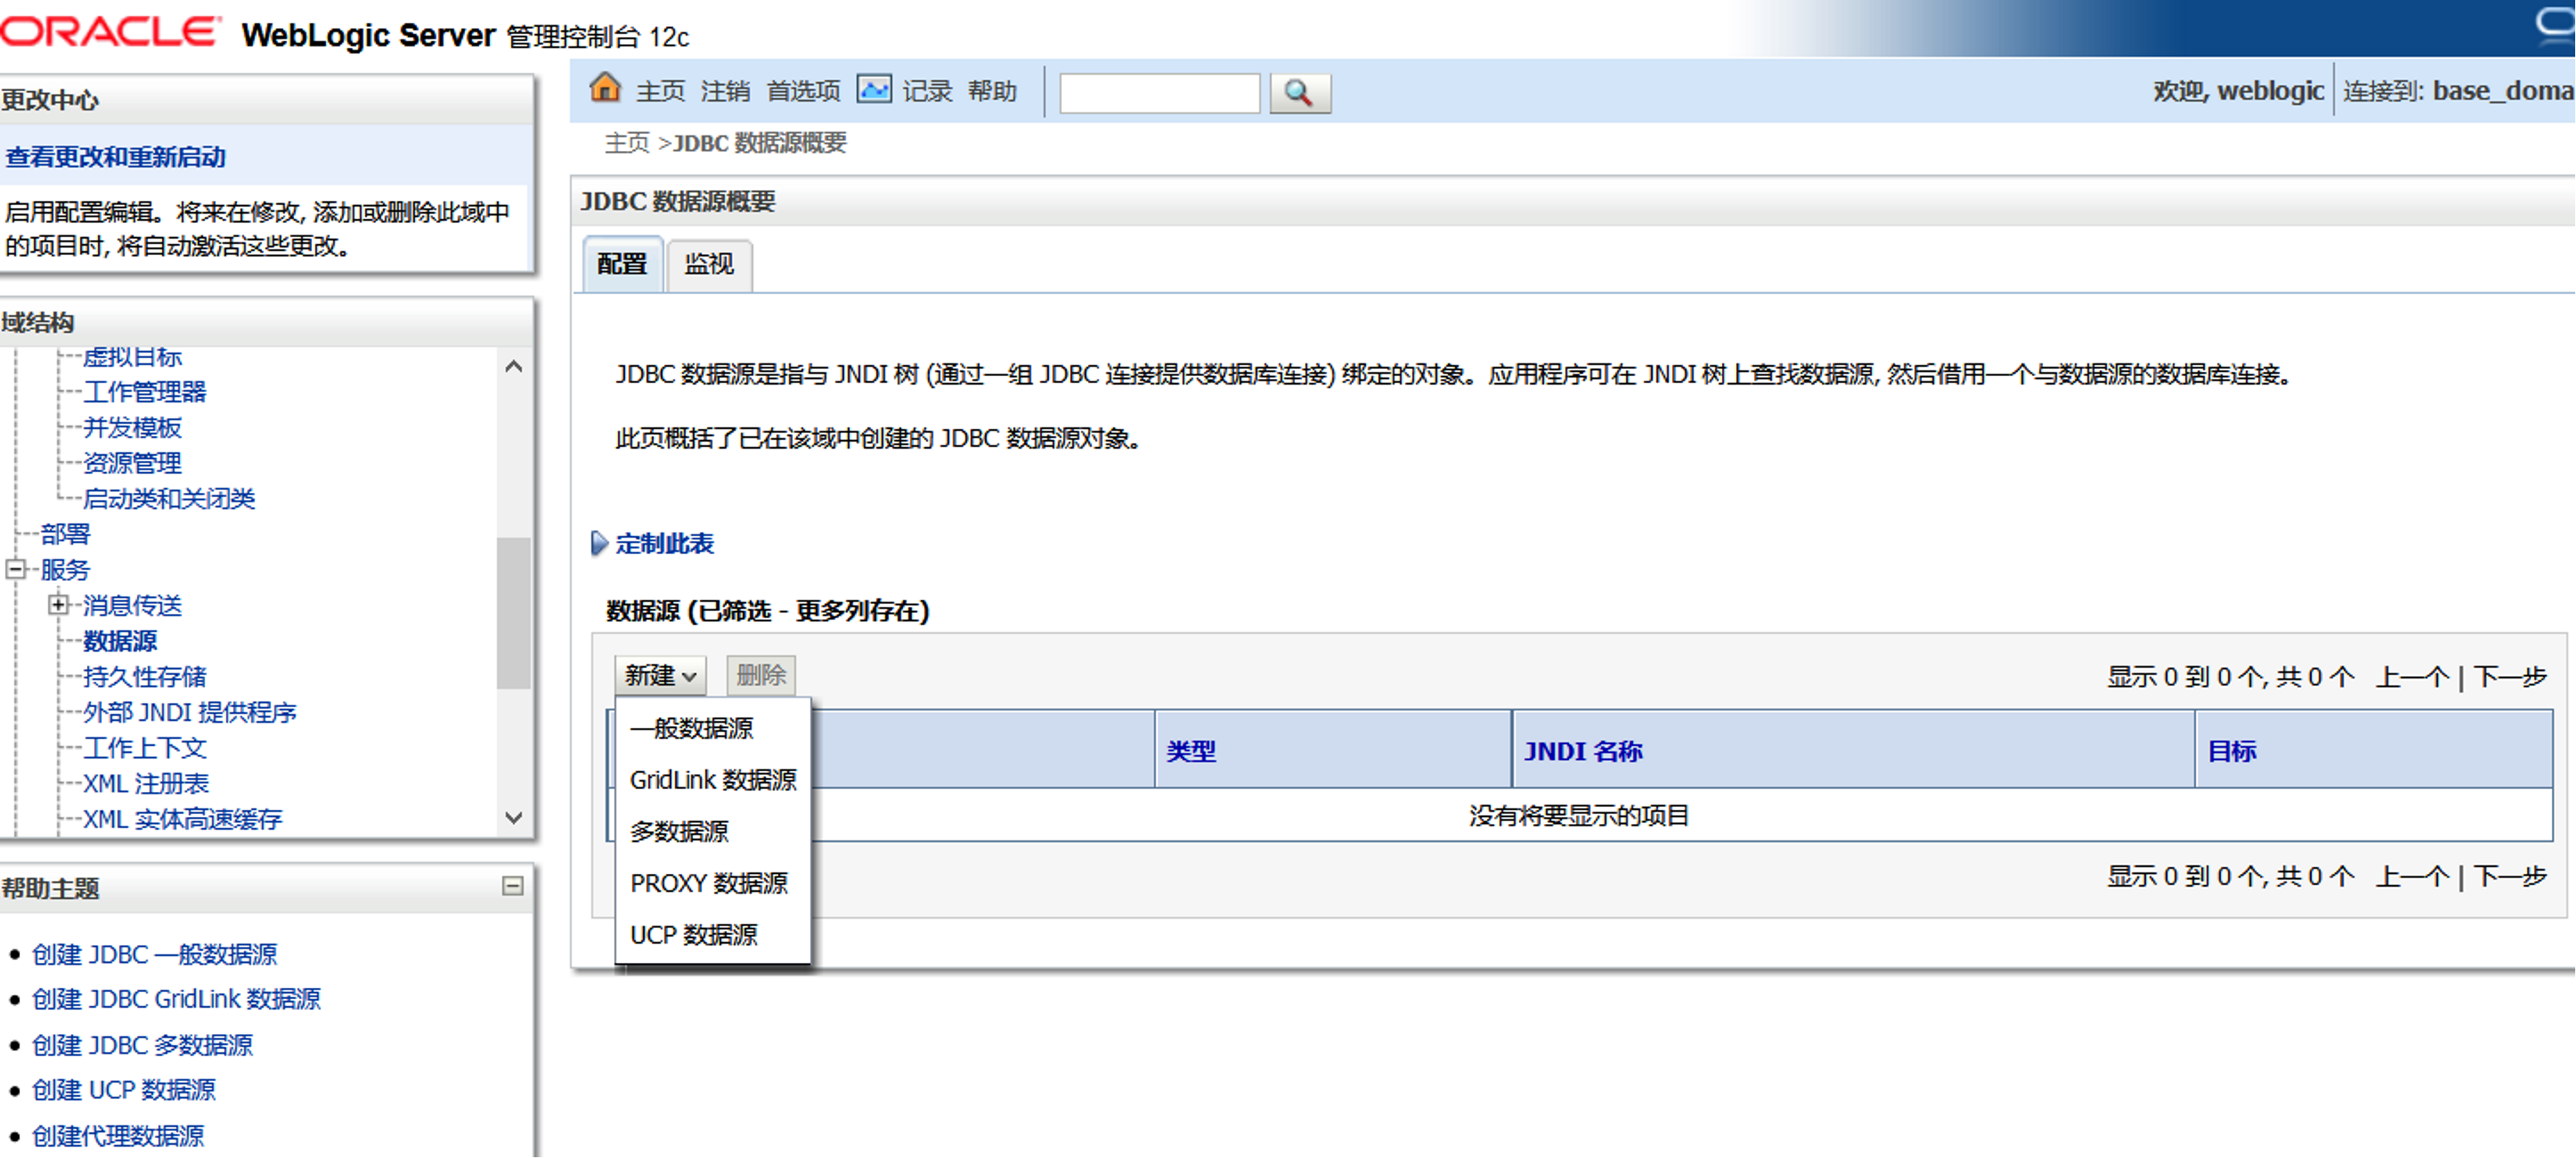
1)登录控制台在服务里面找到数据源,然后新建一条一般数据源。
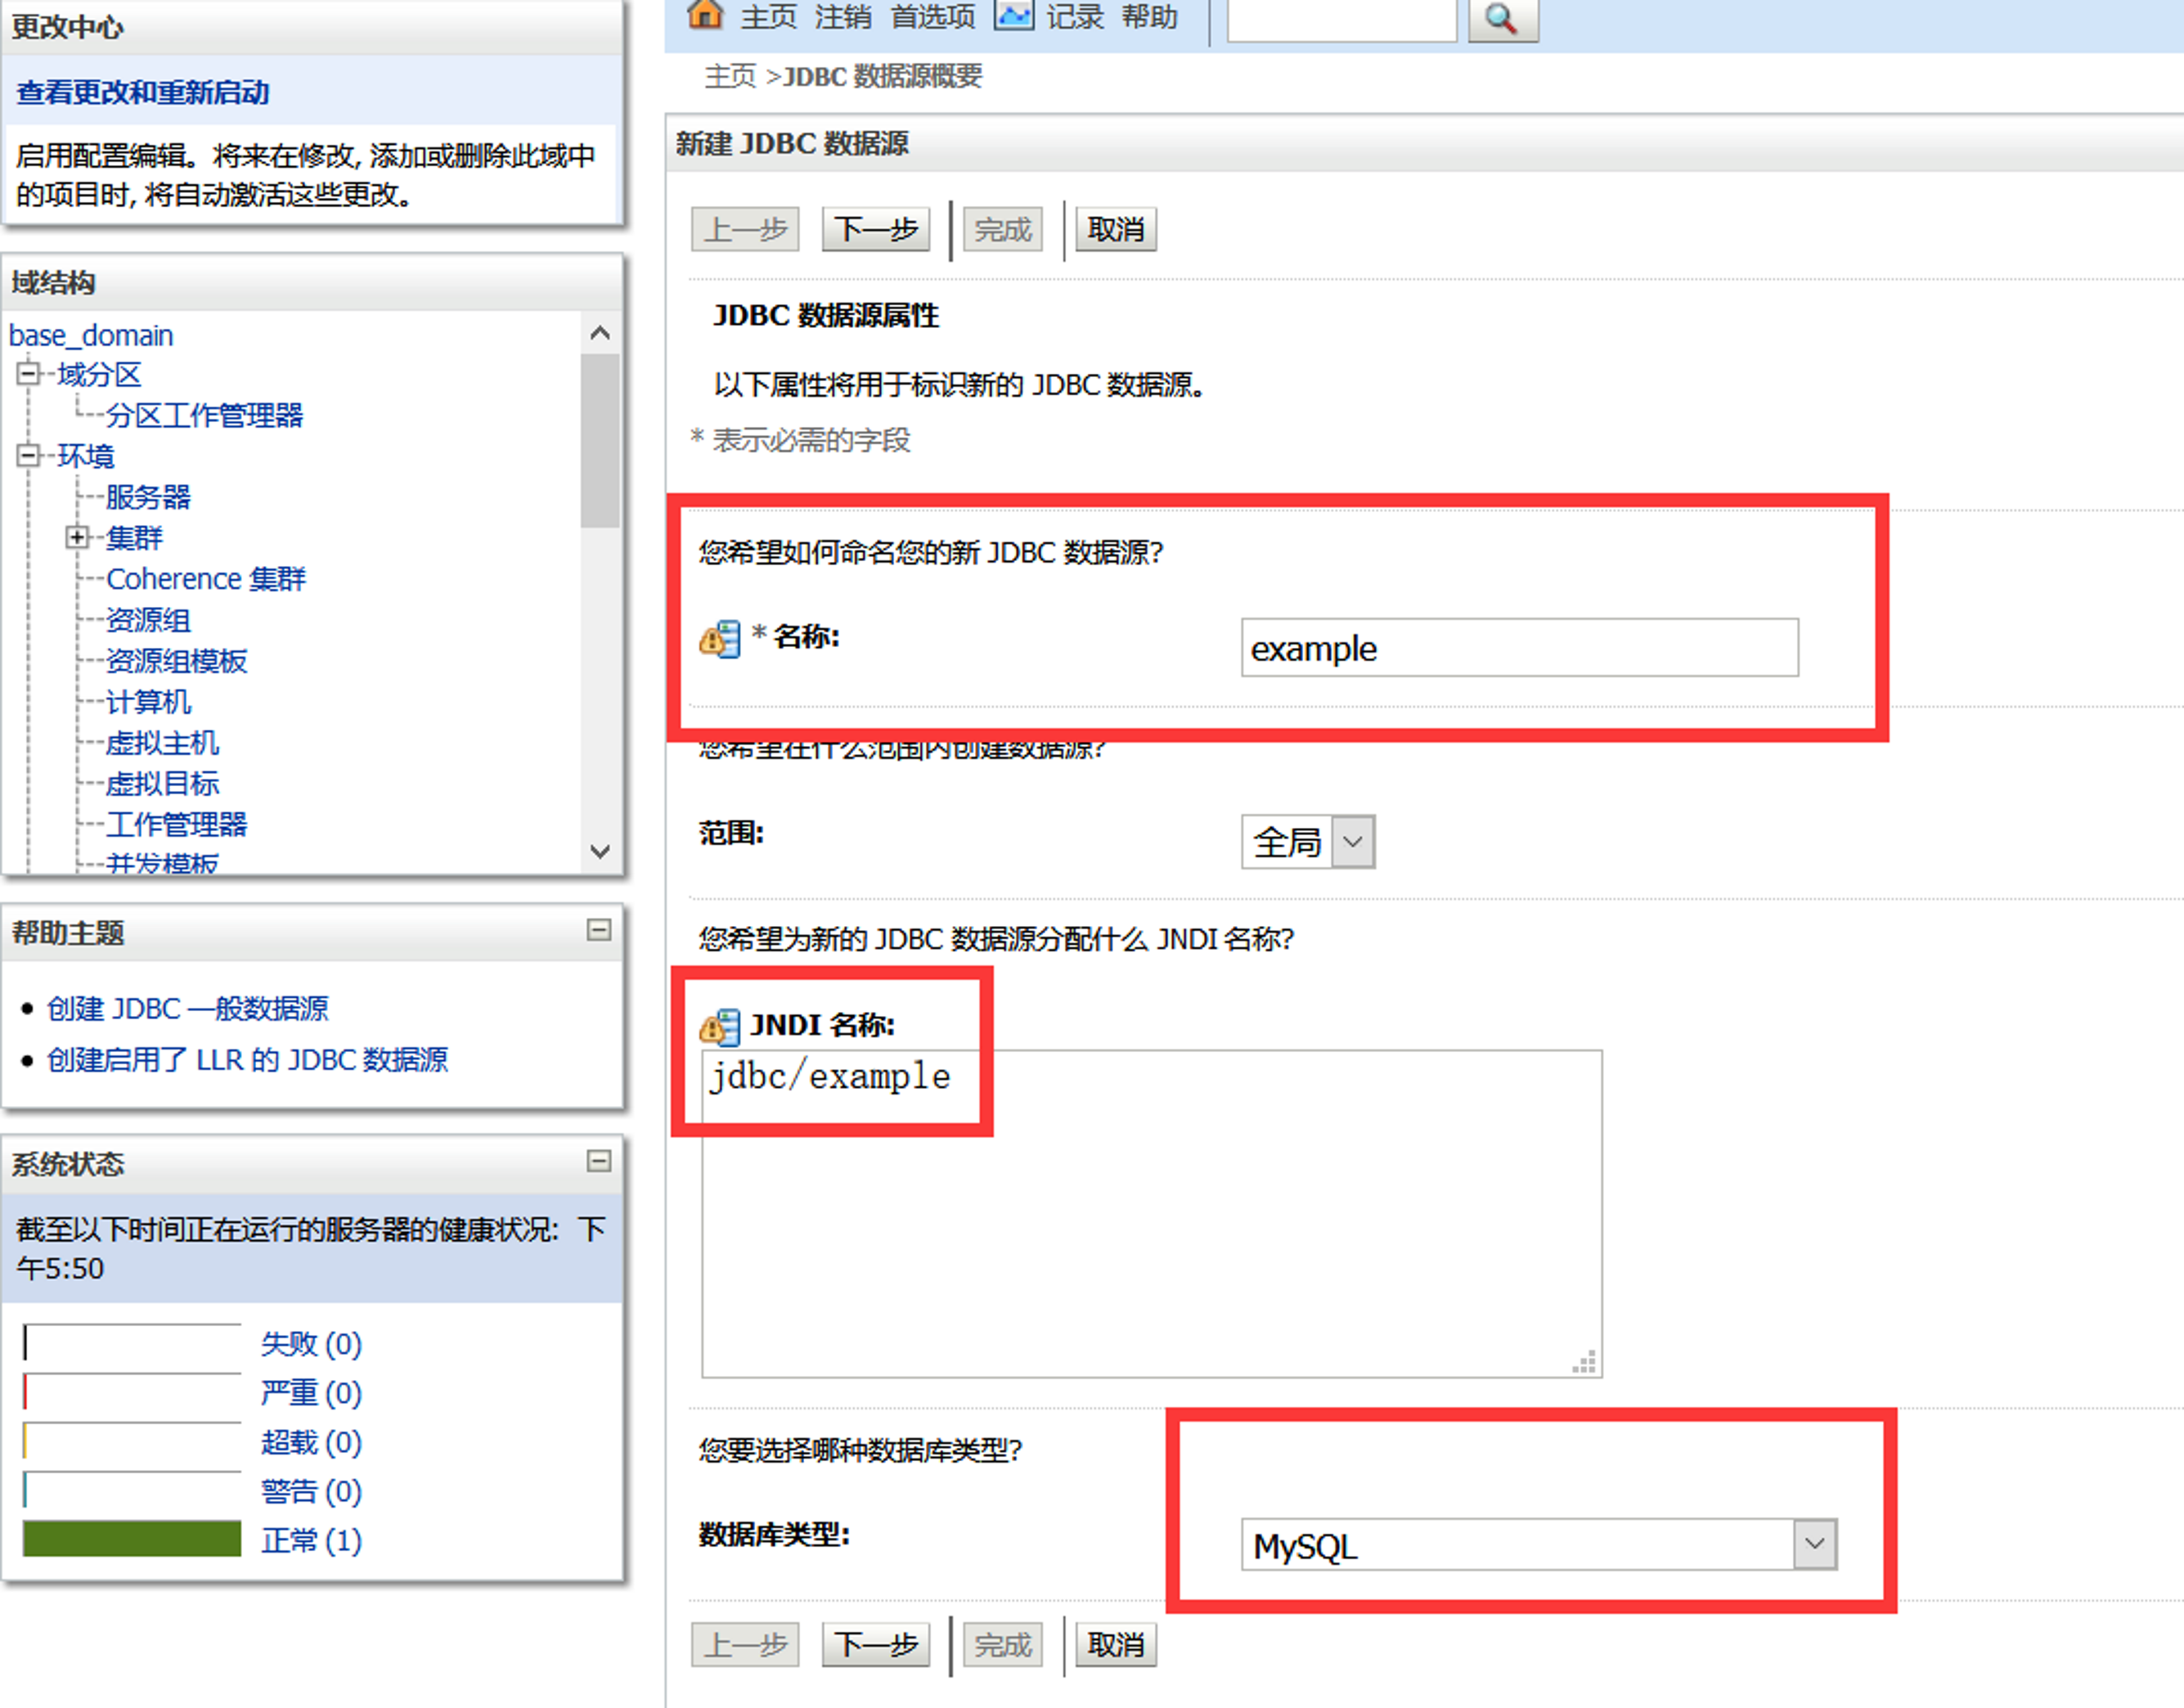
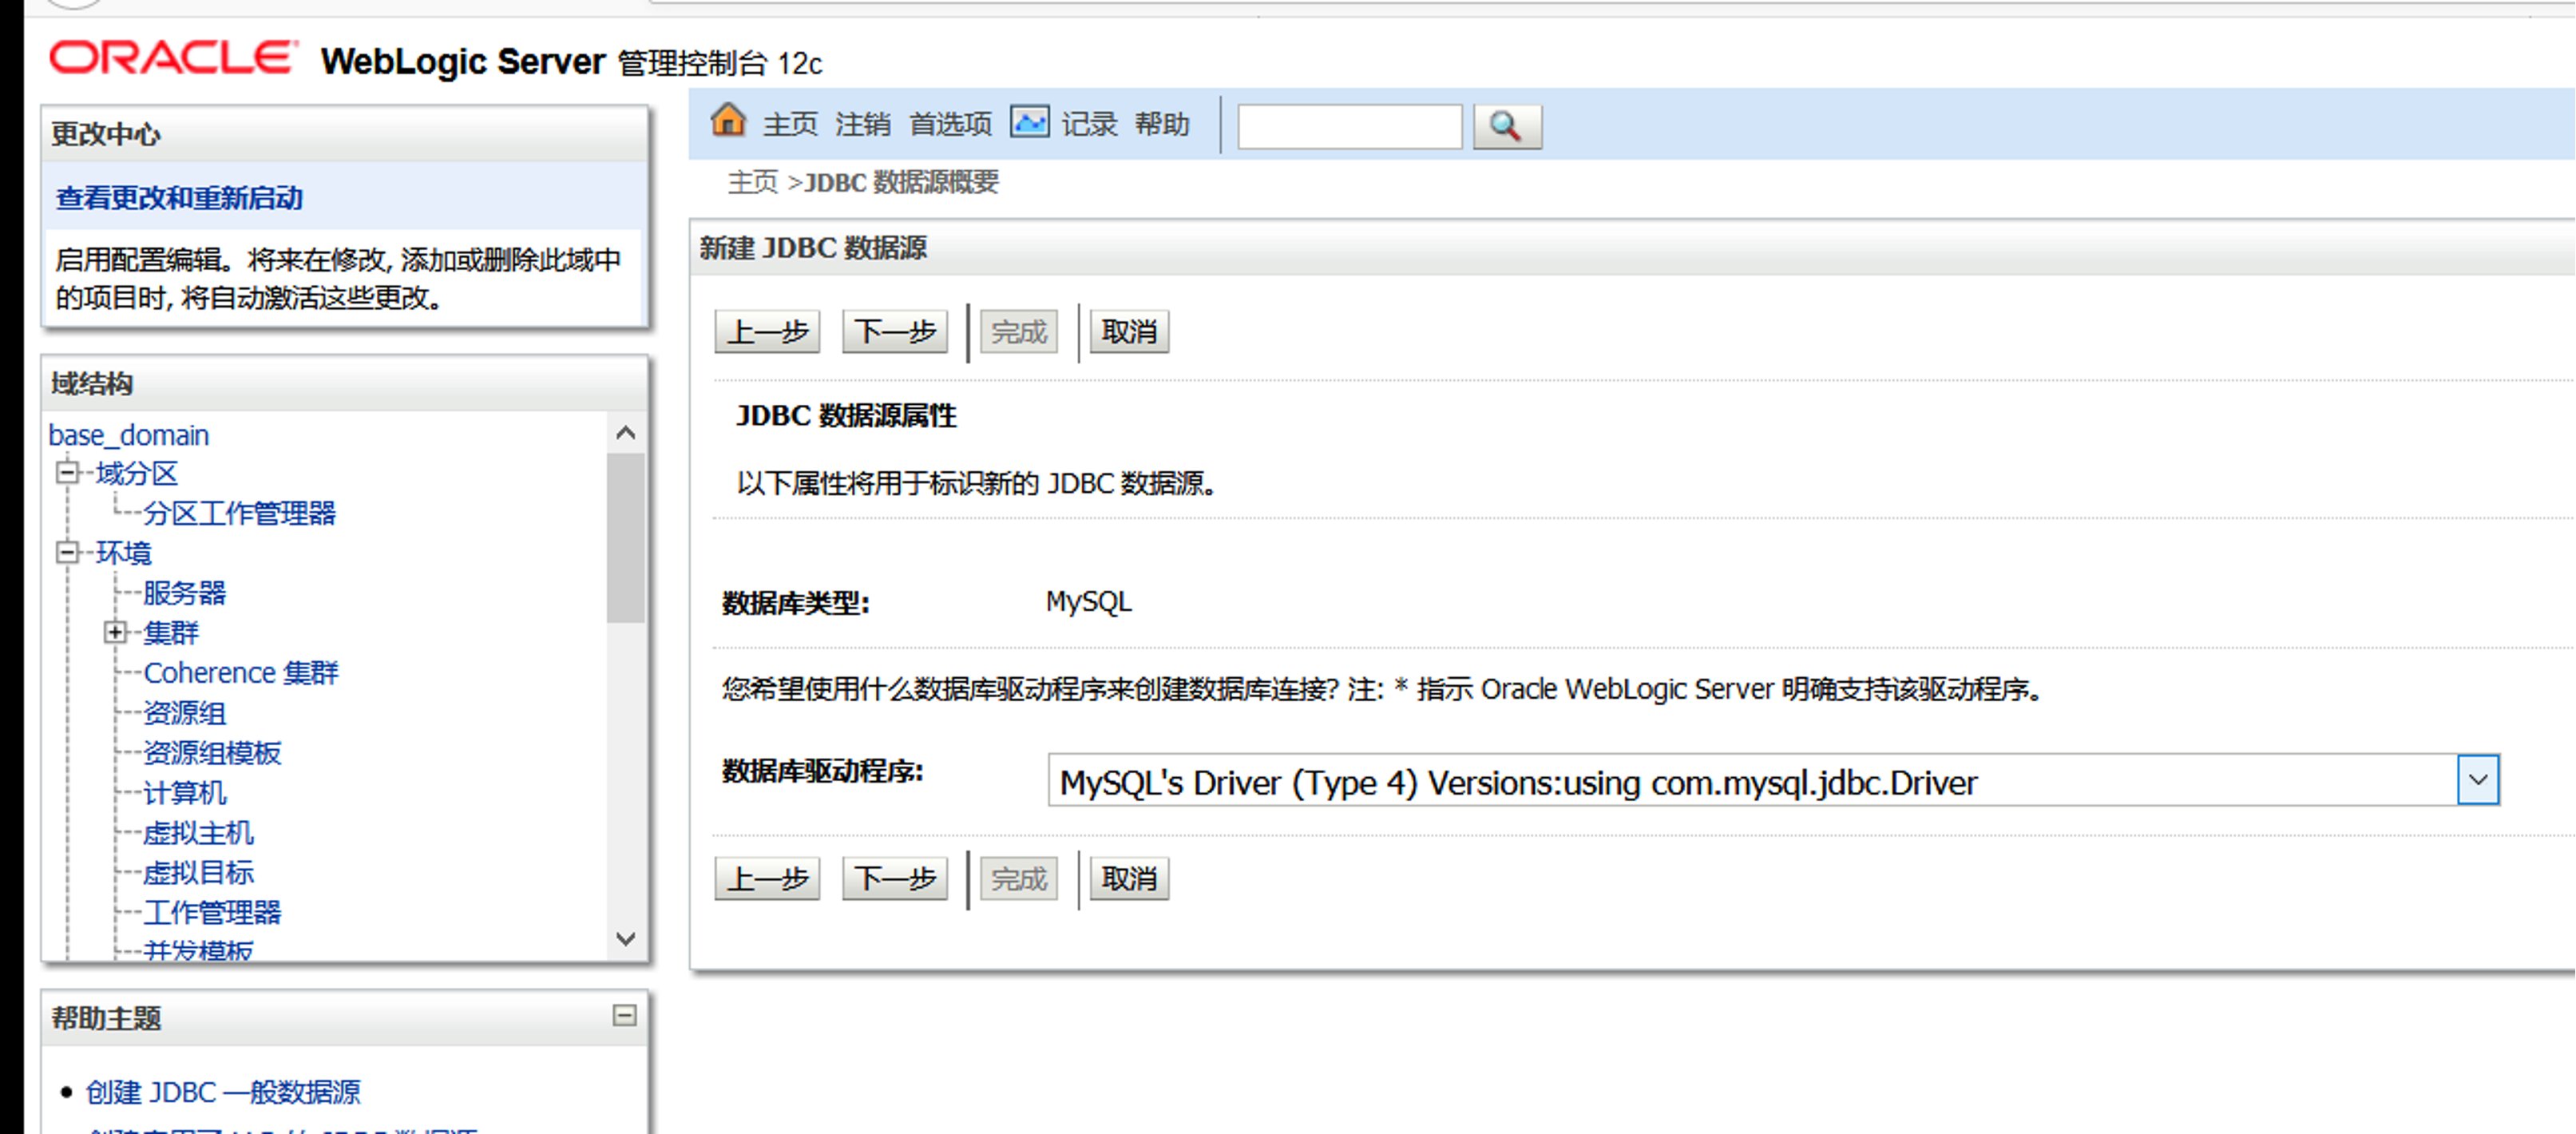
 2)配置数据源名称,JNDI名称,数据库类型。当然这里需要注意JNDI名称,这里是要应用程序的一致的呢,比如:web.xml中配置的JNDI名称
 3)选择数据库驱动。这点吧对比WebSphere就能看出,同一体系的好处了,至少驱动有的。
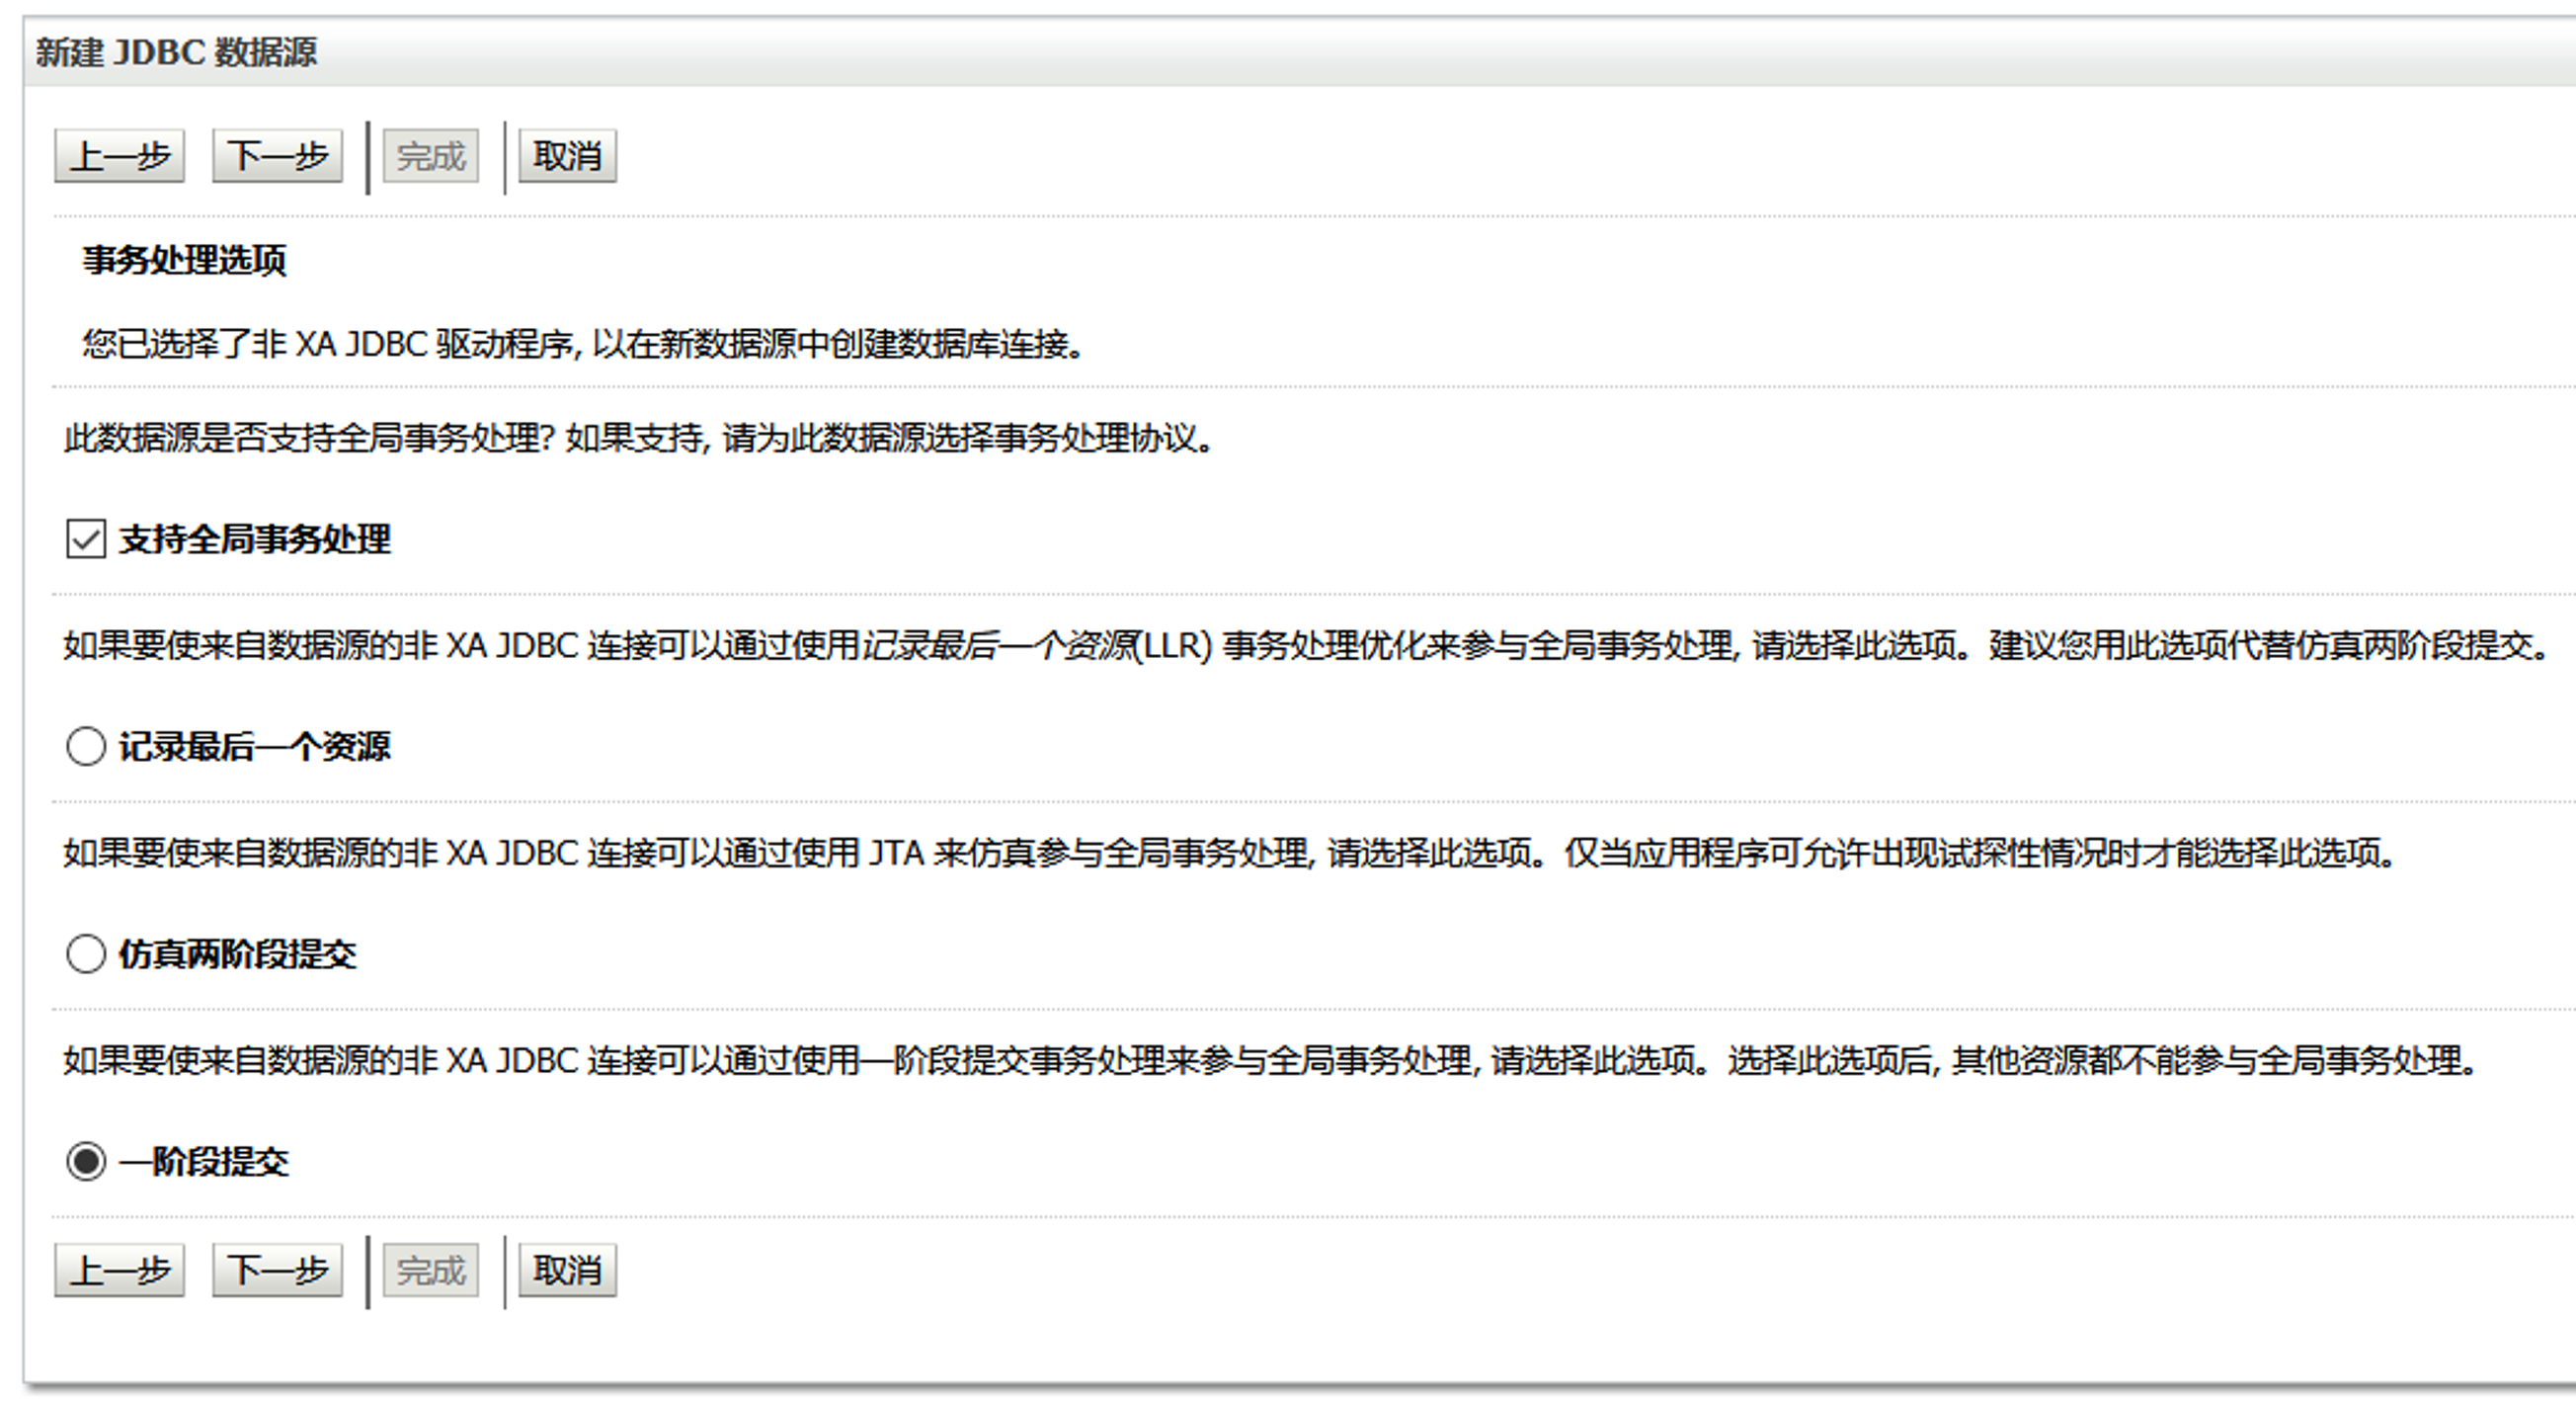
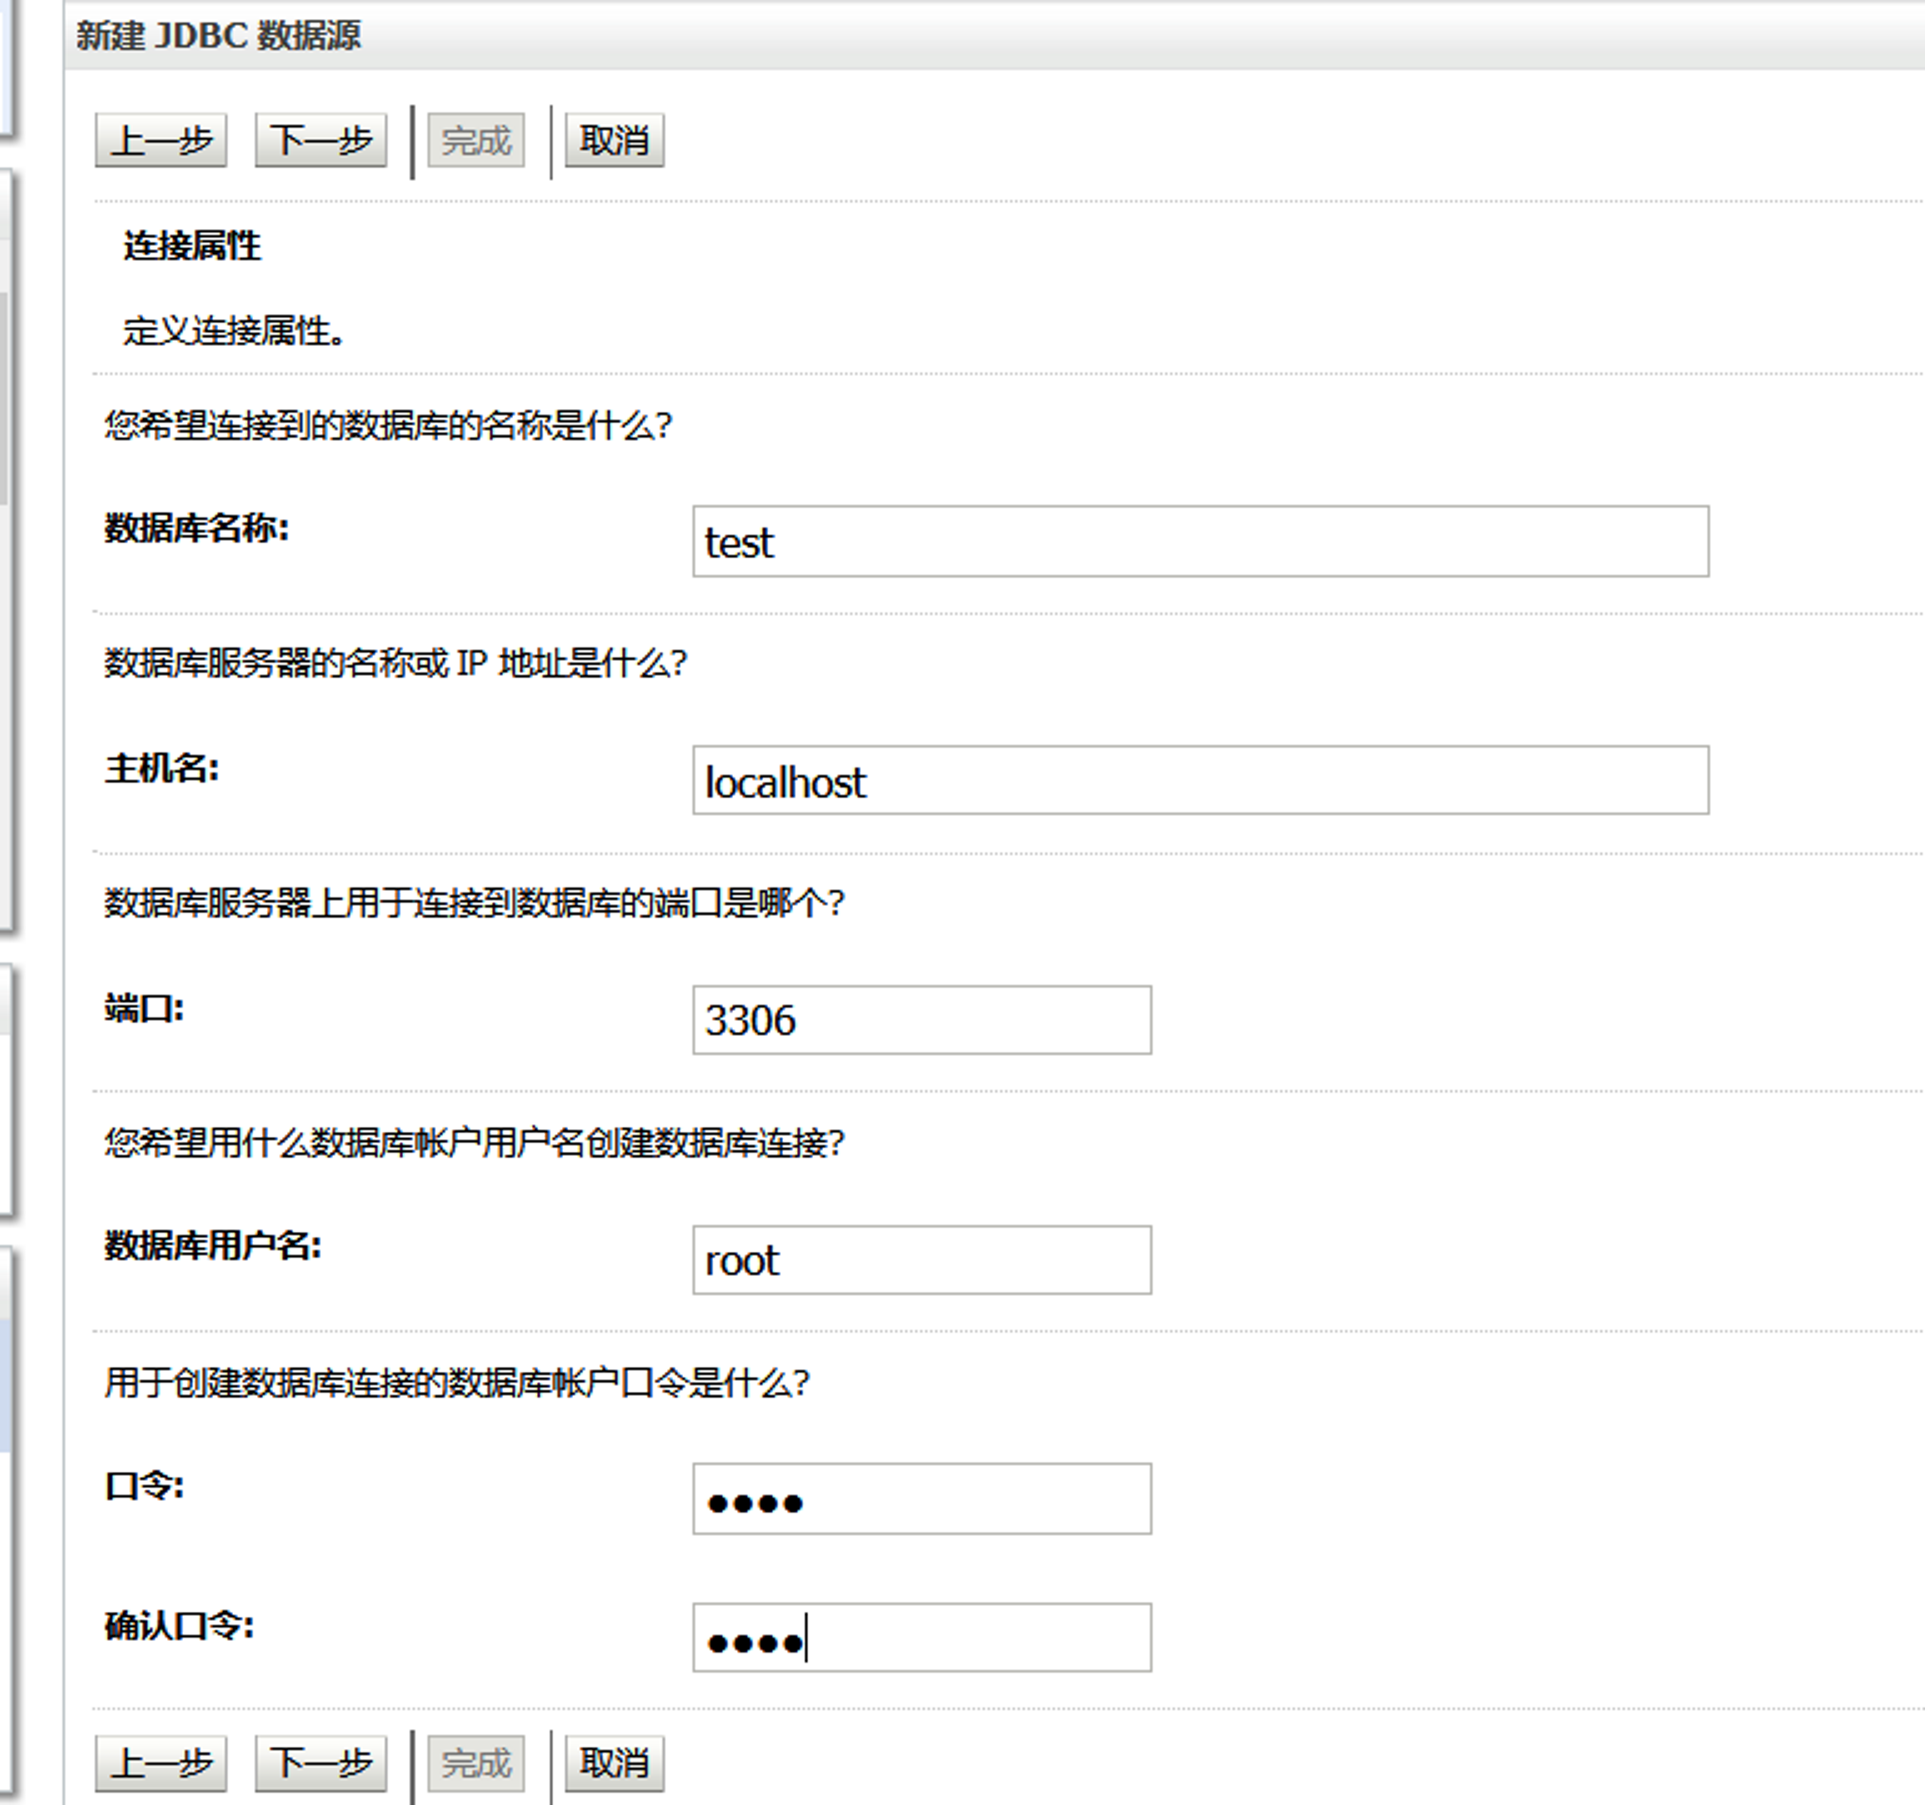
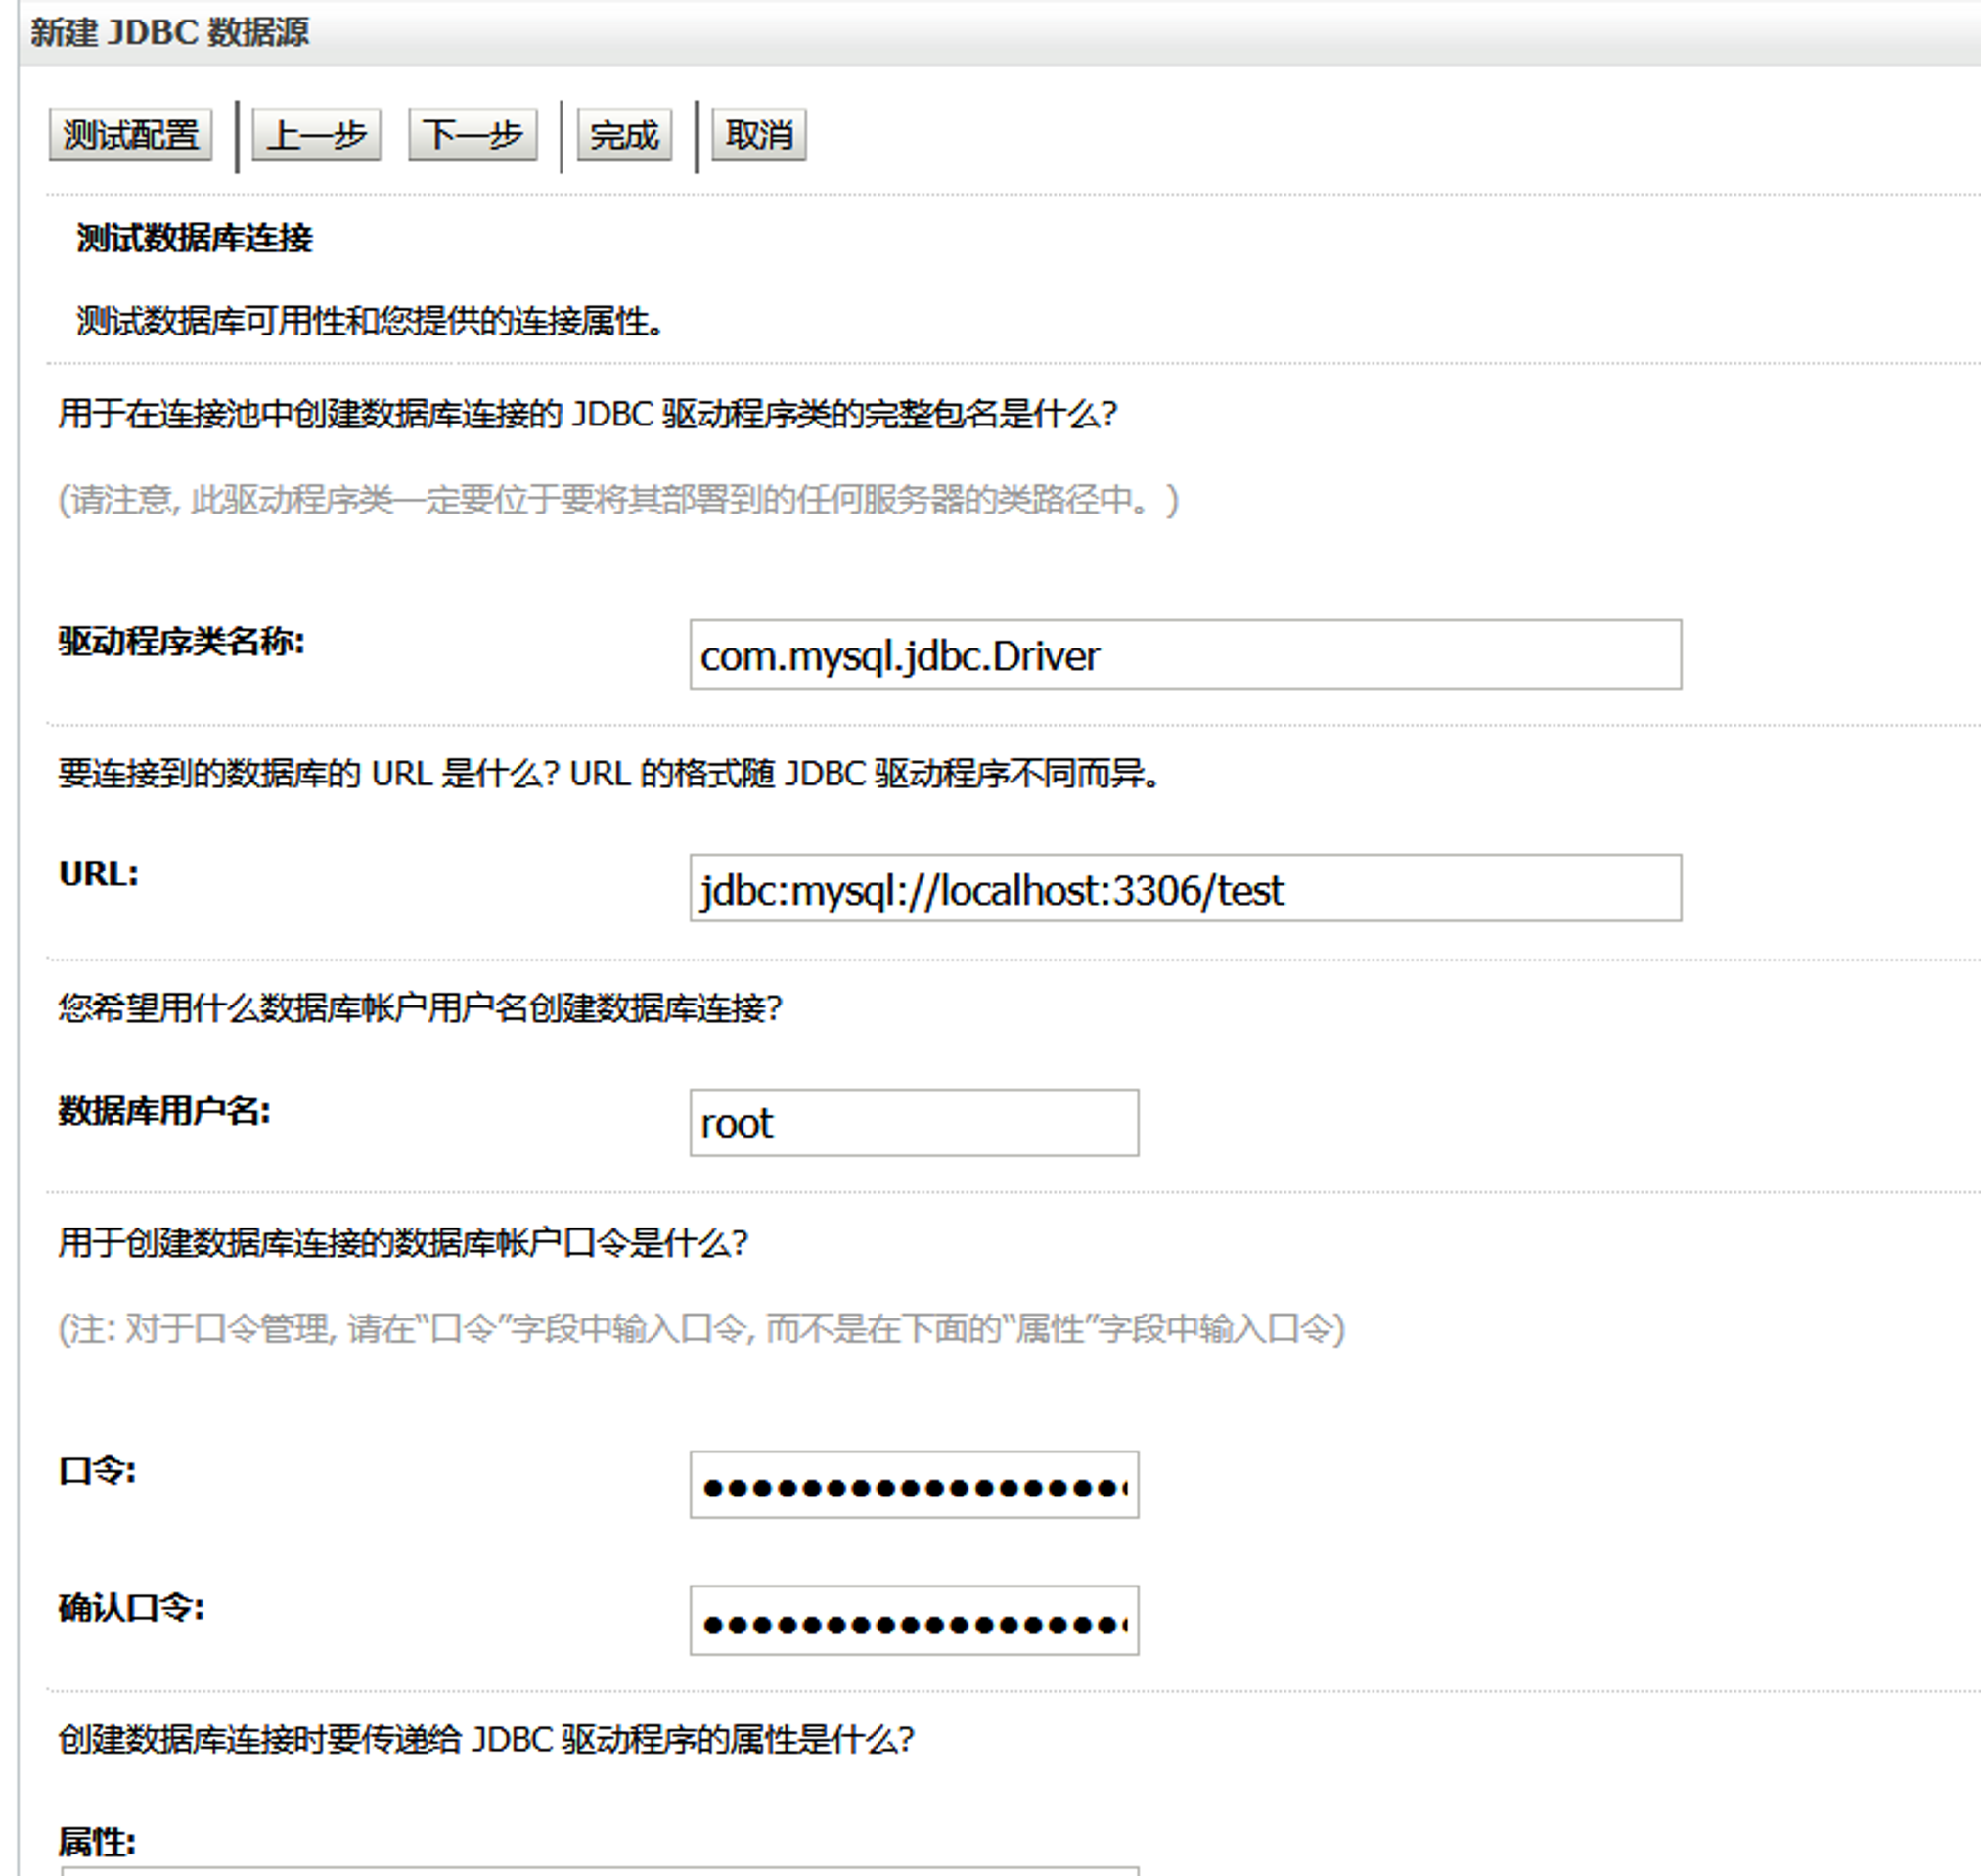
 4)后续的一些配置截图参考,可采用默认设置。当然,数据库名称、主机名、端口、数据库用户名、口令这个肯定要和需要被连接的数据库一致。
 5)完成之后部署之前的war包即可使用。
2.3 WebSphere 8.5.5.14
WebSphere是非常常见的Web应用容器,其配置的主要通过WebSphere控制台完成,比weblogic复杂太多,以下是建议流程。
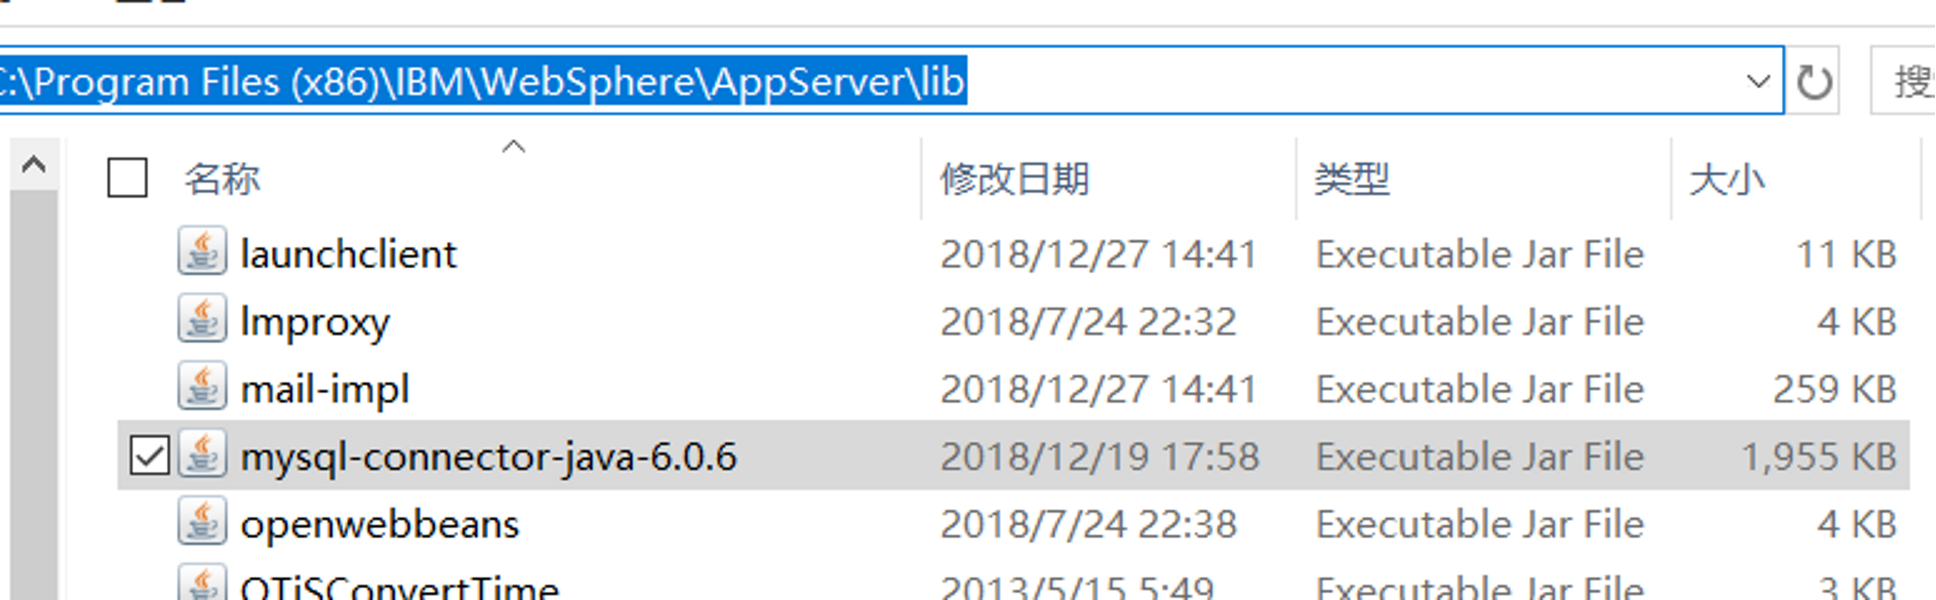
1)WebSphere没有自带mysql的jdbc,需要自己添加。我这里先拷贝放到{WebSphere}\lib。
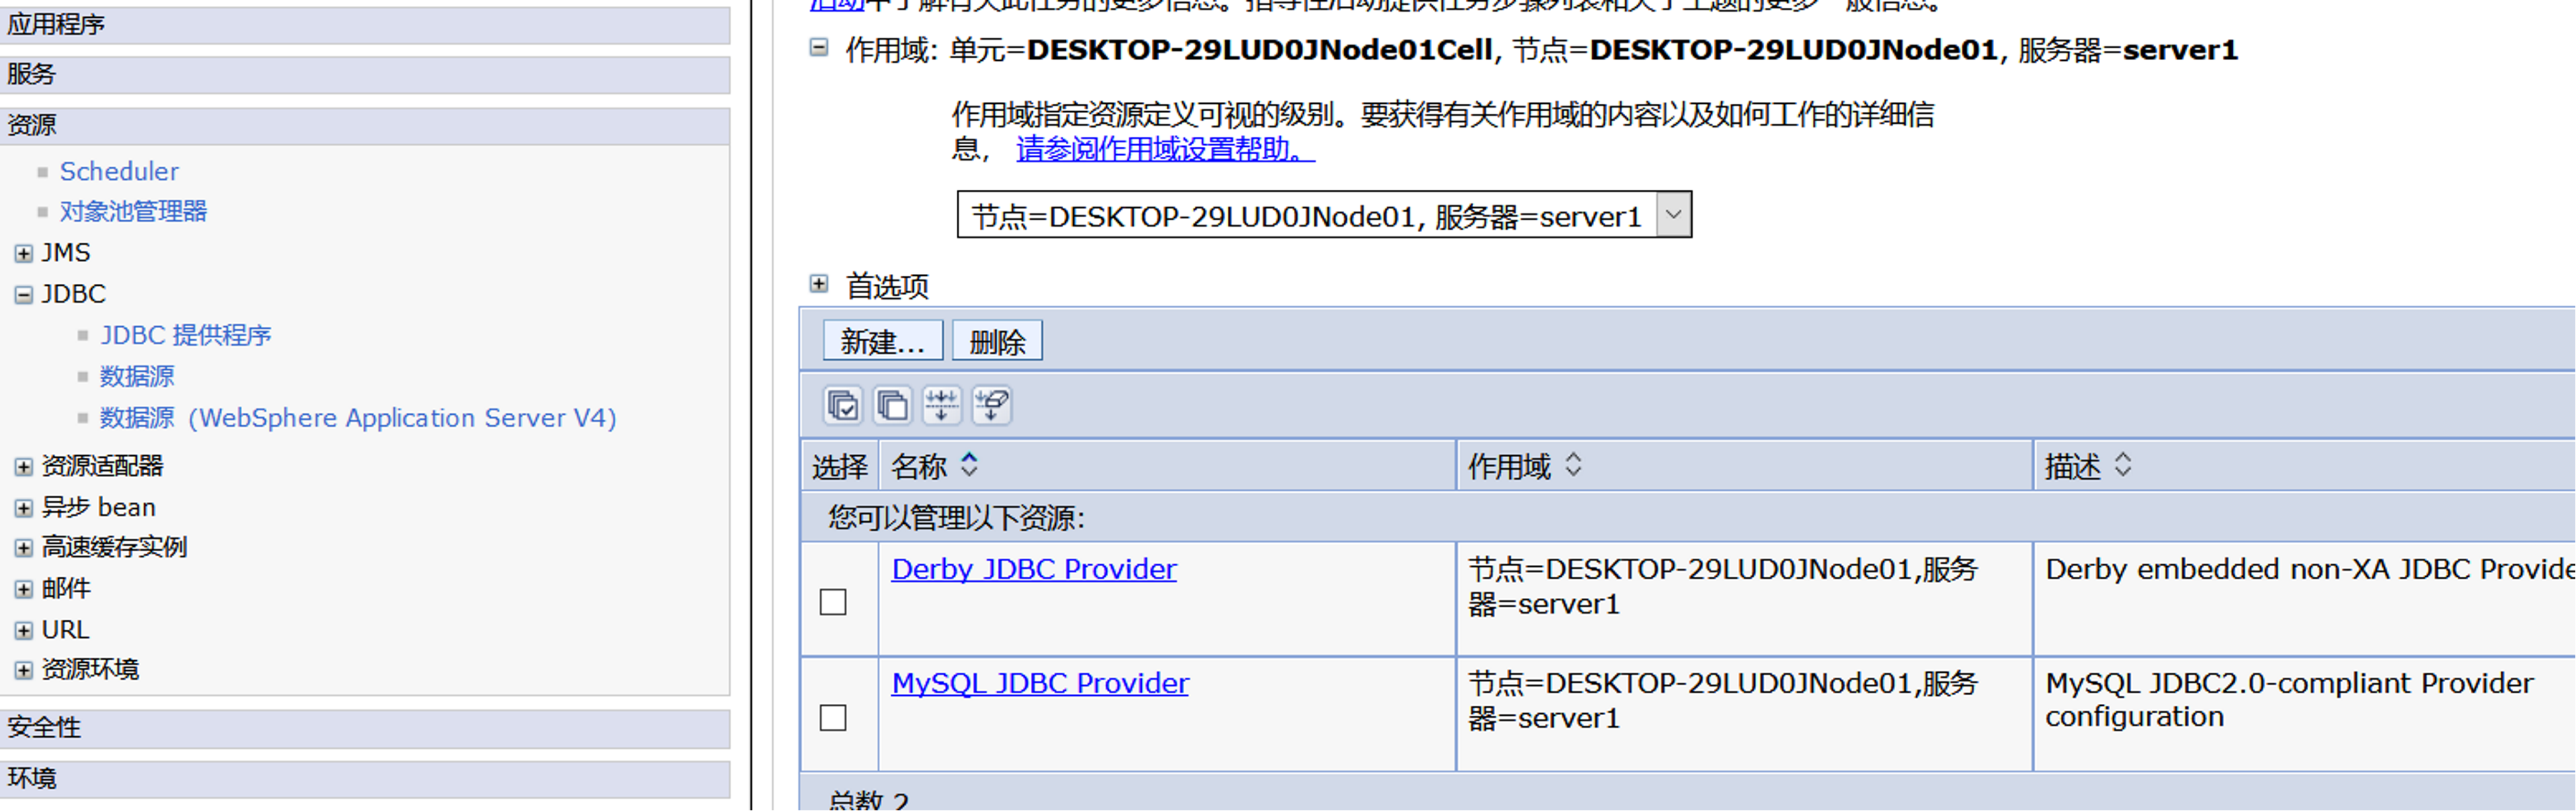
 2)登录控制台,首先先配置资源中JDBC的JDBC提供程序,新建一个JDBC提供程序。作用域可任选,不过不能是全部,毕竟全部并不是一个选项,会提示错误。
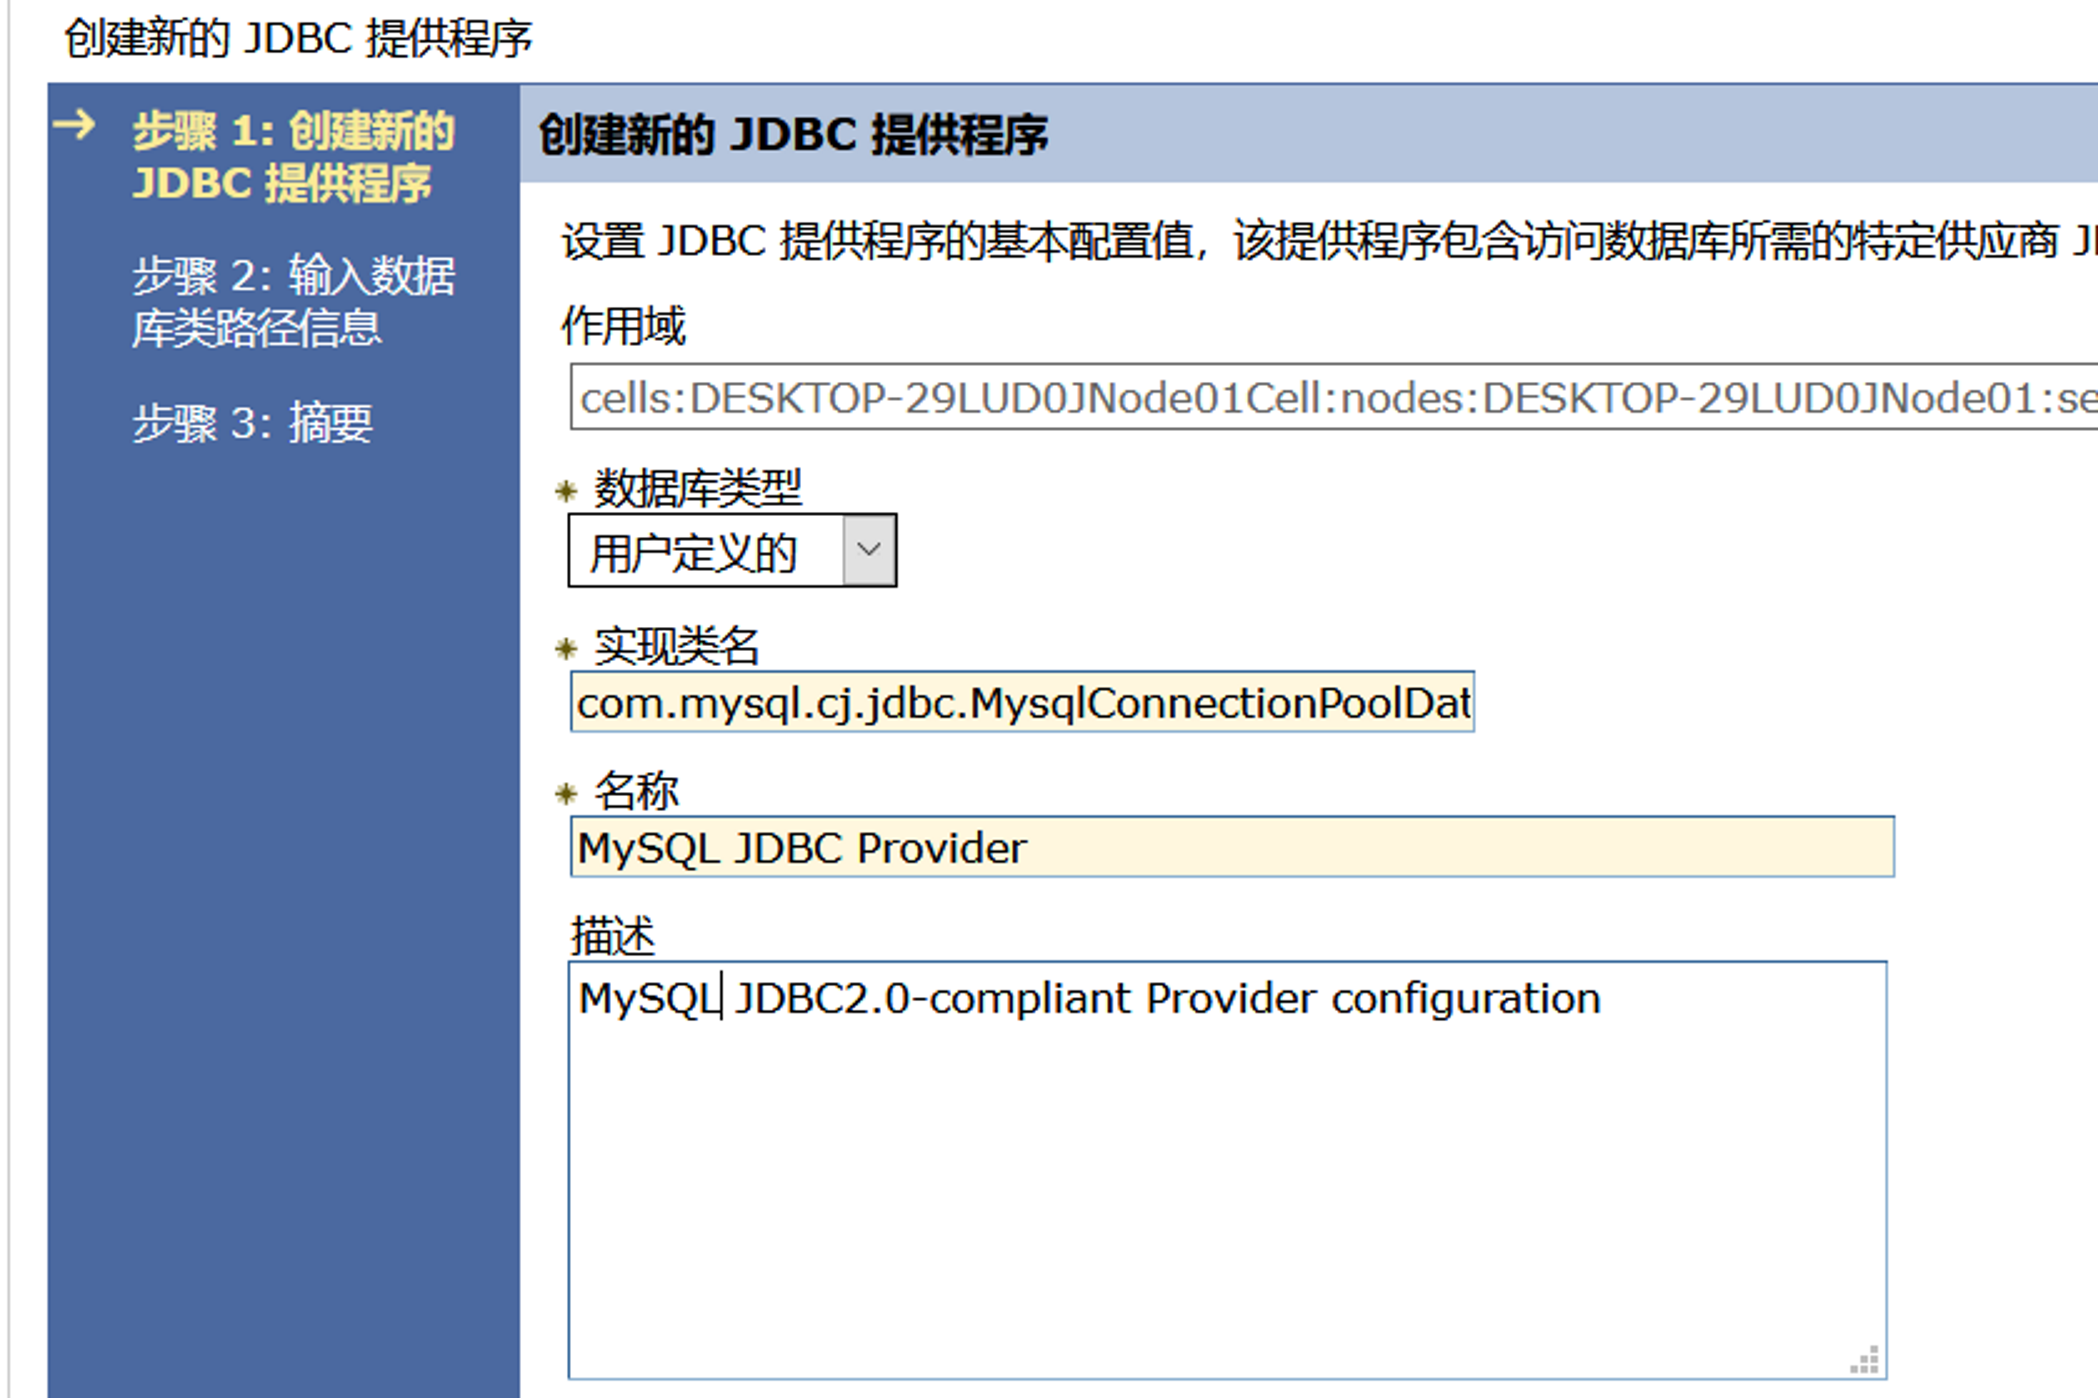
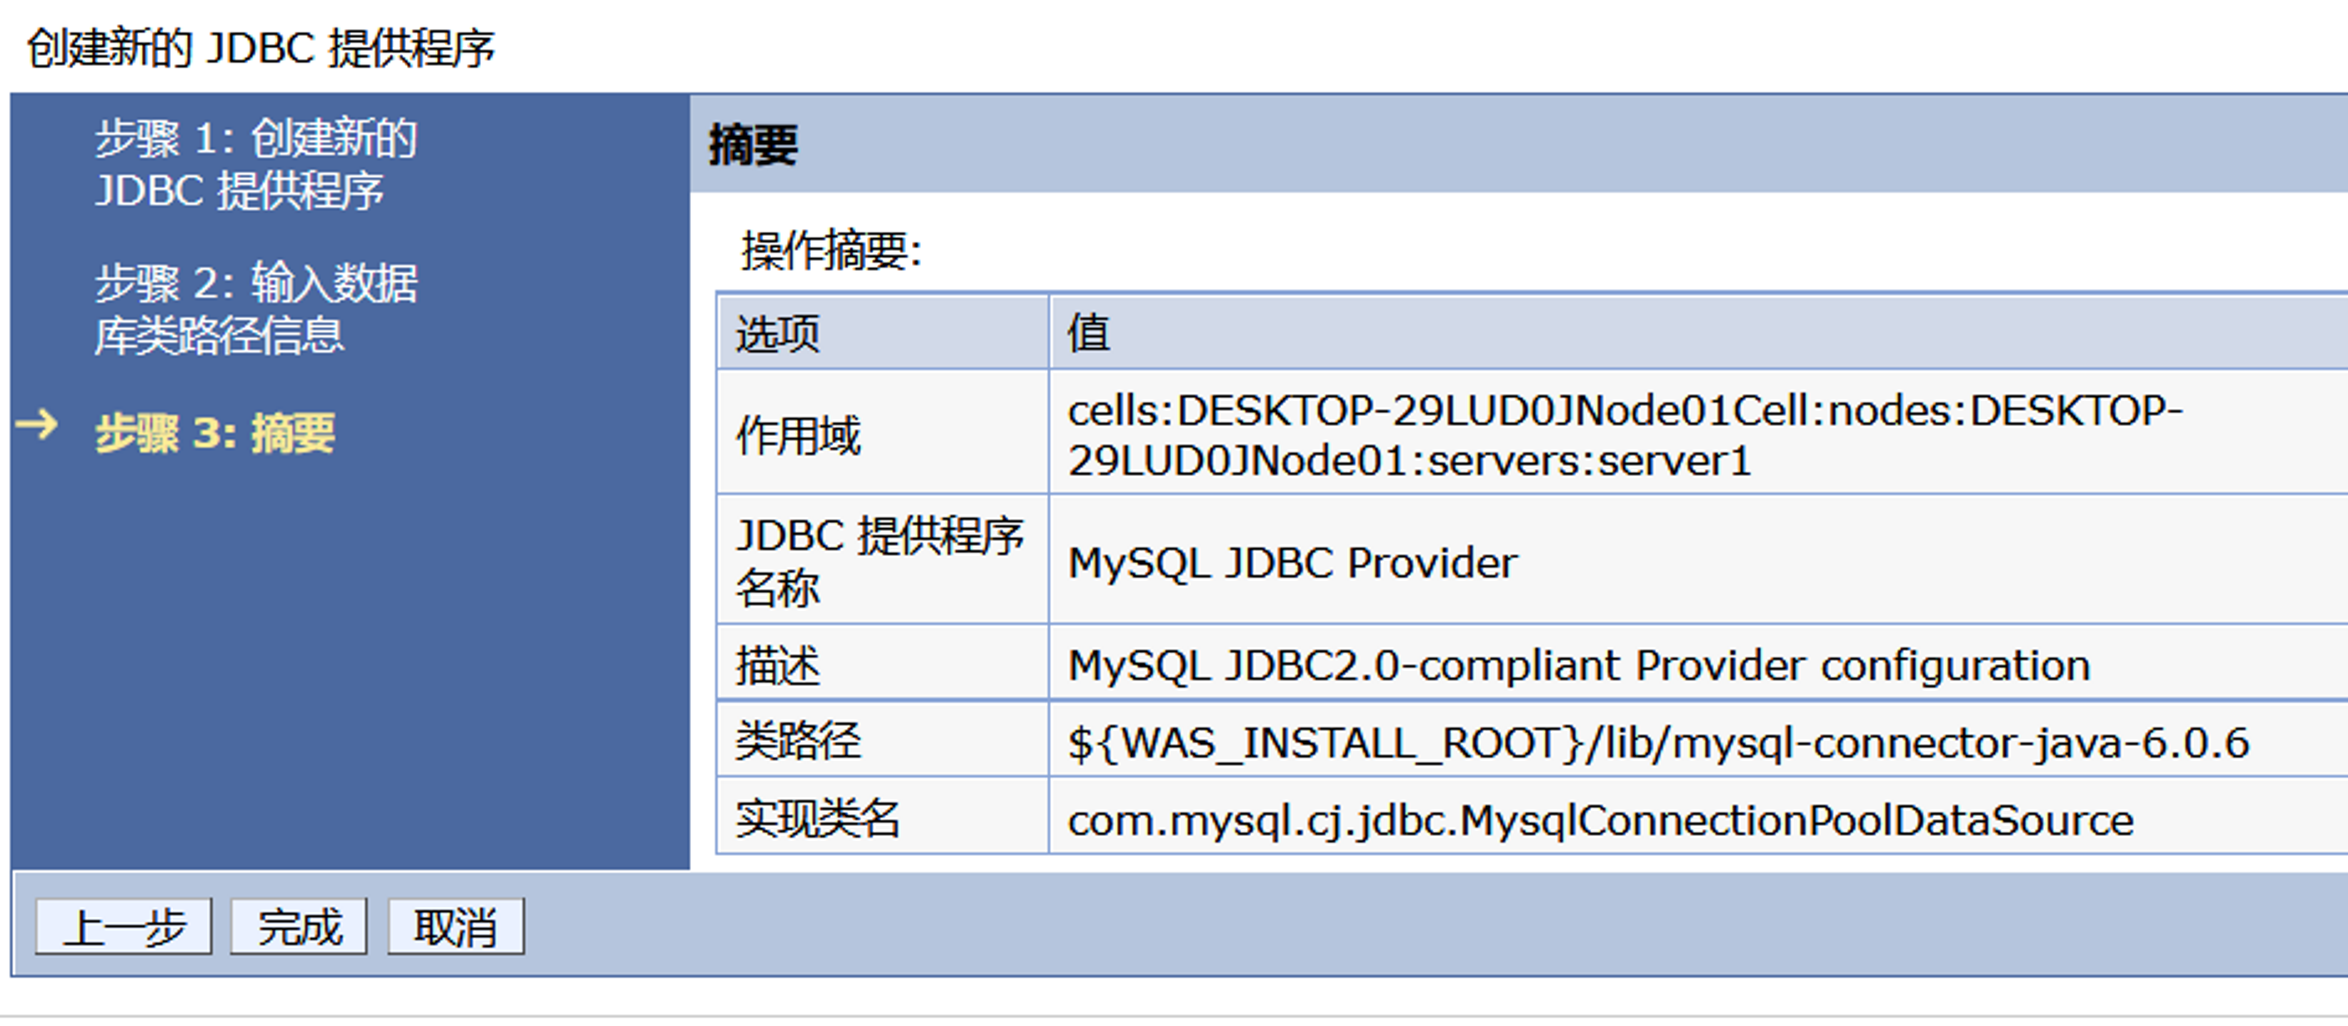
 3)配置实现类名,这里就要到mysql的jdbc包中去找了,找含有名称DataSource或ConnectionPoolDataSource的类文件。其他的则是描述性质字段可自便。完整内容截图看下图第二张即可。

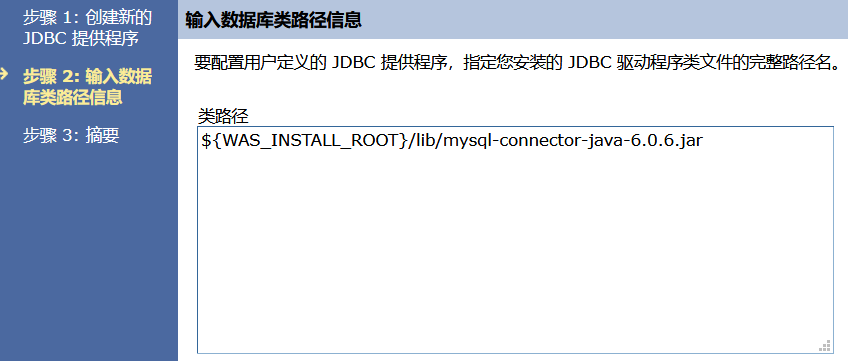
 4)配置类的jar包路径,之前我放在lib下这里则图个方便,依靠环境变量${WAS_INSTALL_ROOT}获取WebSphere安装路径,然后再指向jar包。
 5)核对下配置,没问题就可以完成了。
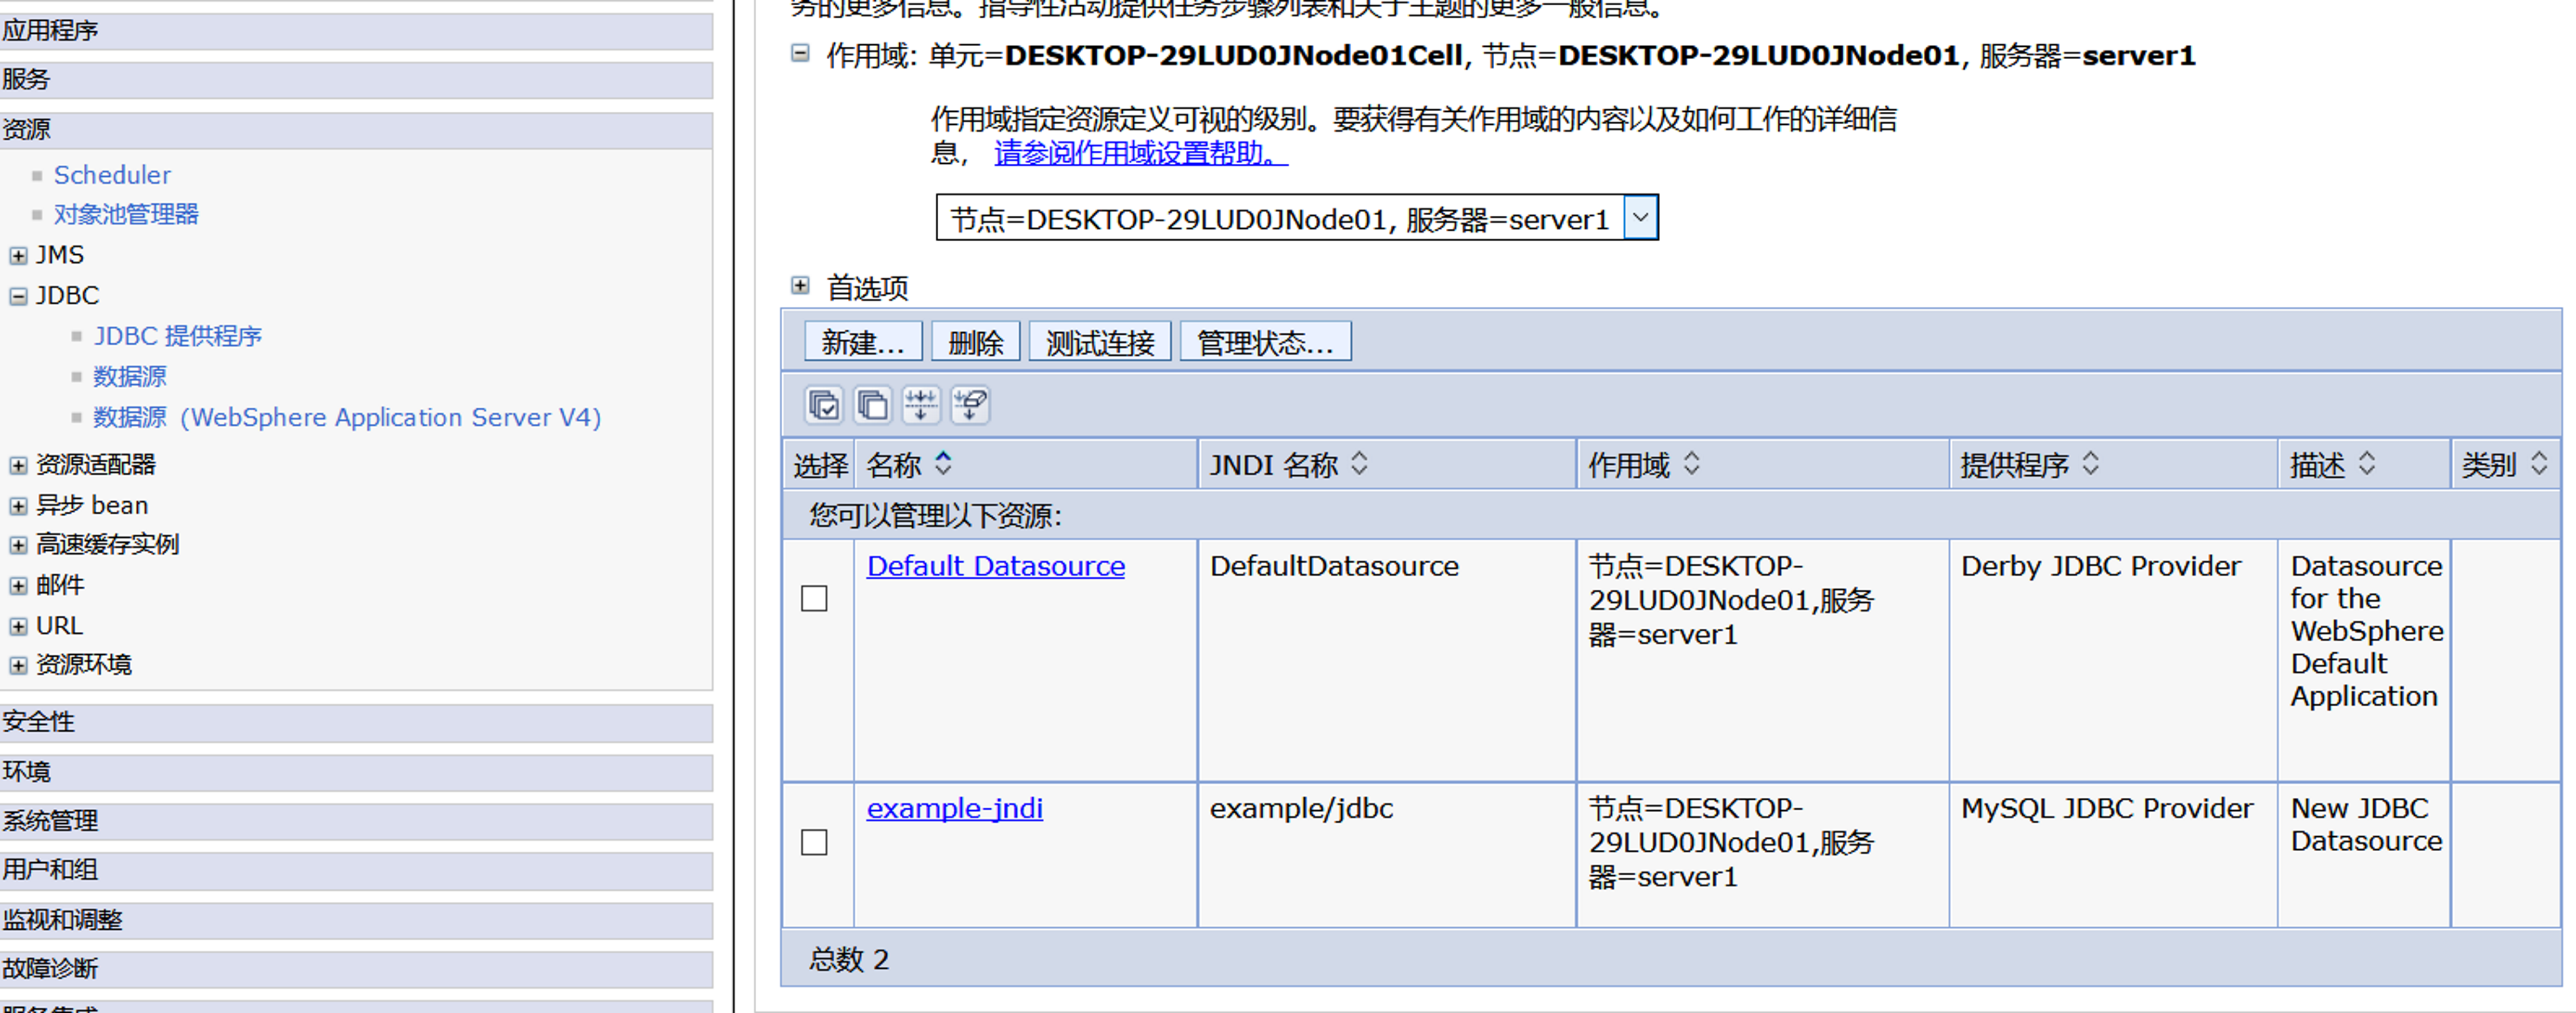
 6)以上是第一个麻烦。接下来配置JDBC中的数据源,点击新建。作用域可任选。
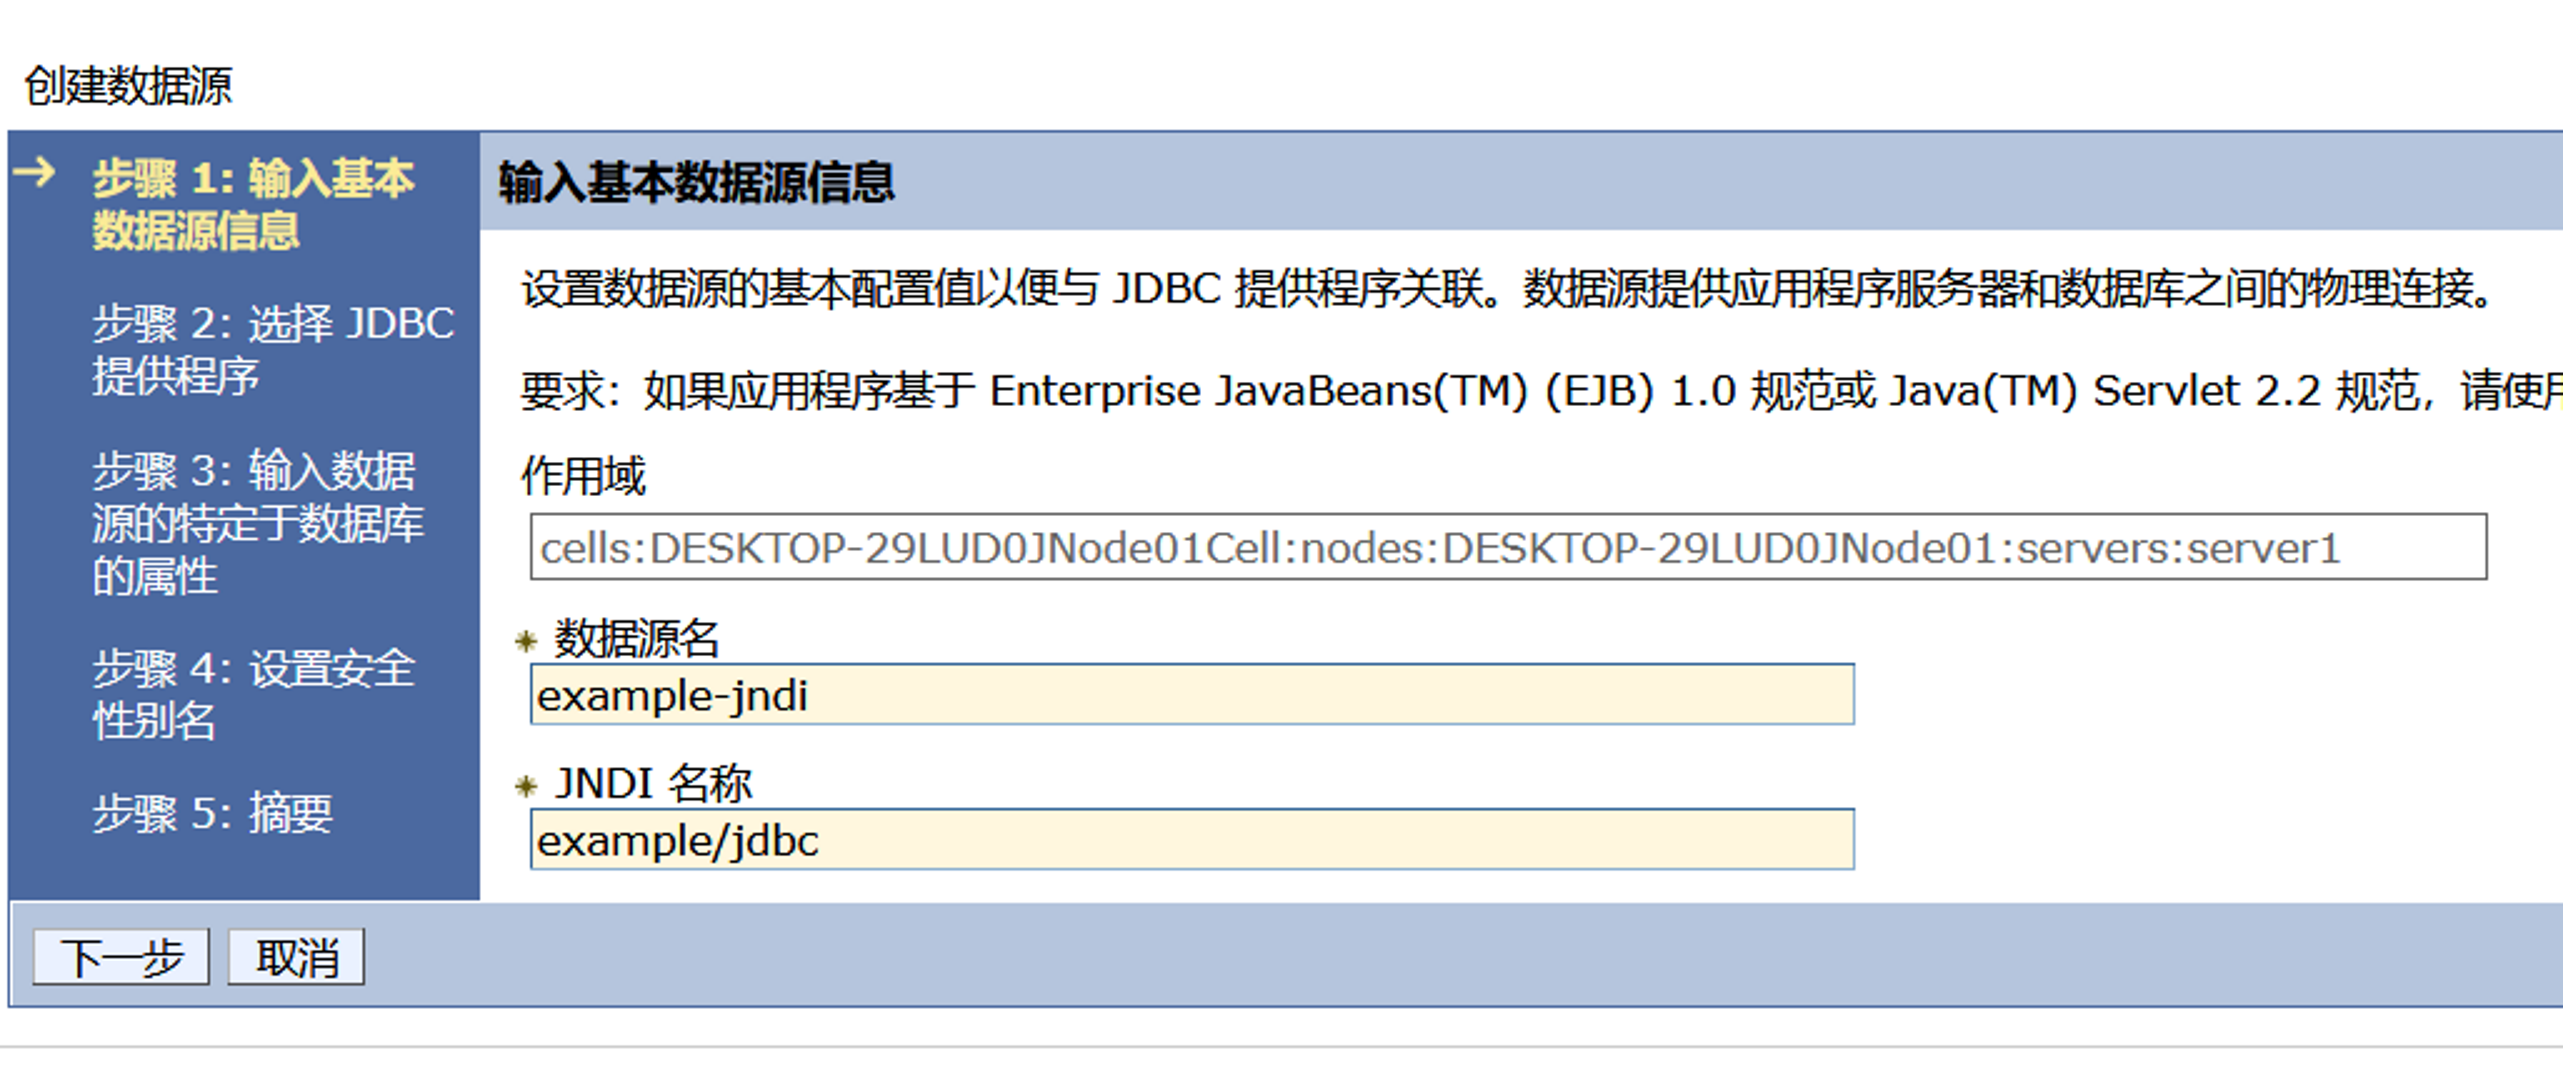
 7)配置数据源名和JNDI名称,重点是JNDI名称,需要与应用中引用的一致。
8)选择刚才设置好的JDBC提供程序。
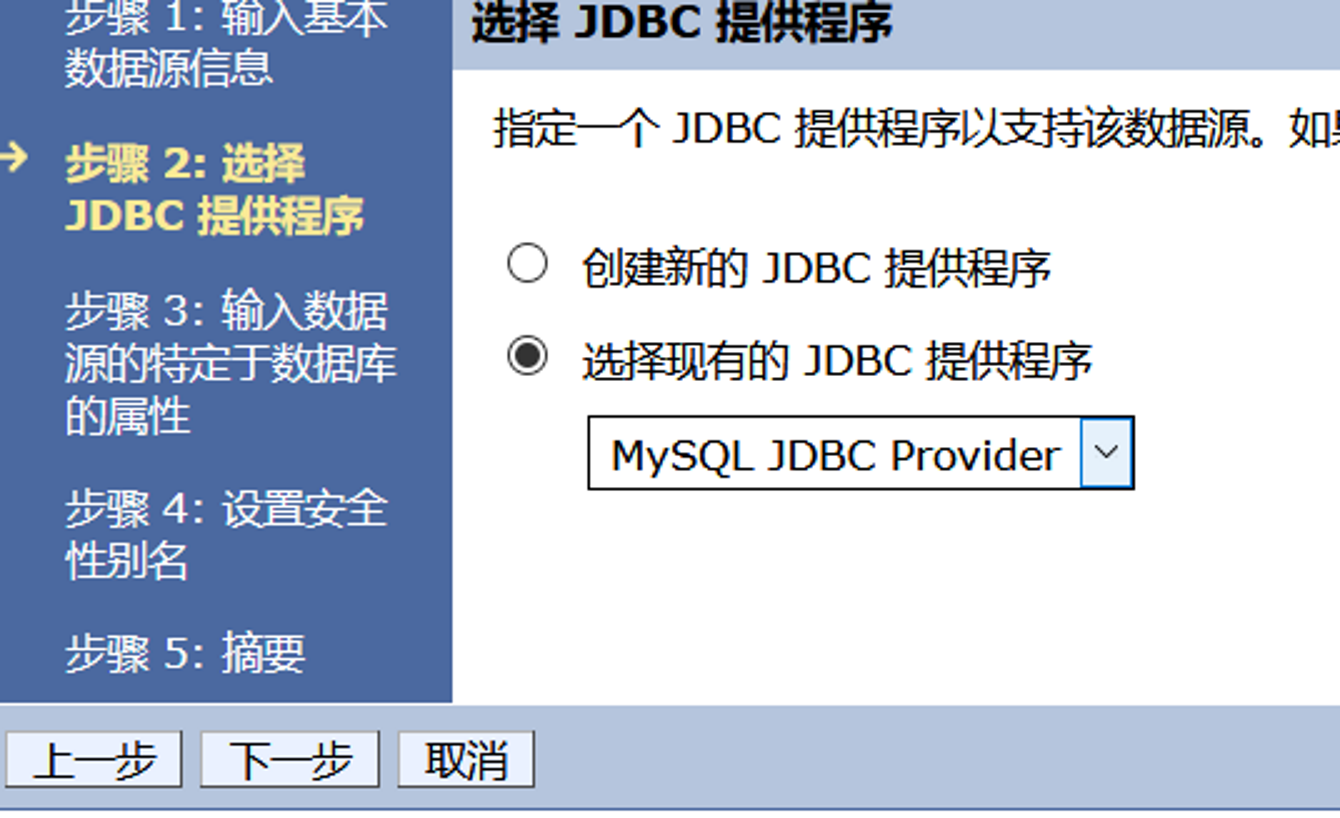
9)一路默认设置到完成
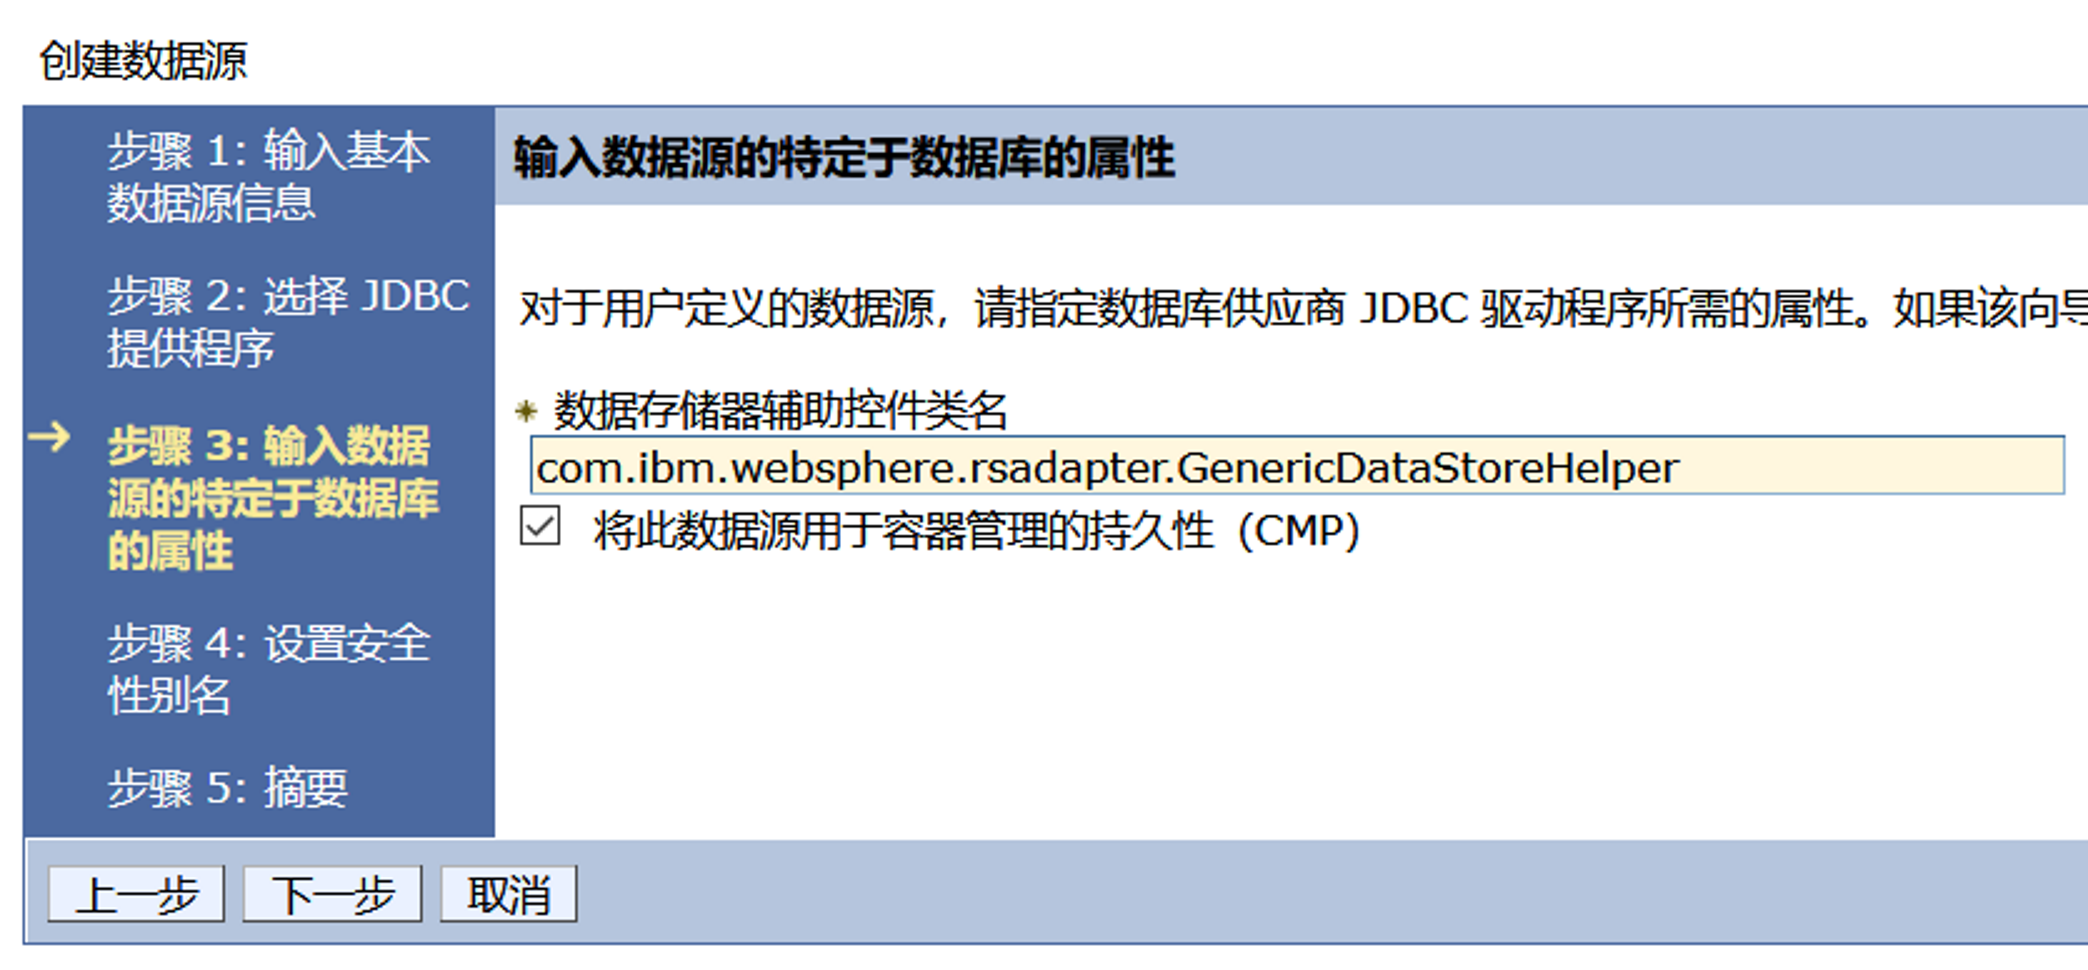
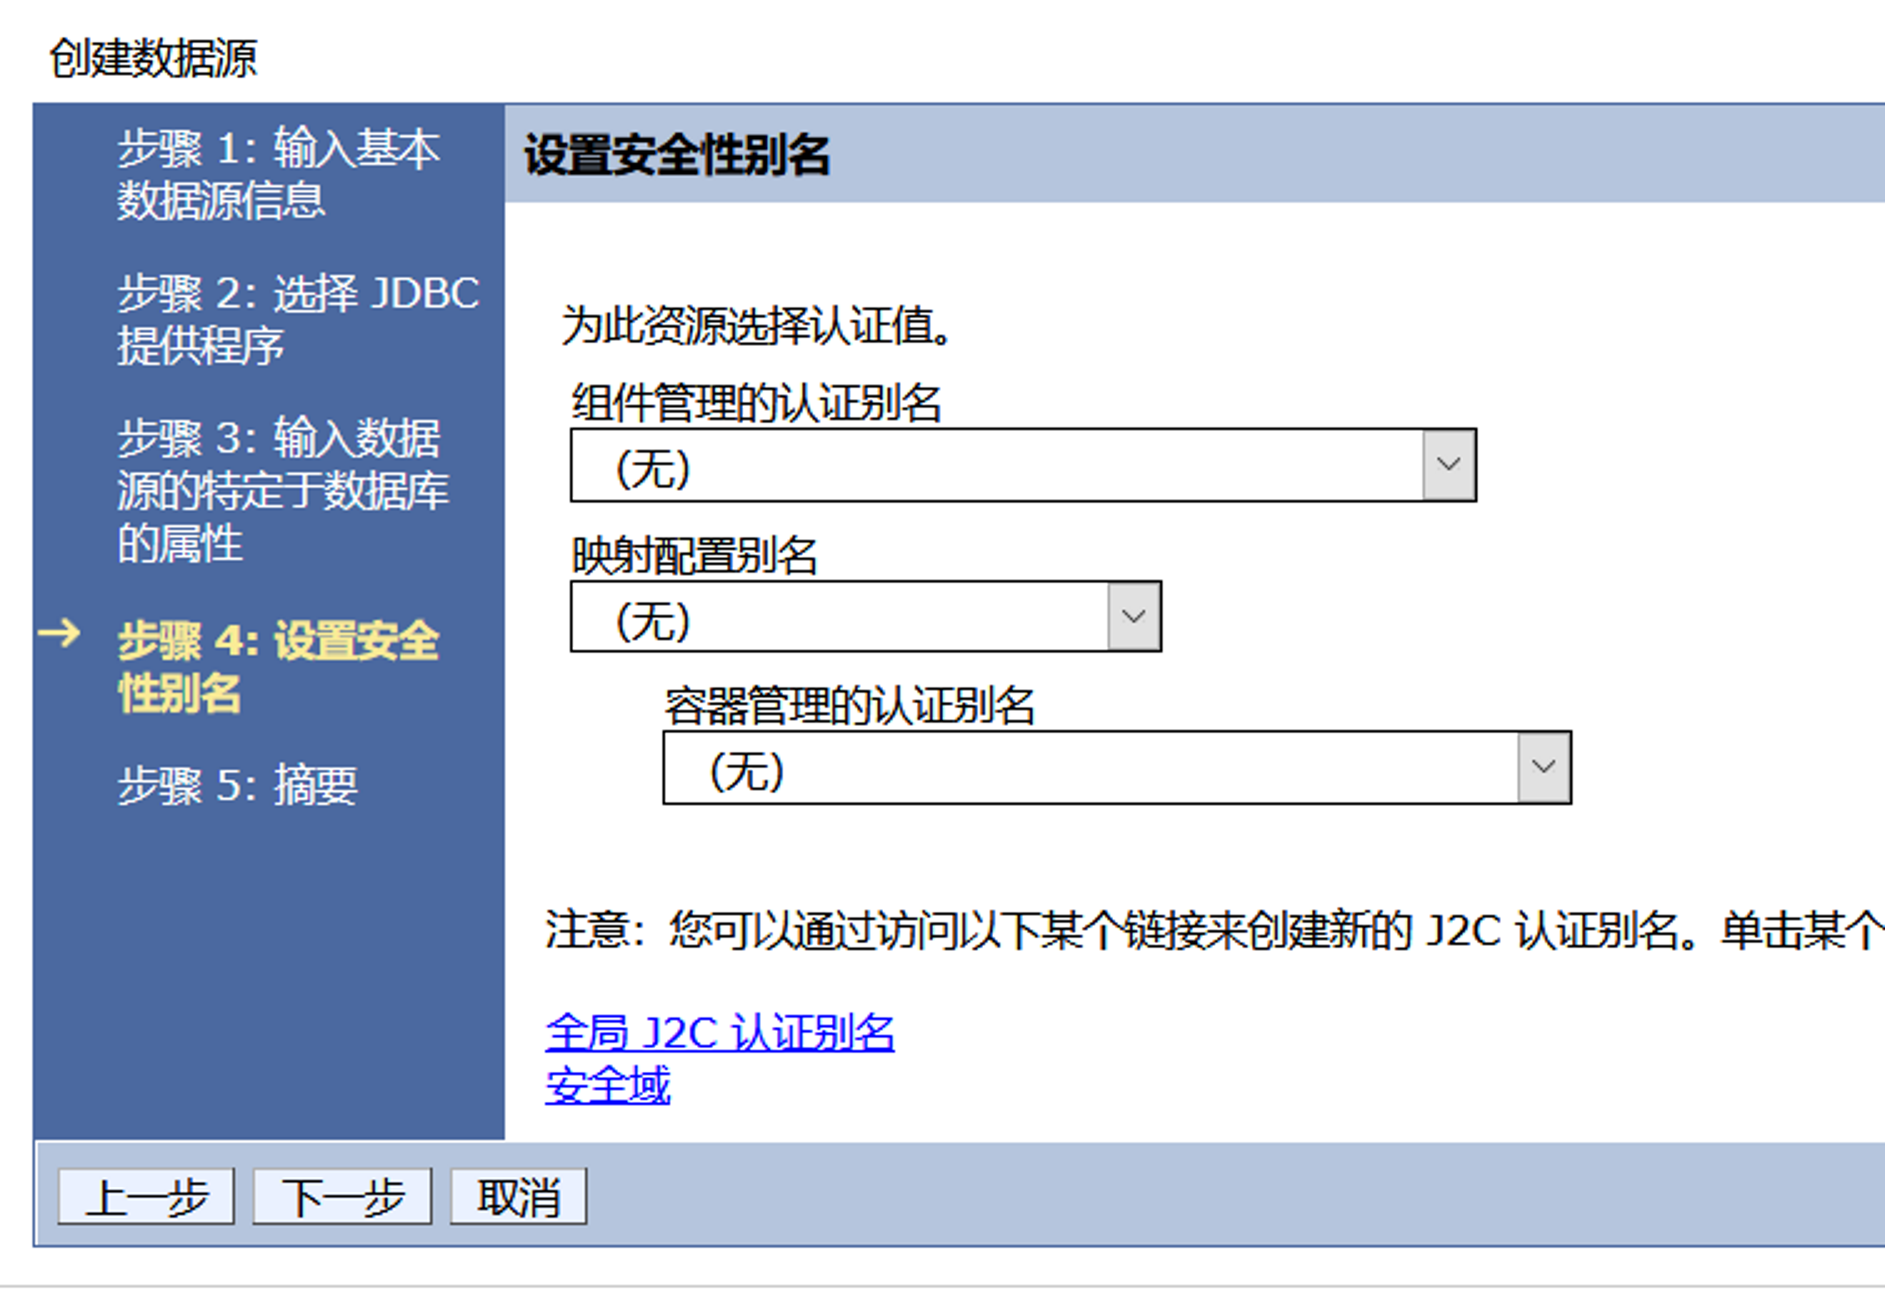
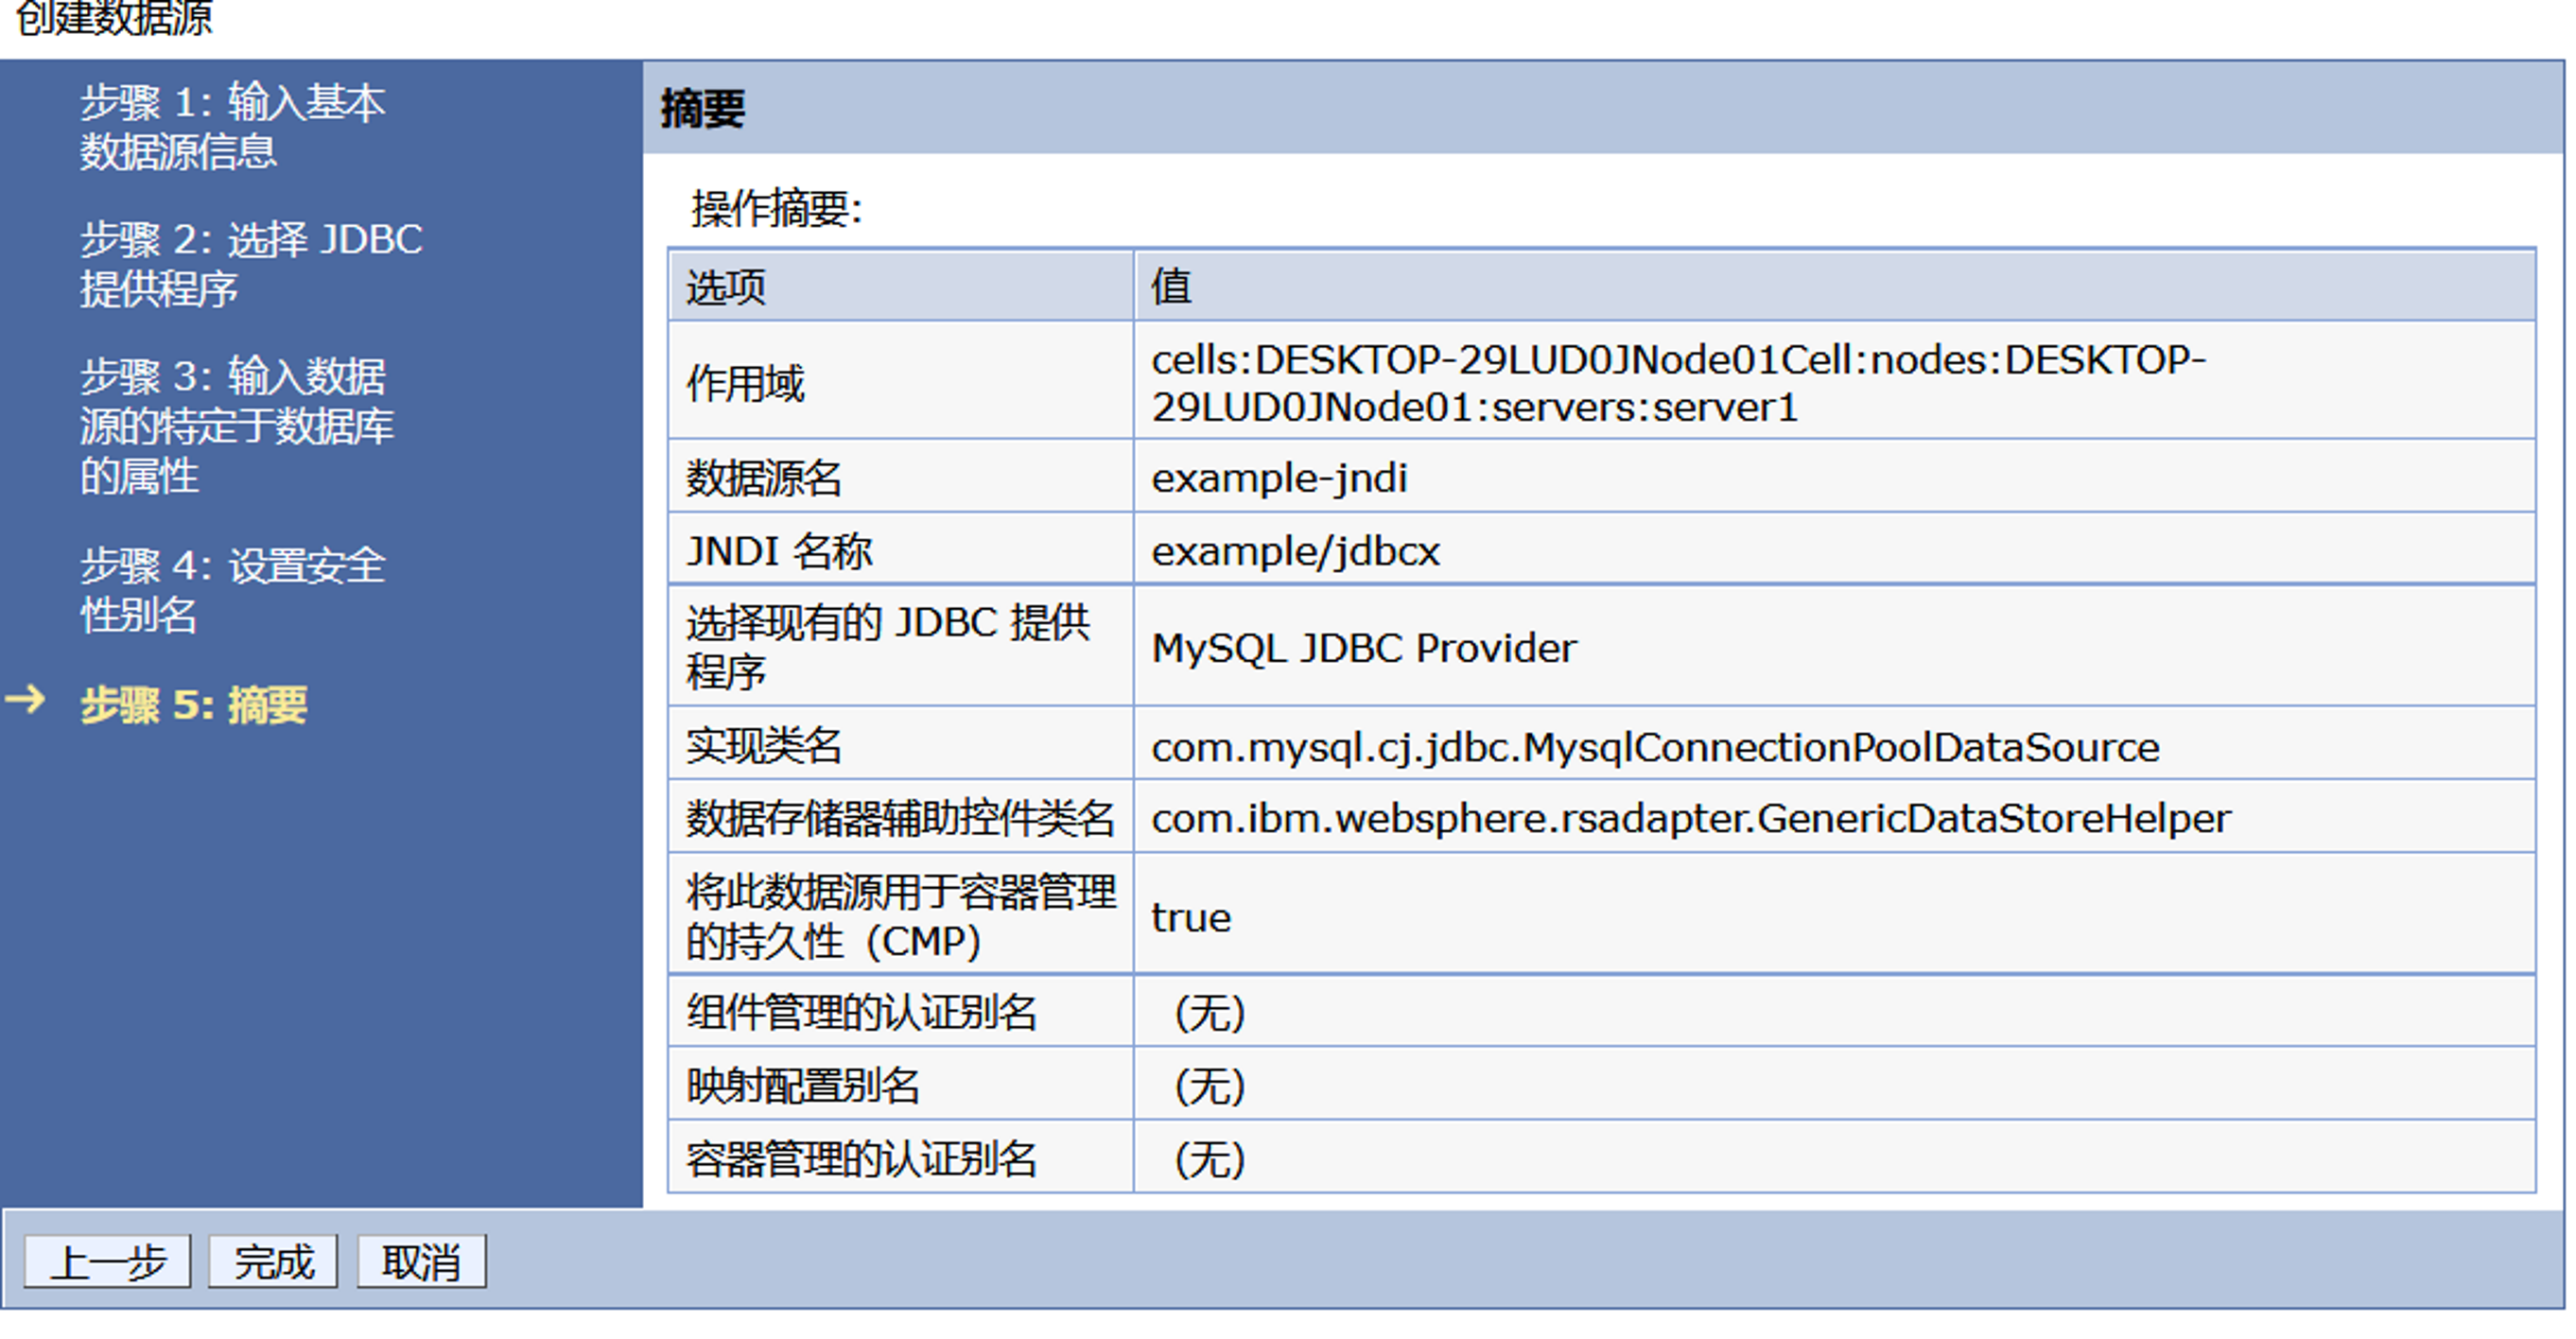 10)是的我咋没有配置数据库连接地址、数据库用户名、口令等呢?接下来就是了。进入之前新建的数据源配置。
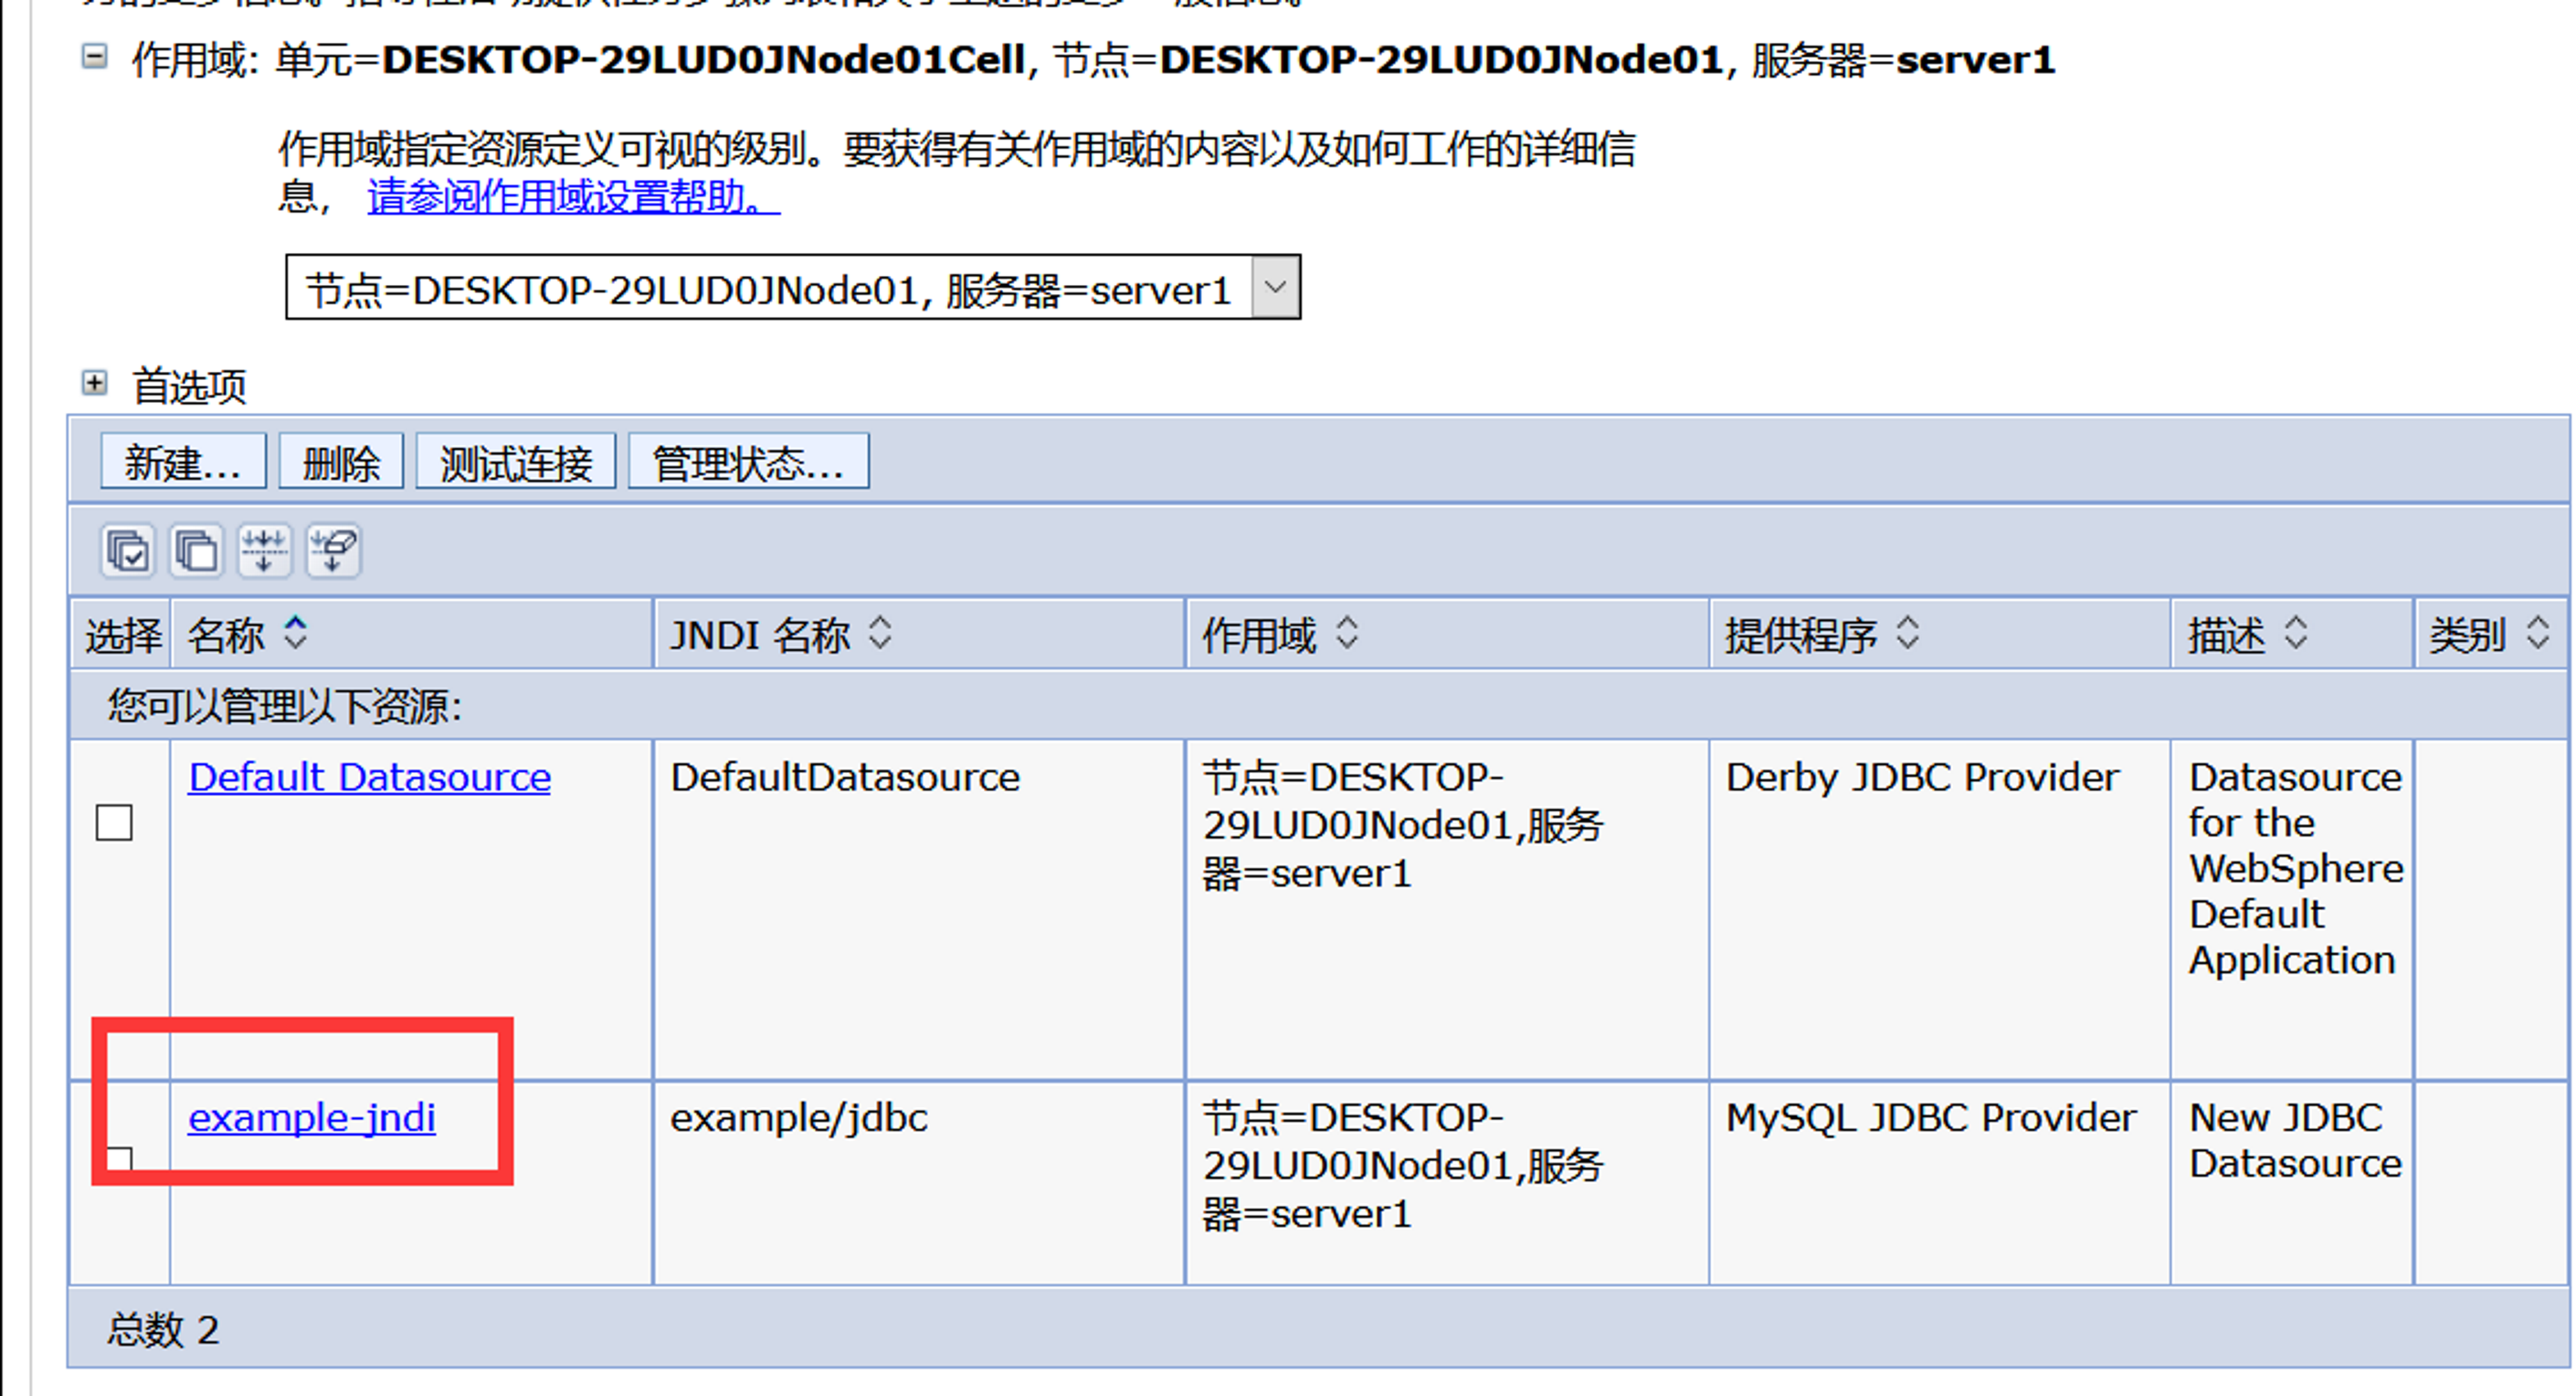
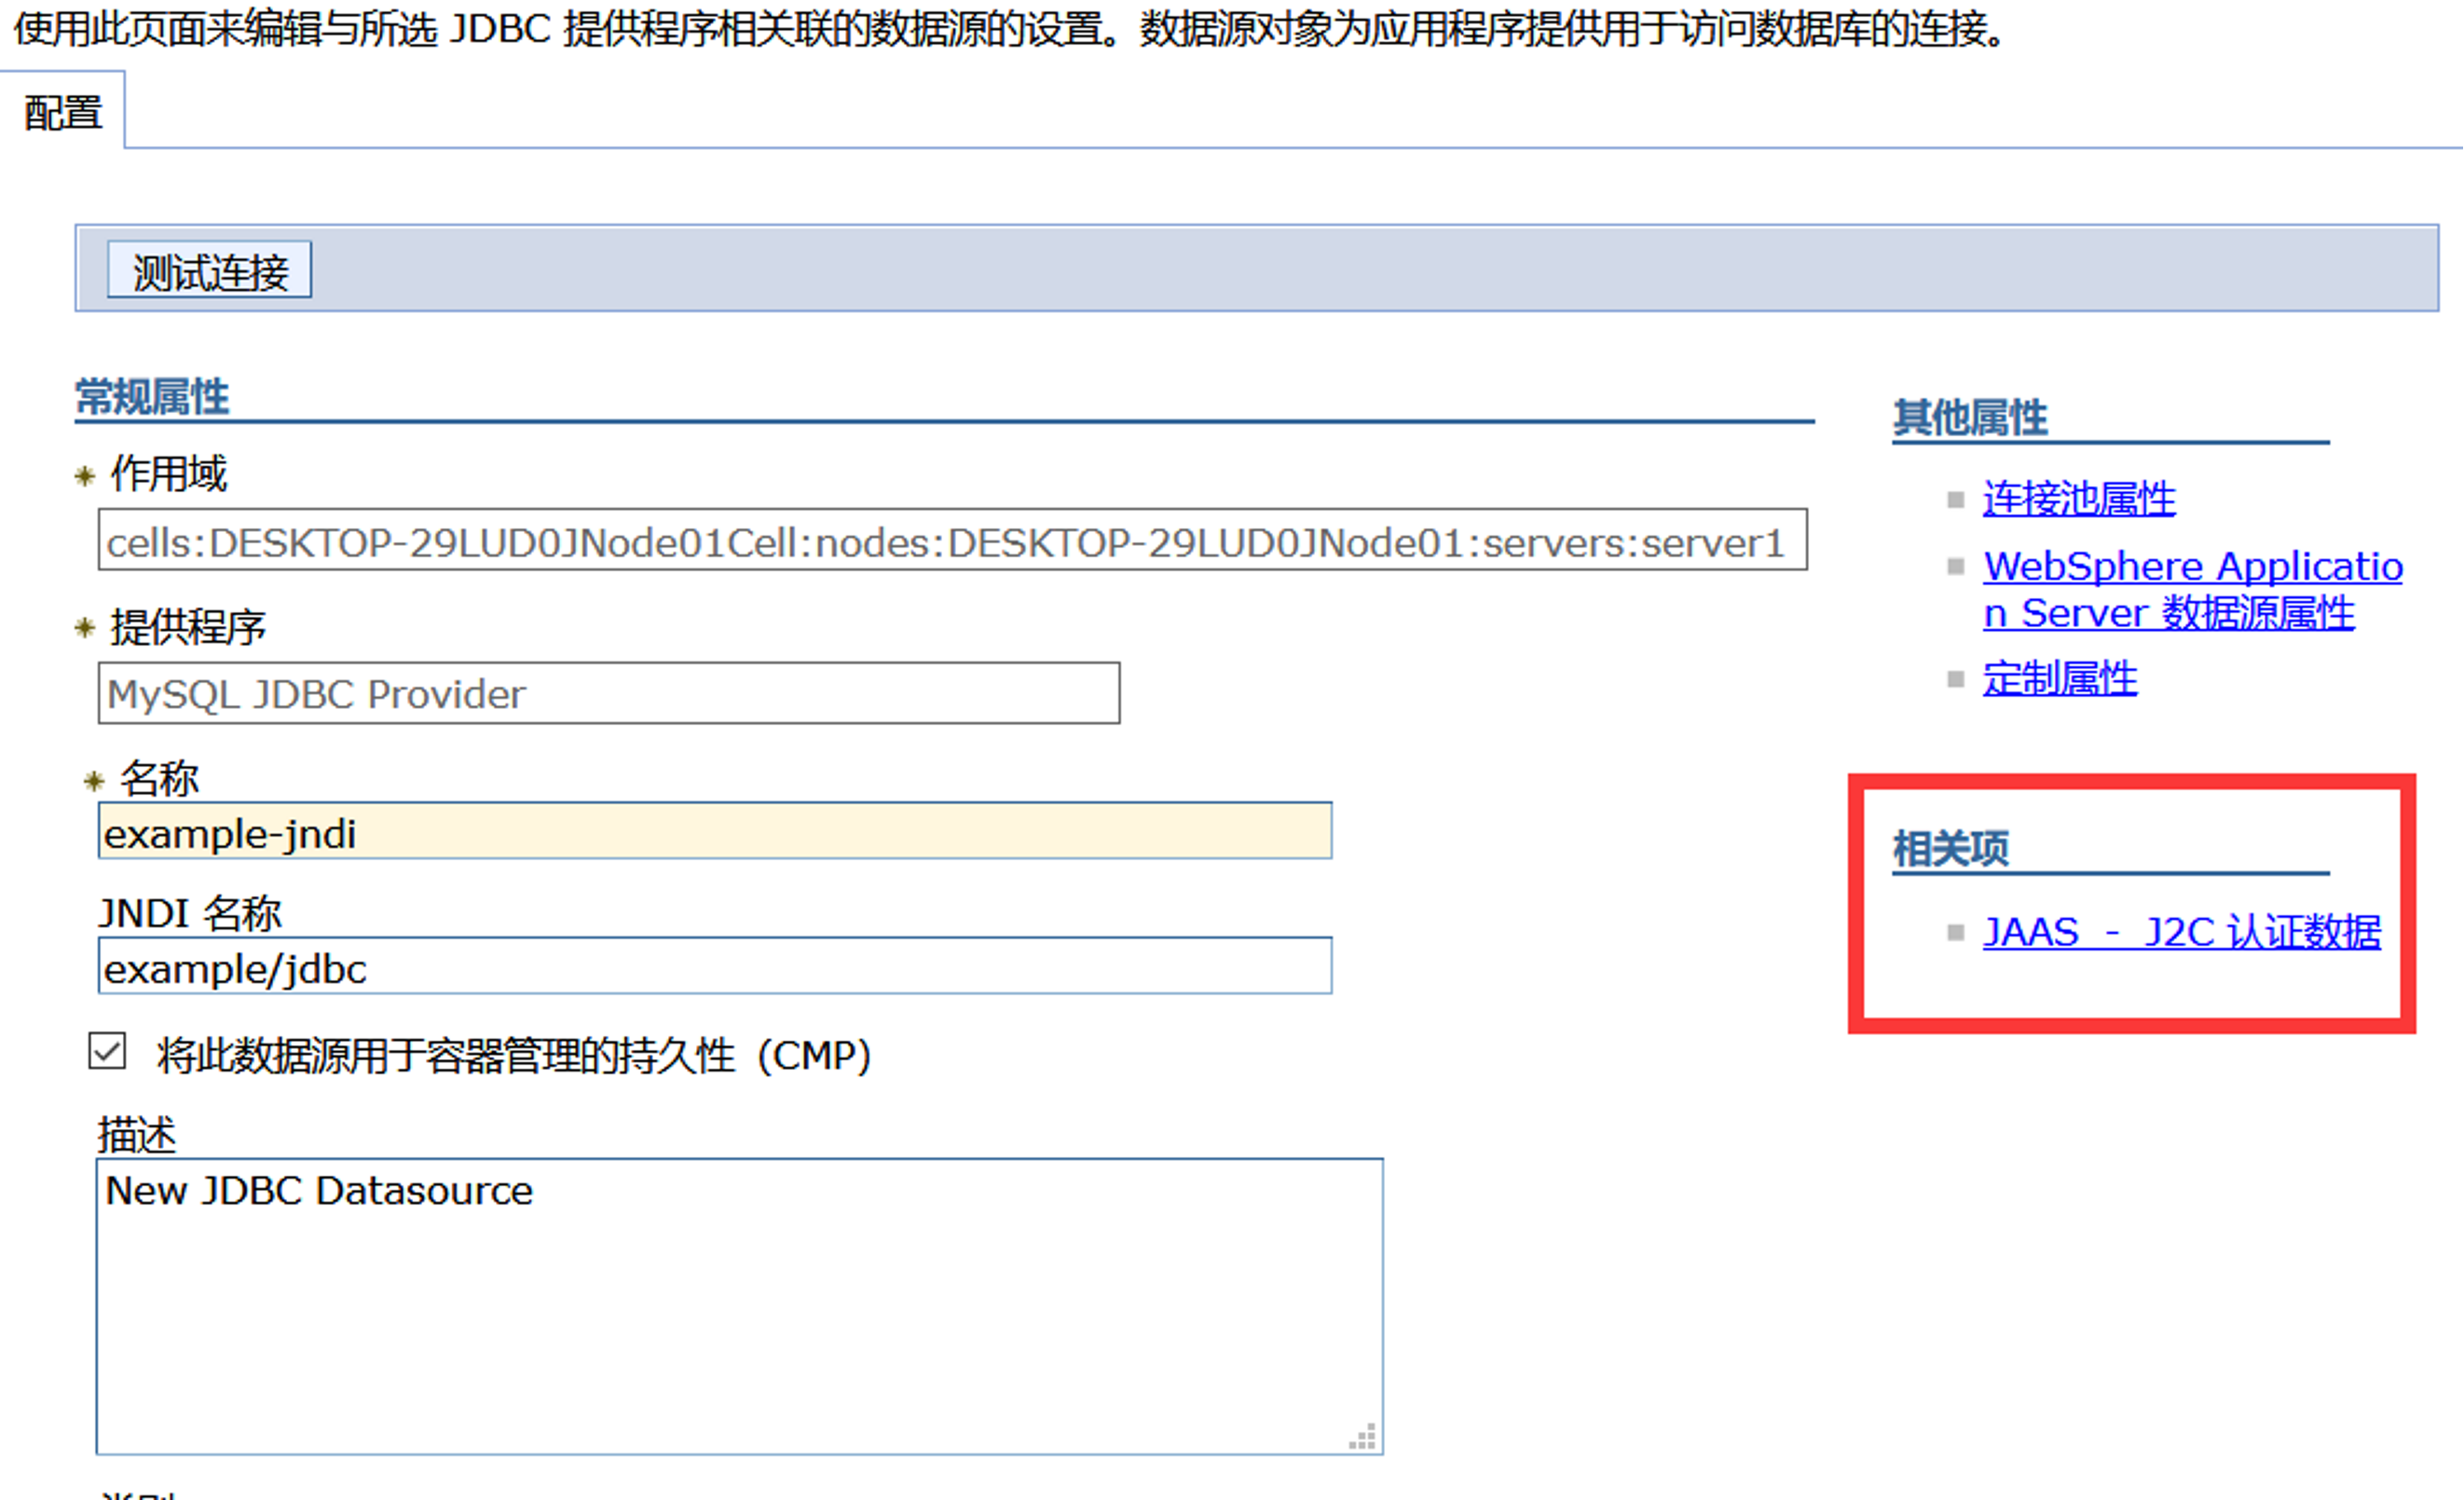
11)进入J2C认证数据。
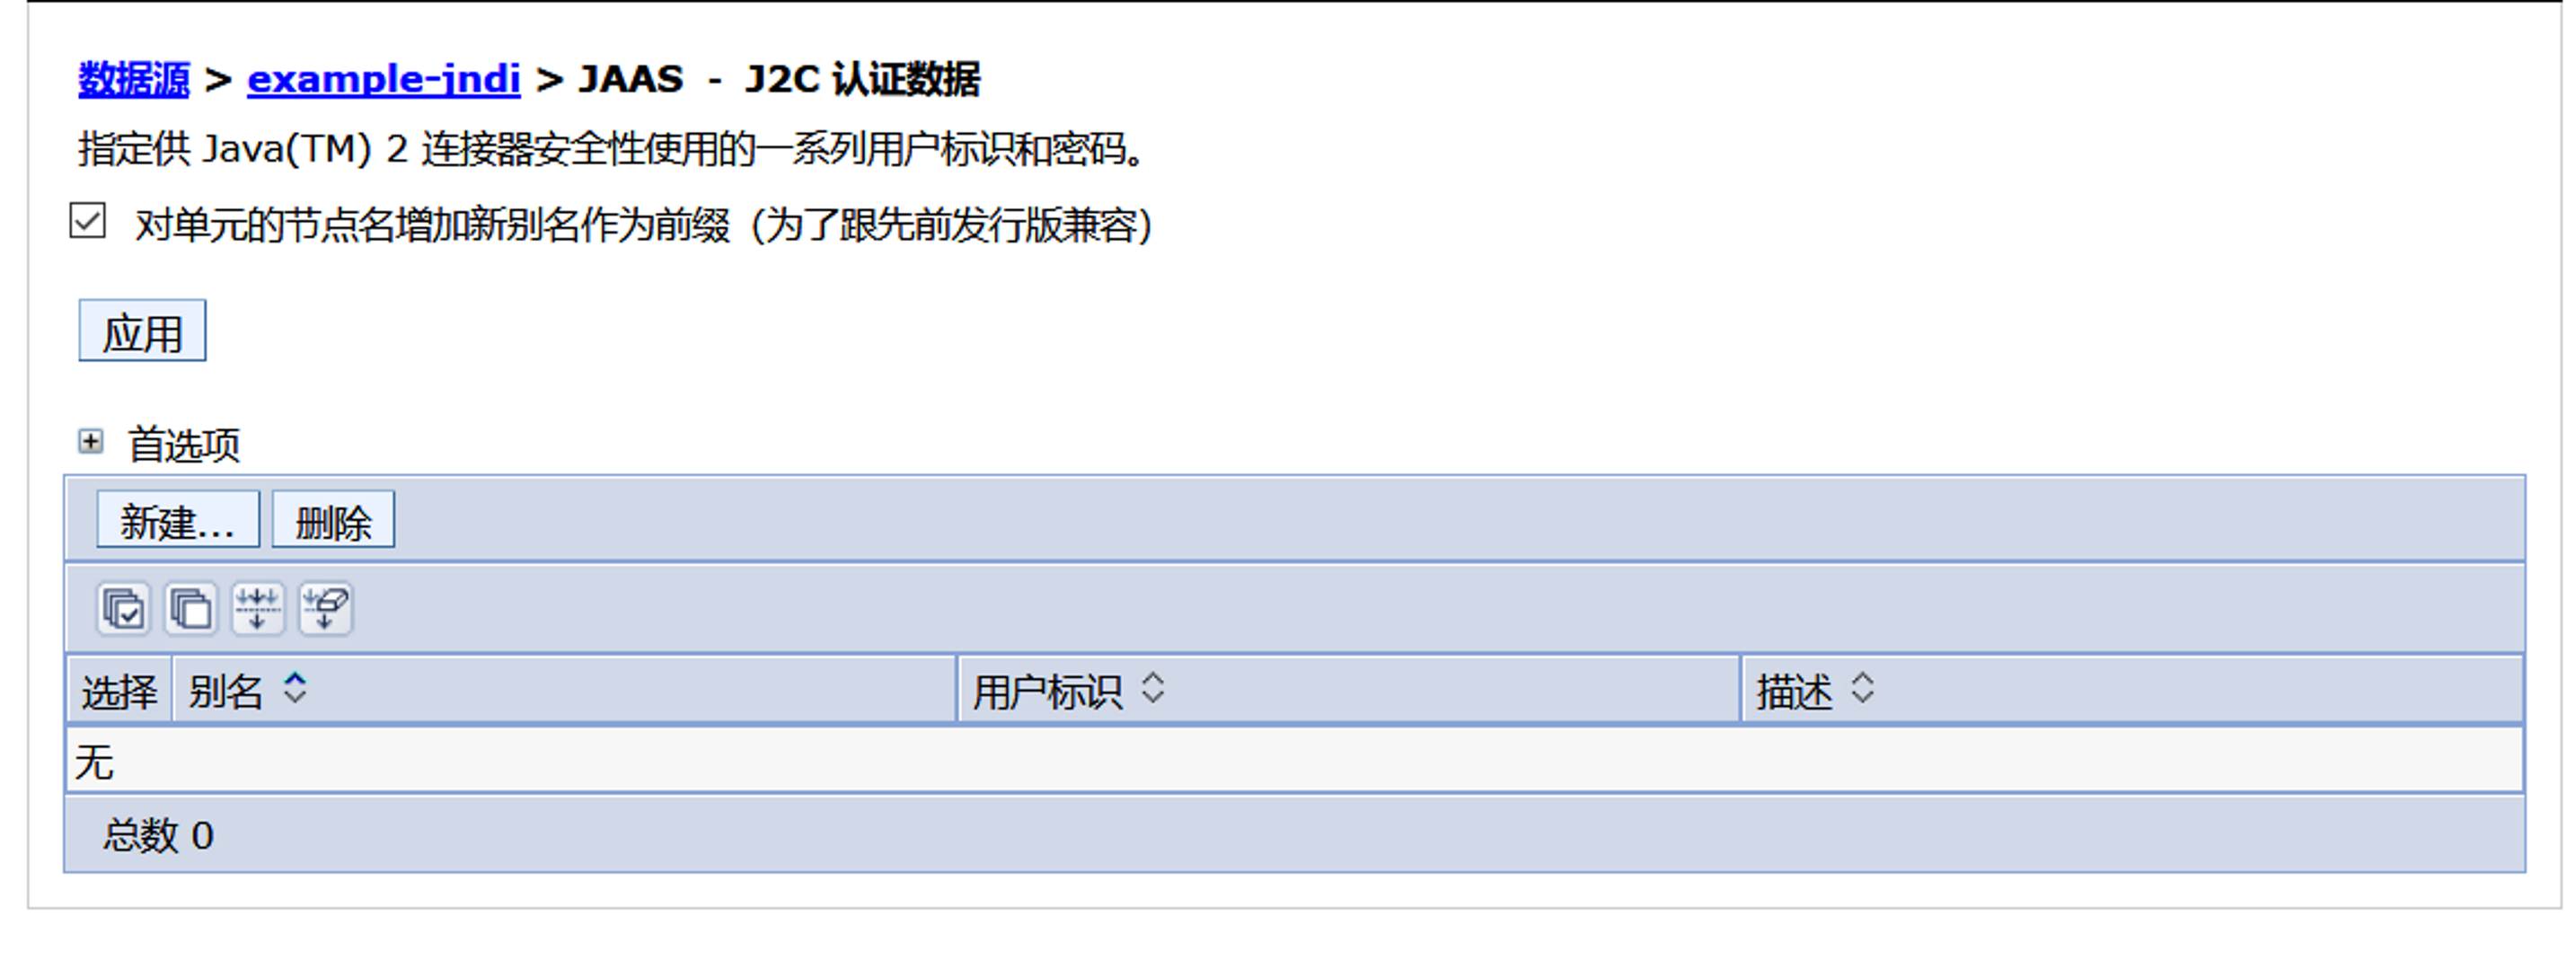
 12)新建一项
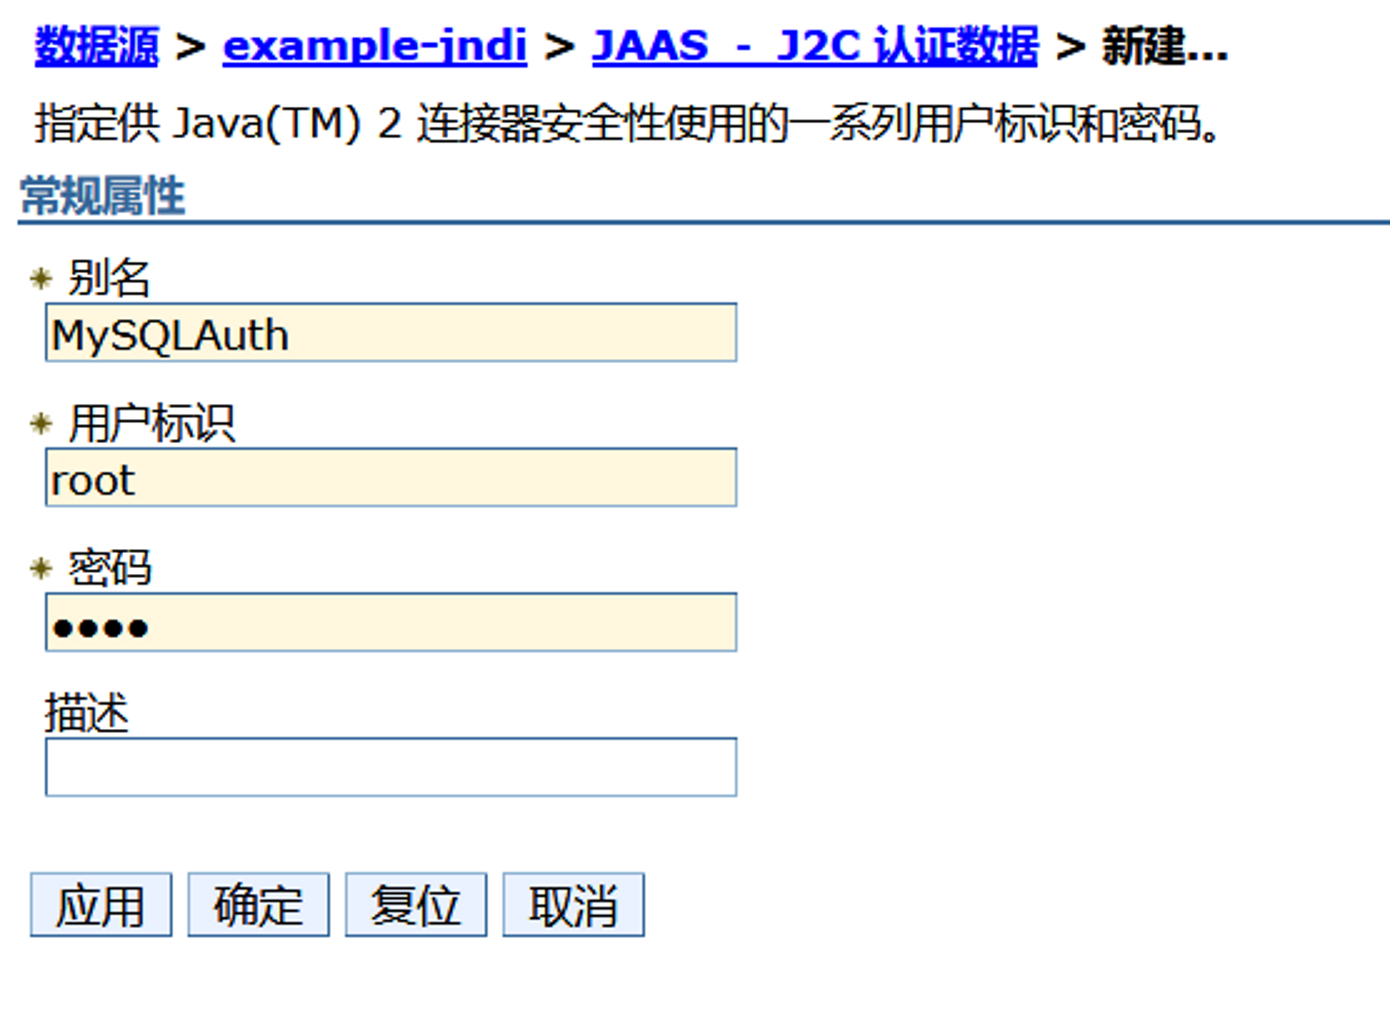
 13)别名可自定义,用户标识和密码需要填写为数据库的用户名和密码。
 14)确定之后,再次打开刚新建的数据源配置,选择右侧定制属性。
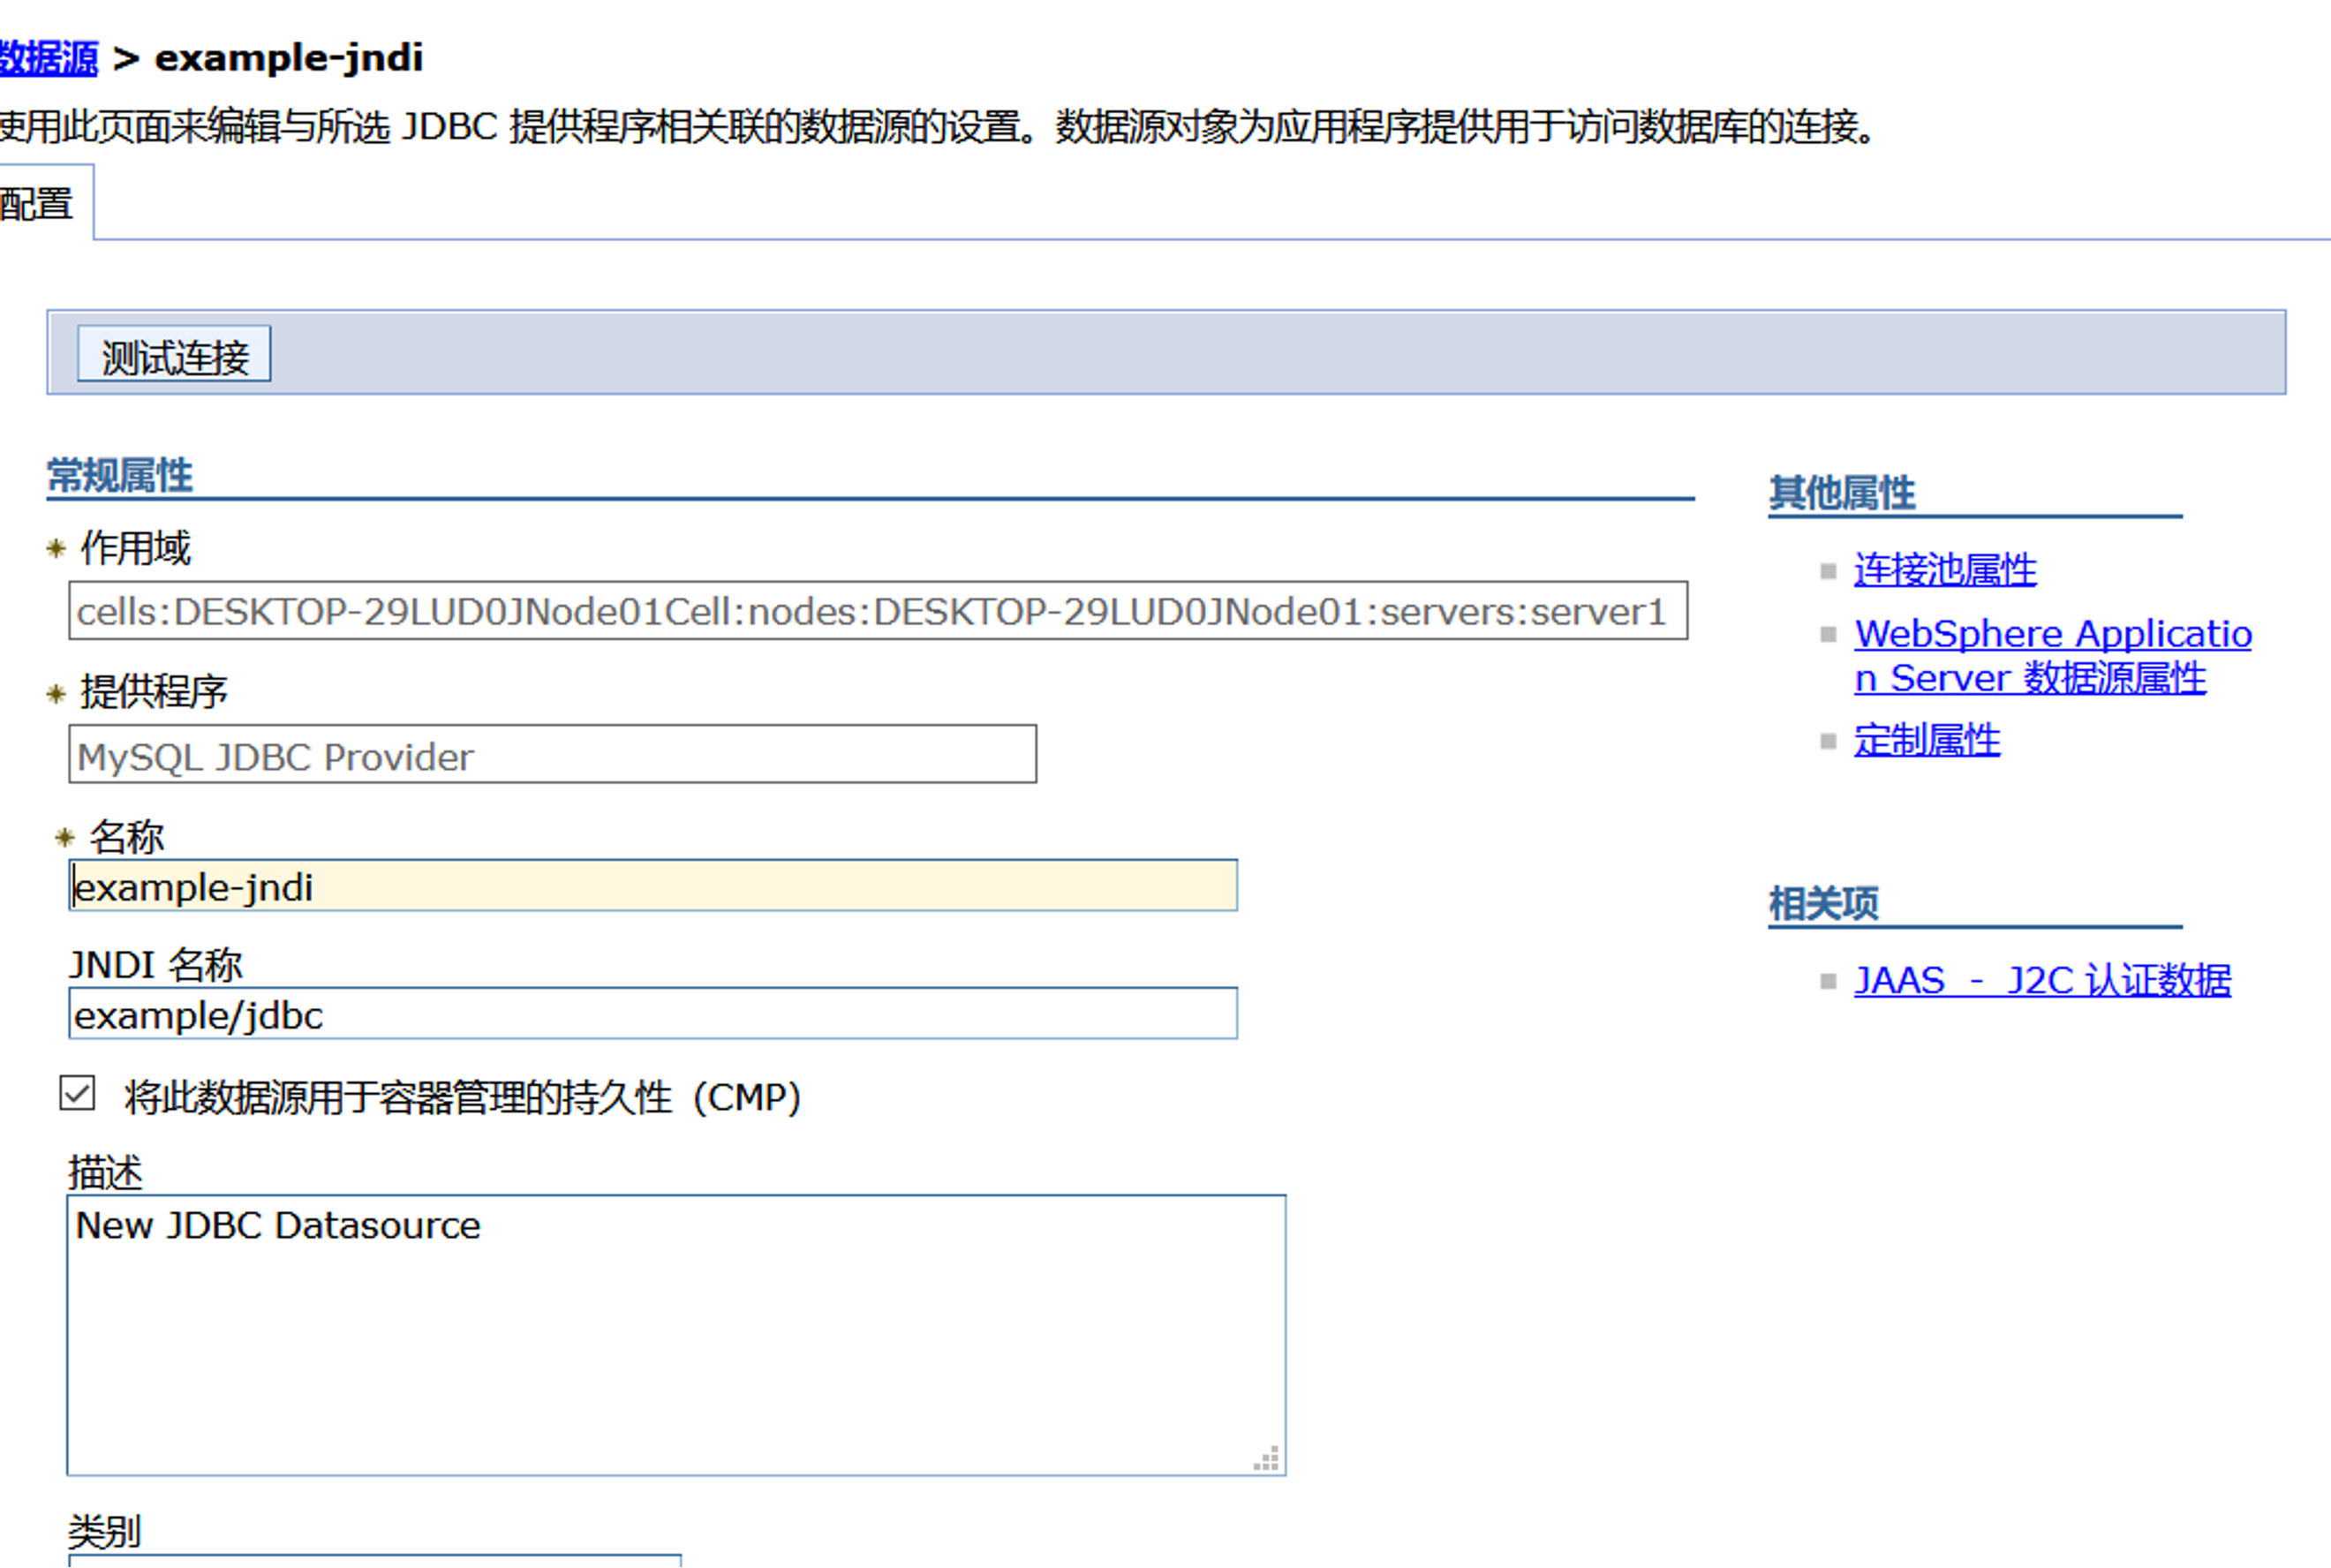 15)新建一条属性
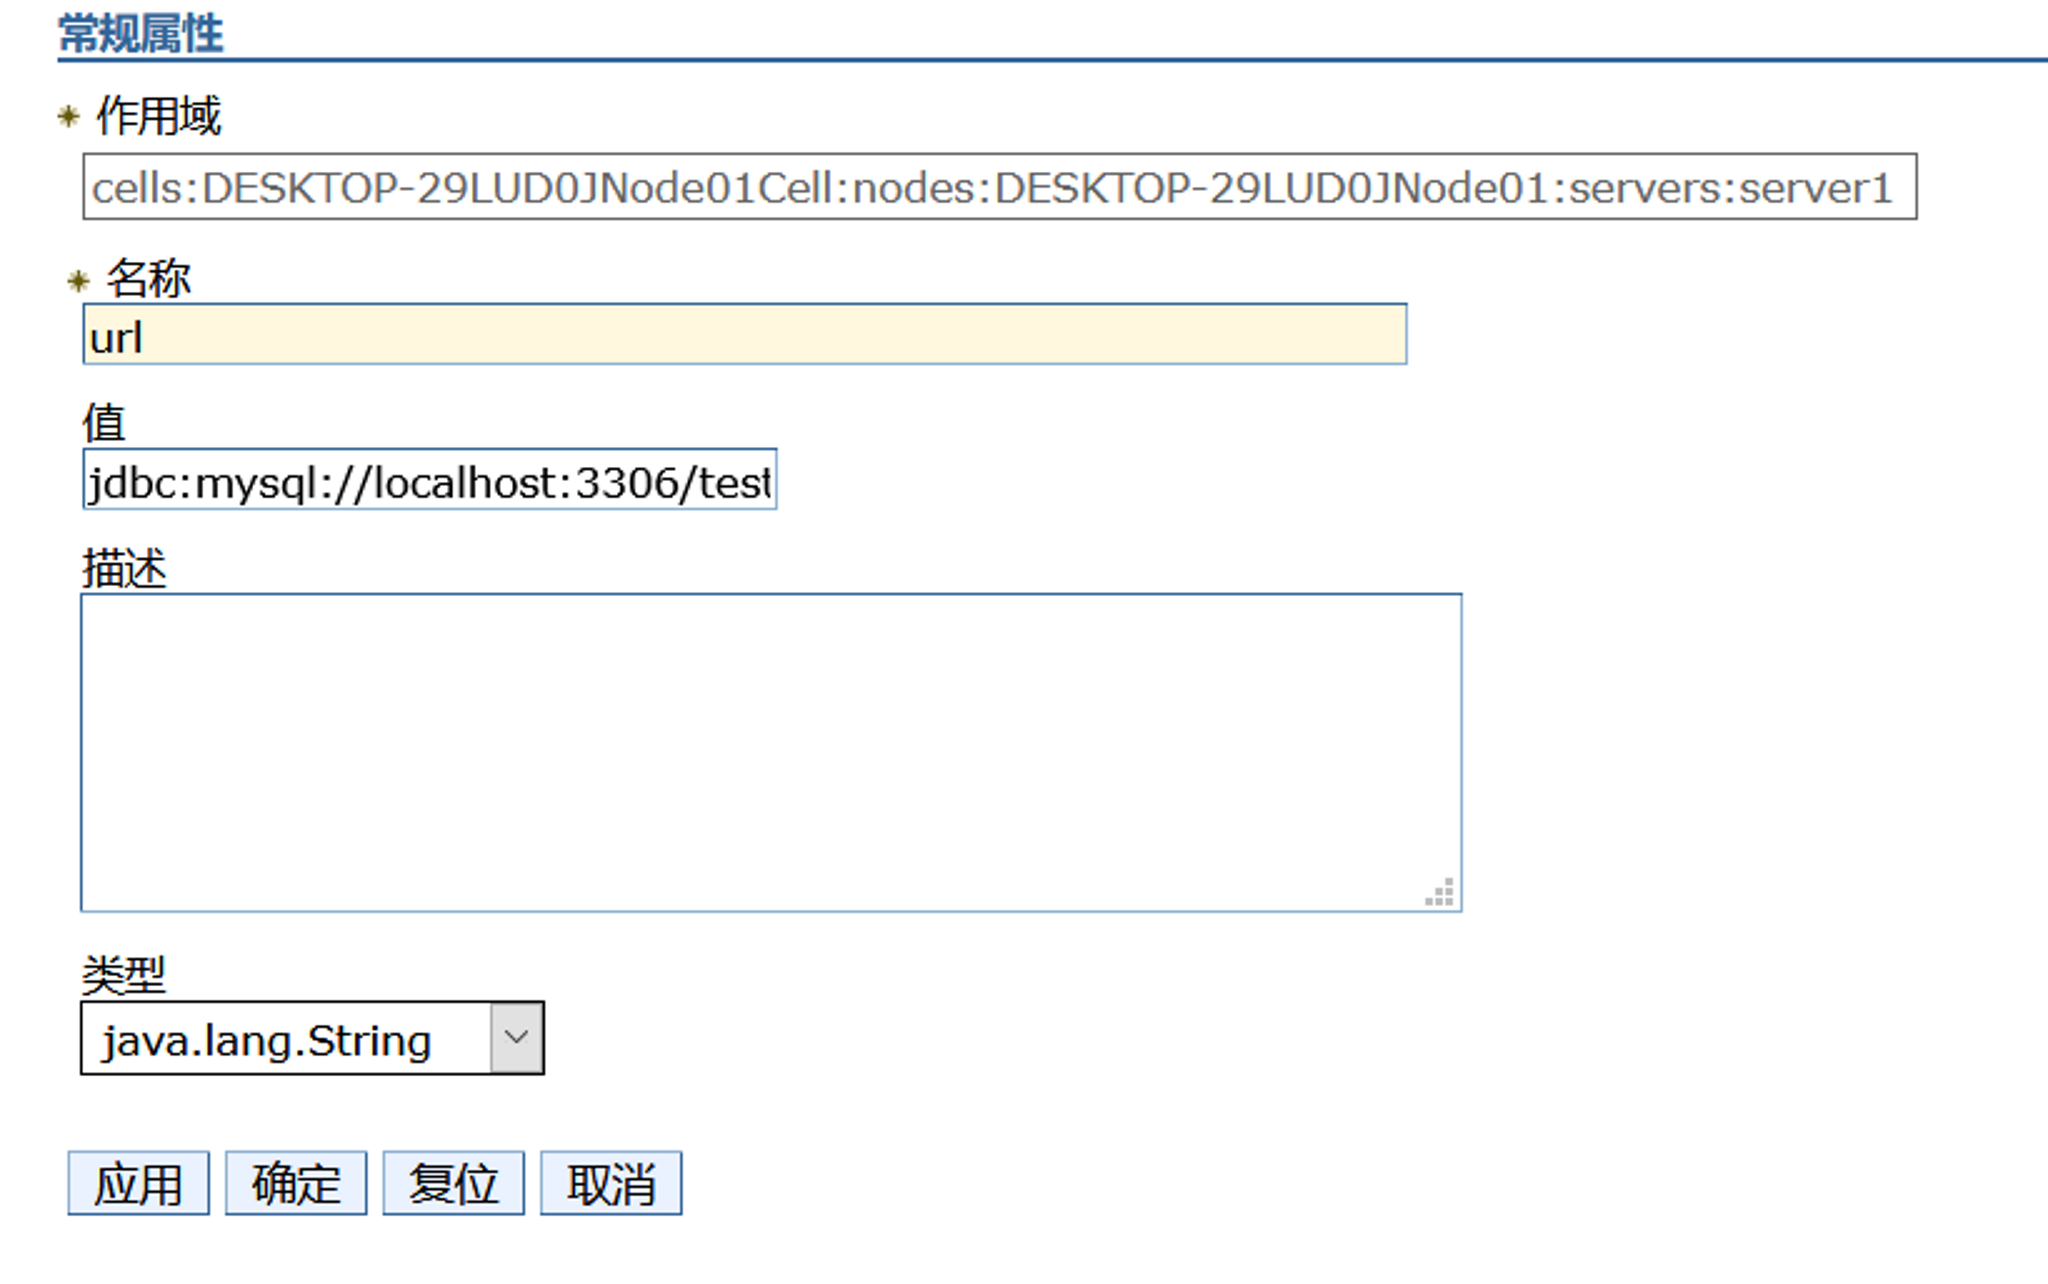
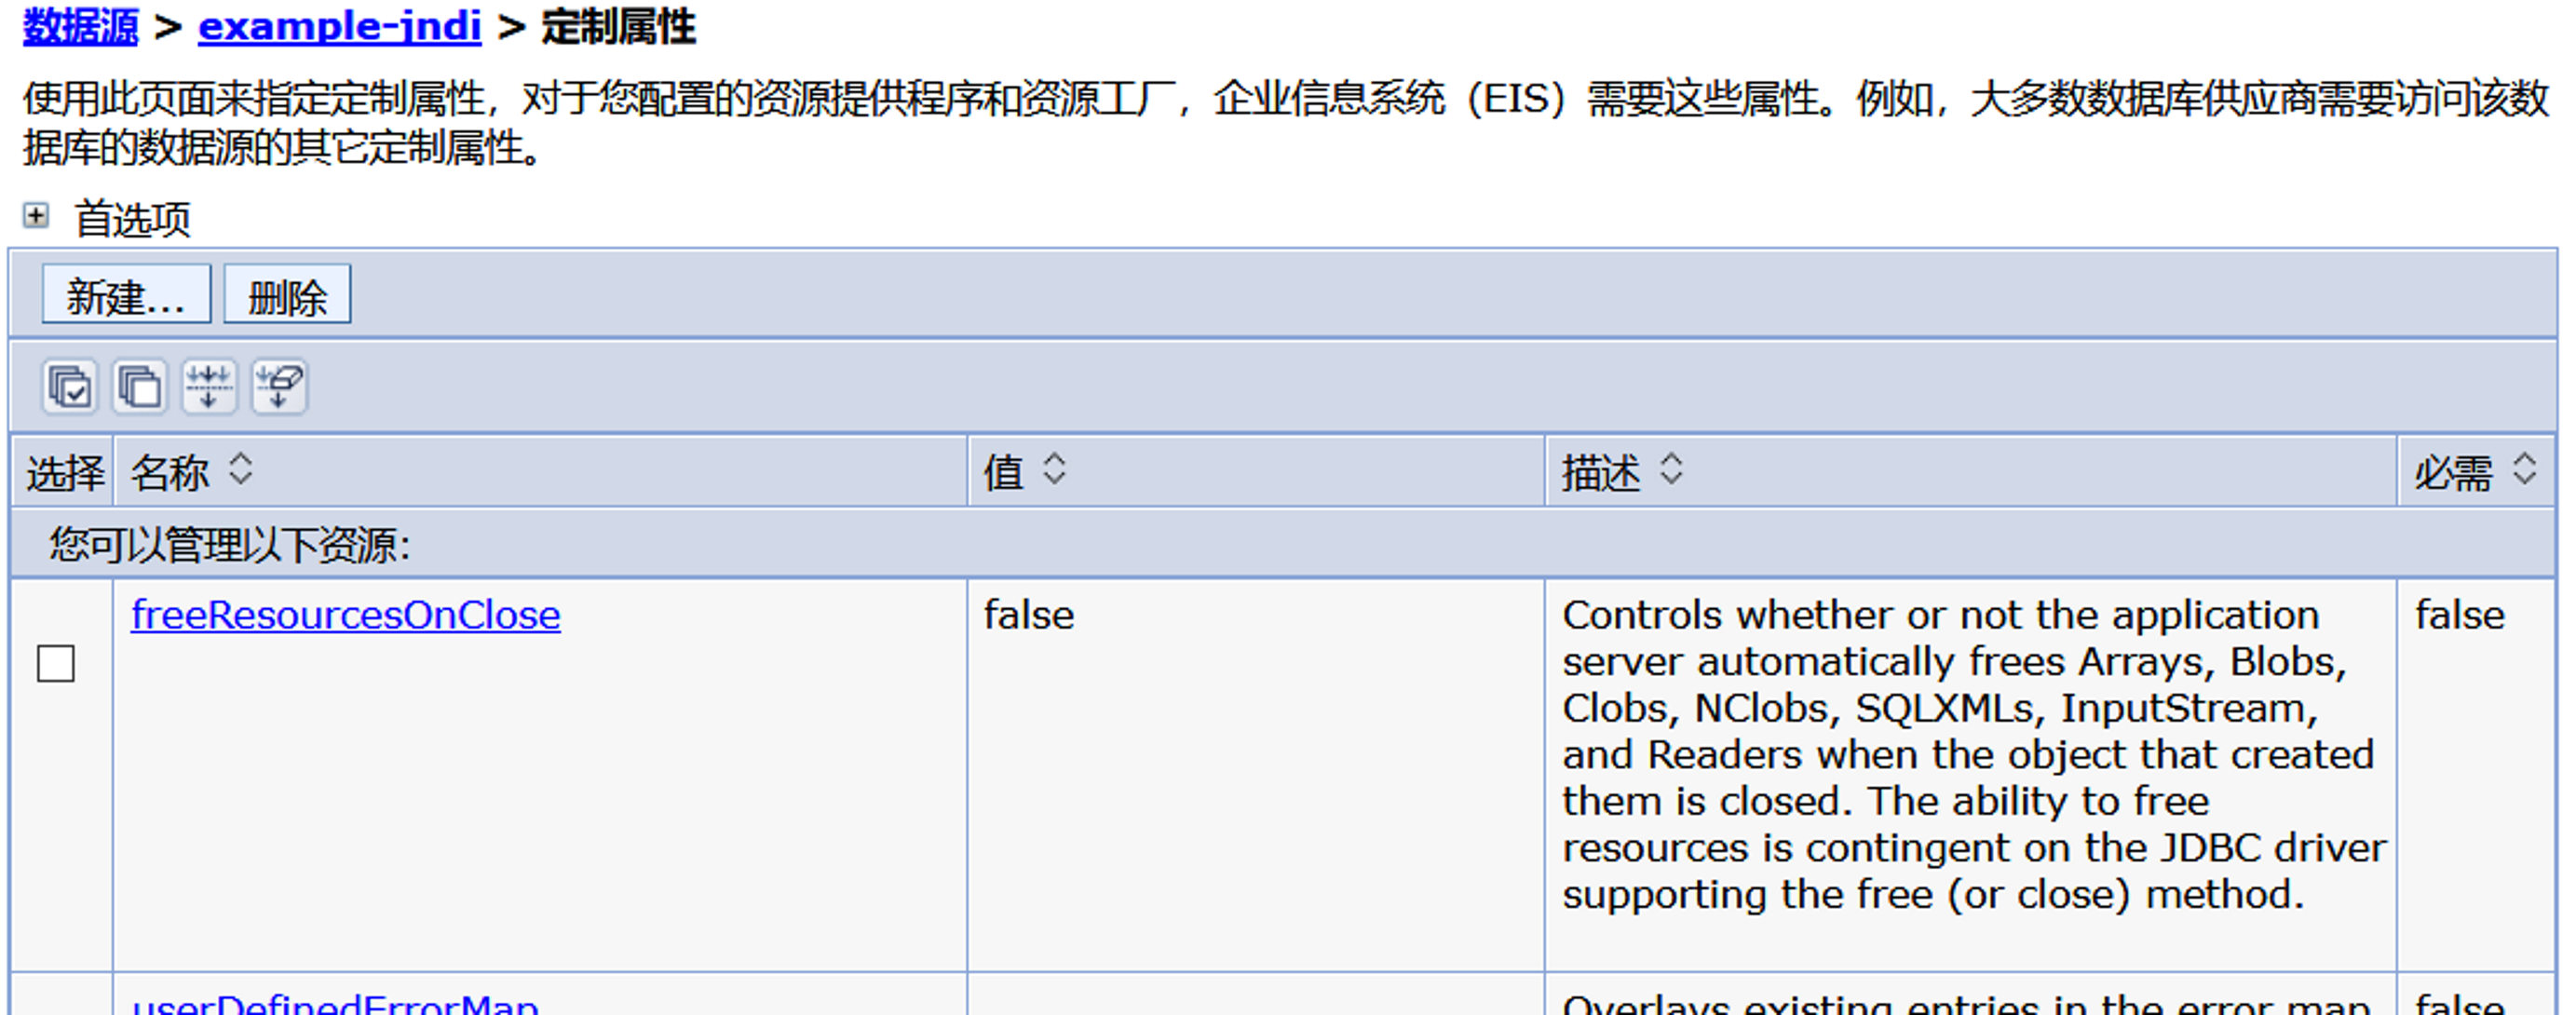 16)名称为“url”,这个是固定的。值则是数据库地址,java一般是jdbc:mysql://开头。
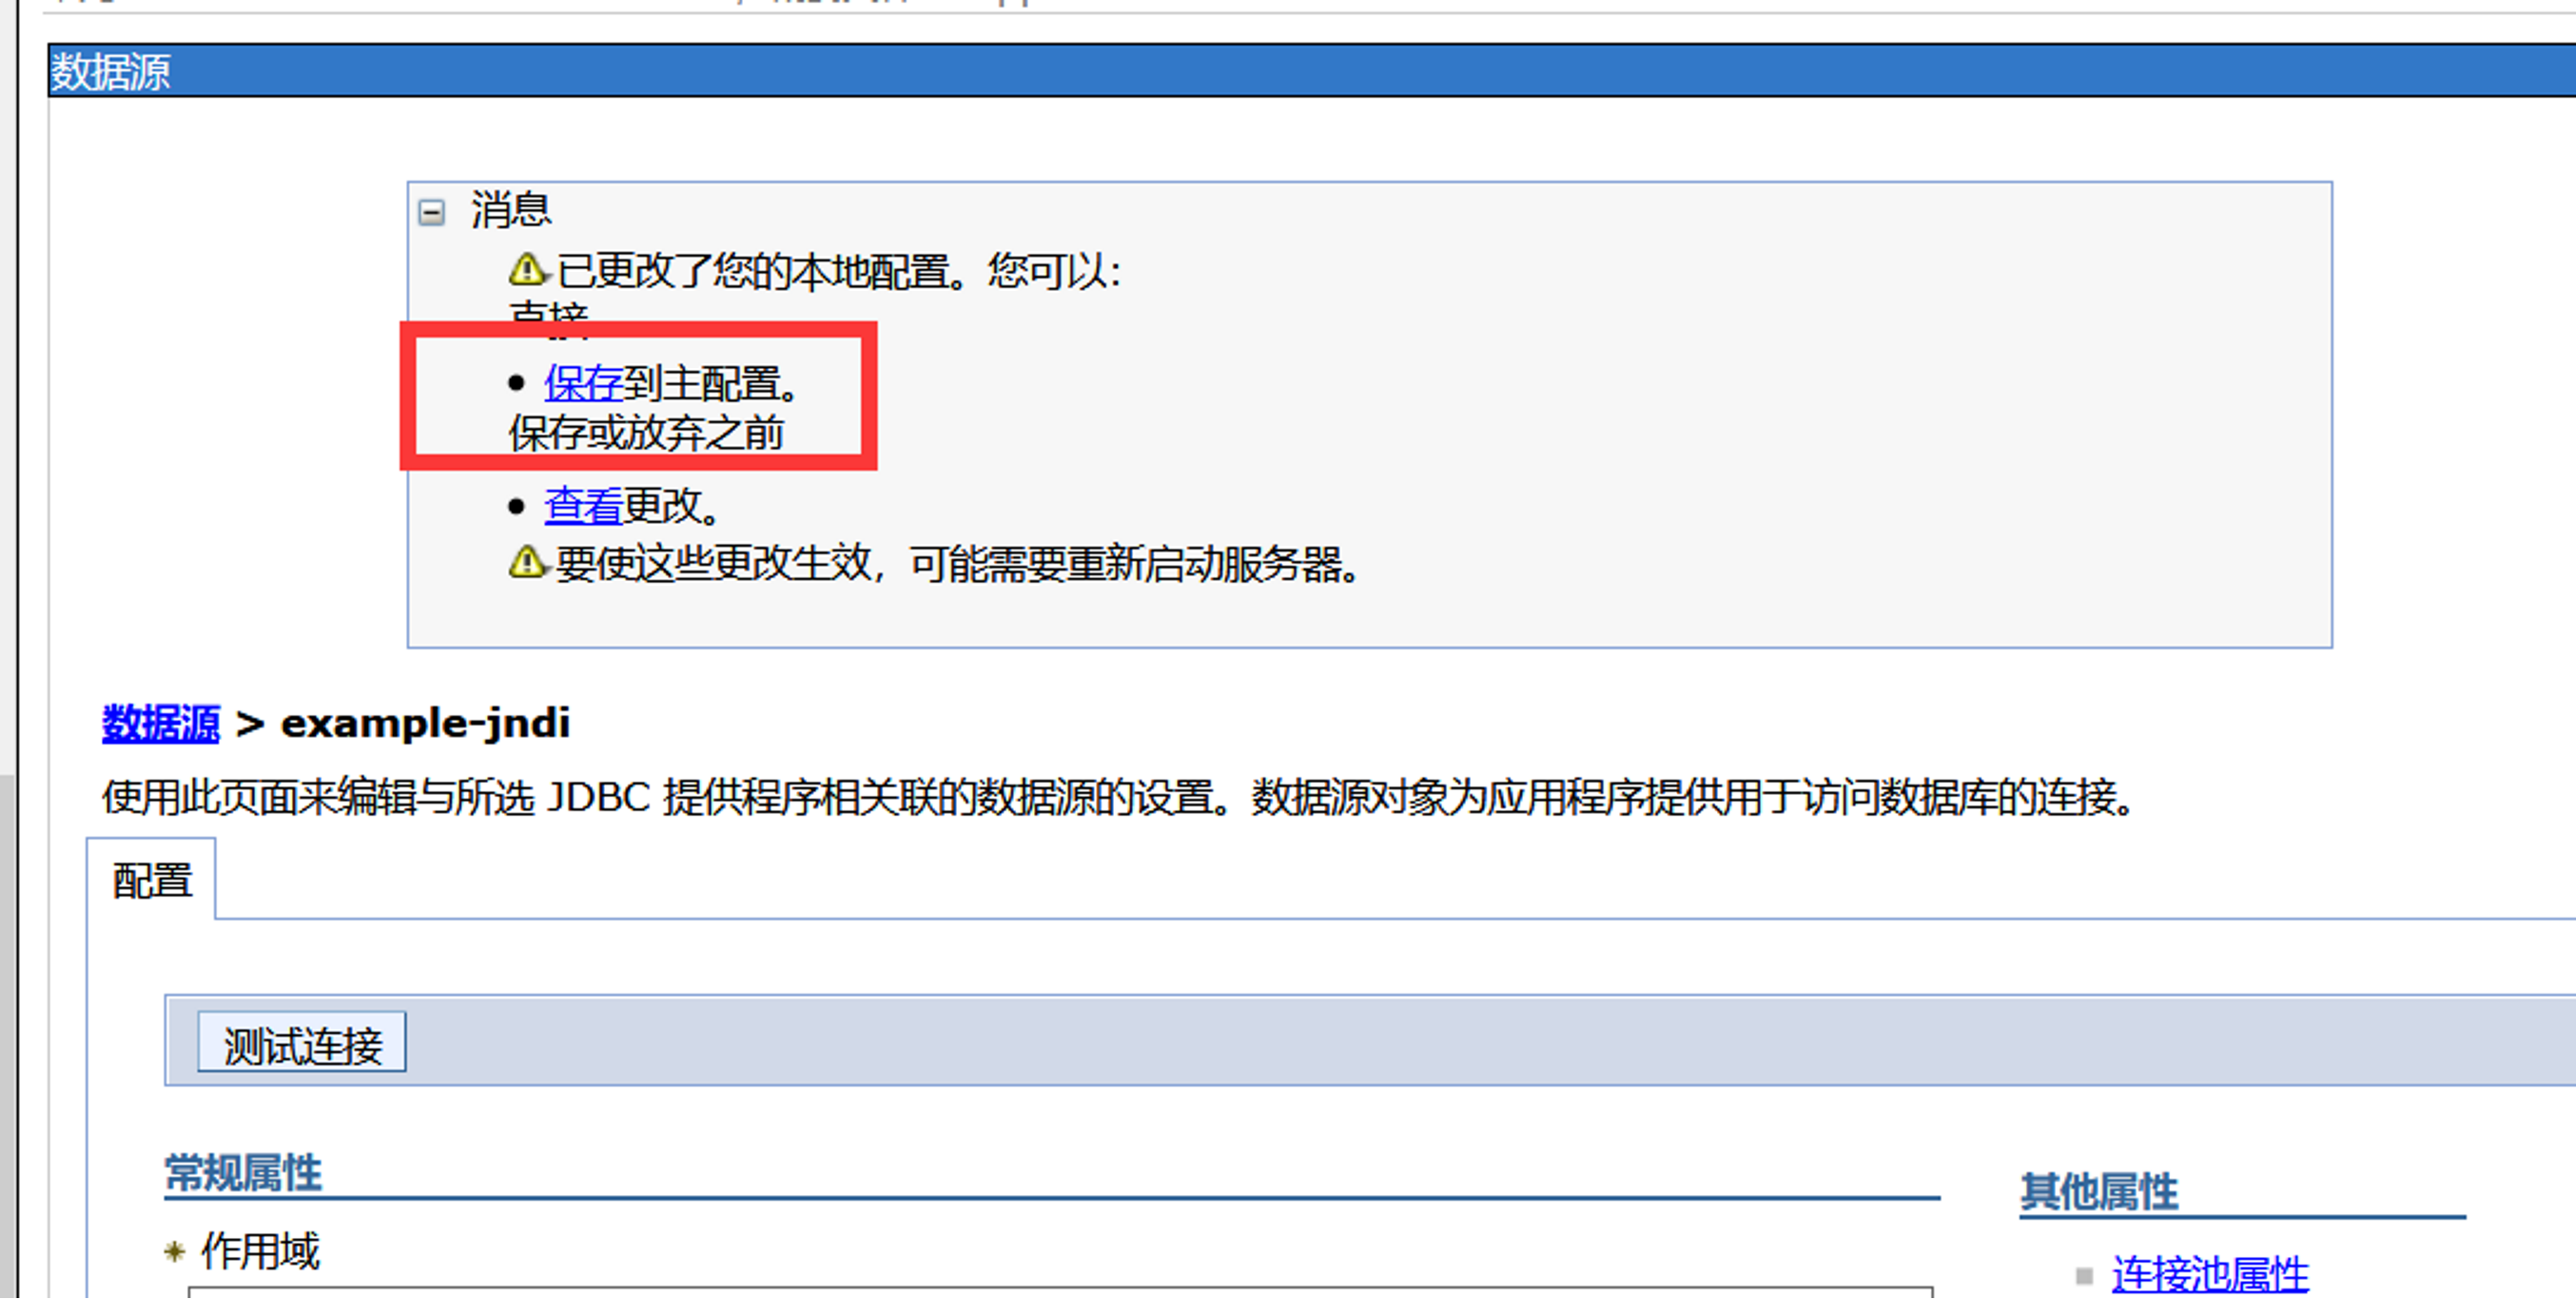
 17)确定之后返回JNDI数据源配置,保存到主配置。点击测试连接,只要没有错误就OK,警告可以忽略。
18)完成之后部署之前的war包即可使用。
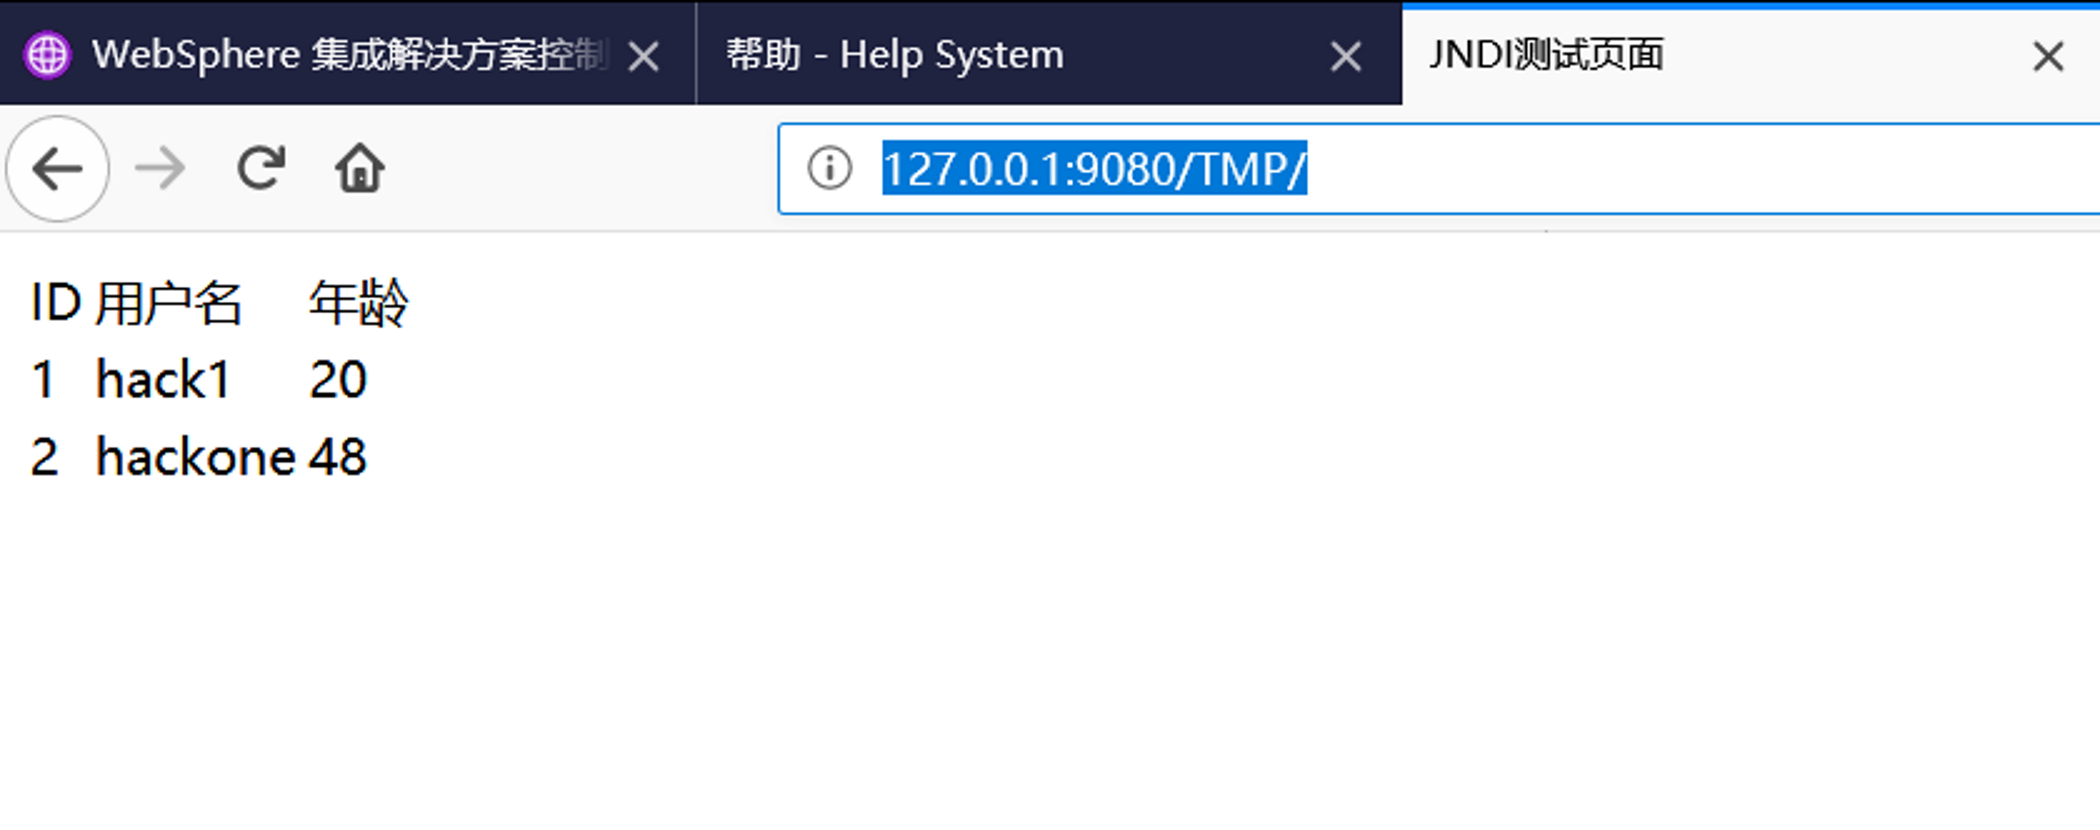
三、反向思考
以上三种配置,各位看官看还行?Tomcat上应该已经很透彻了,如果是Weblogic和Websphere要是某一天我进入不了控制台,又要找到数据库的配置,咋办???还请继续往下看。
3.1 WebLogic 12c
1)WebLogic当配置好JNDI数据源后,对应的配置会存放到域目录的config\jdbc下。(域目录由WebLogic由用户指定,安装或控制台皆可配置,我安装的时候直接无脑下一步自然就在这里了C:\Oracle\Middleware\Oracle_Home\user_projects\domains\base_domain)
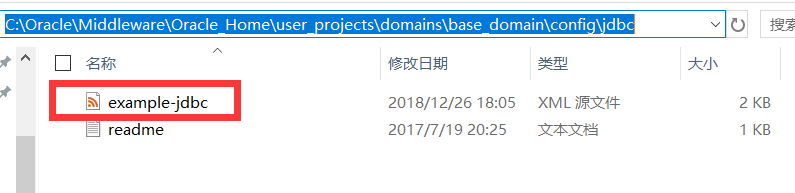 2)根据WebLogic控制台中配置的名称,在此处就会保存为对应名称的配置文件。上面配置案例是”example-jdbc”,所以文件名也就是example-jdbc.xml。打开配置文件查看配置内容,配置中包含数据库连接、数据库用户名、加密后的口令、JNDI名称。
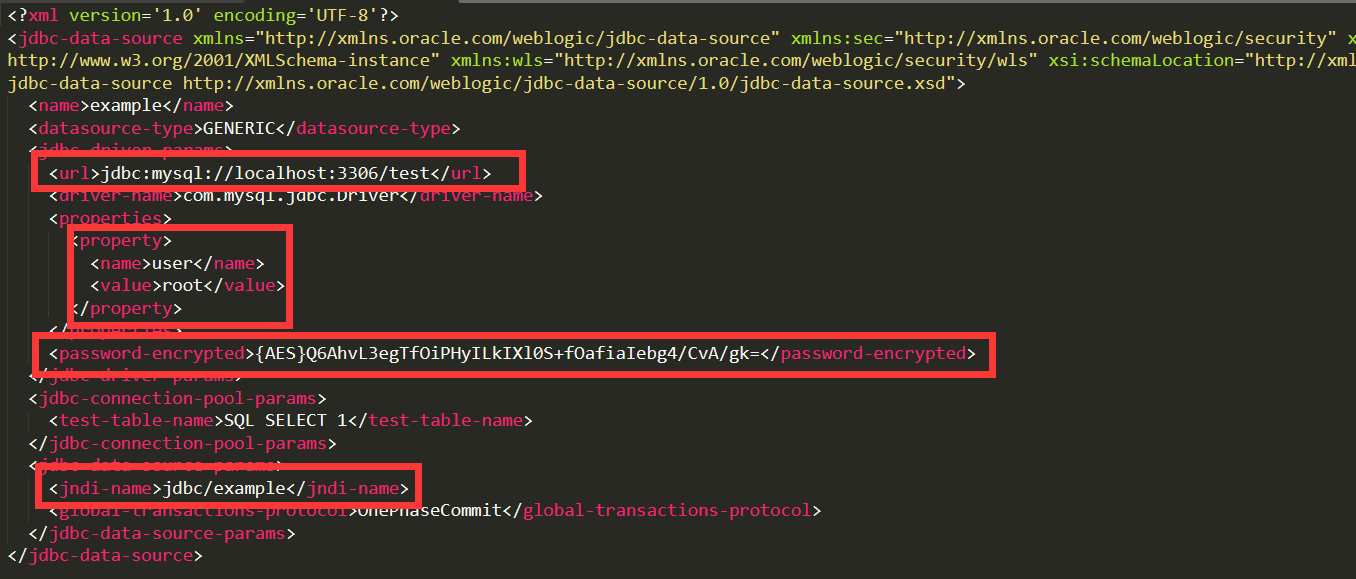 3)既然是找回密码,那还需要解密一下密码才算完结。WebLogic的密码解密需要两个条件,一个是加密后的字符串,一个是域目录下security\SerializedSystemIni.dat文件。具备两者就可以进行解密了。解密工具地址:https://github.com/NetSPI/WebLogicPasswordDecryptor。(当然解密控制台密码也是可以的。)

3.2 WebSphere 8.5.5.14
1)WebSphere稍稍麻烦点,大概就像前面配置一样麻烦。值得回顾一下之前在配置的时候有作用域的选项,不同的作用域配置,会导致数据库配置保存在不同的位置。庆幸的是文件名是固定的都是resources.xml。
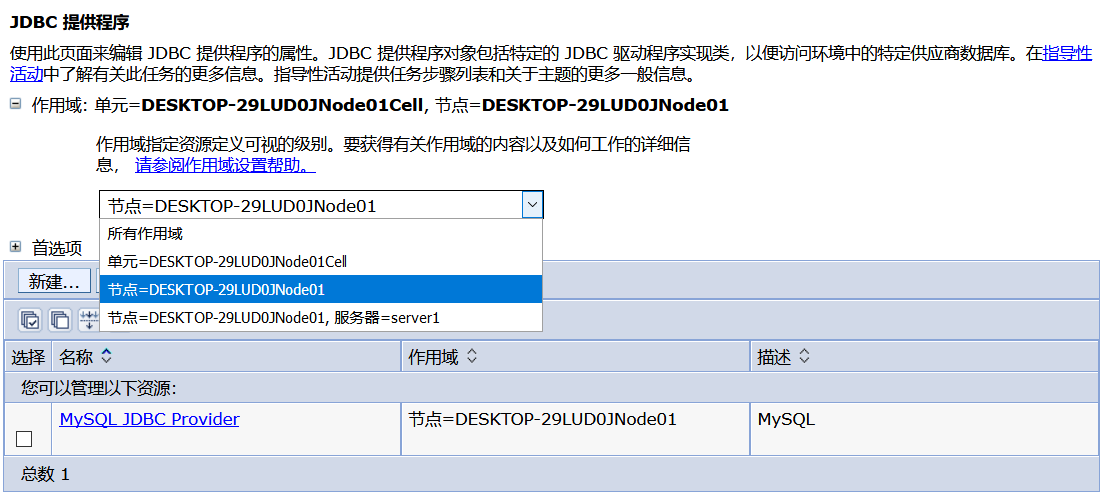
2)无脑下一步安装后单元作用域默认路径C:\Program Files (x86)\IBM\WebSphere\AppServer\profiles\AppSrv01\config\cells\DESKTOP-29LUD0JNode01Cell,这里面需要注意AppSrv01,DESKTOP-29LUD0JNode01Cell都是可以自由配置无固定形式,但是中间的路径结构是固定的。(DESKTOP-29LUD0JNode01Cell意思是{SystemHostName}Node01Cell。)
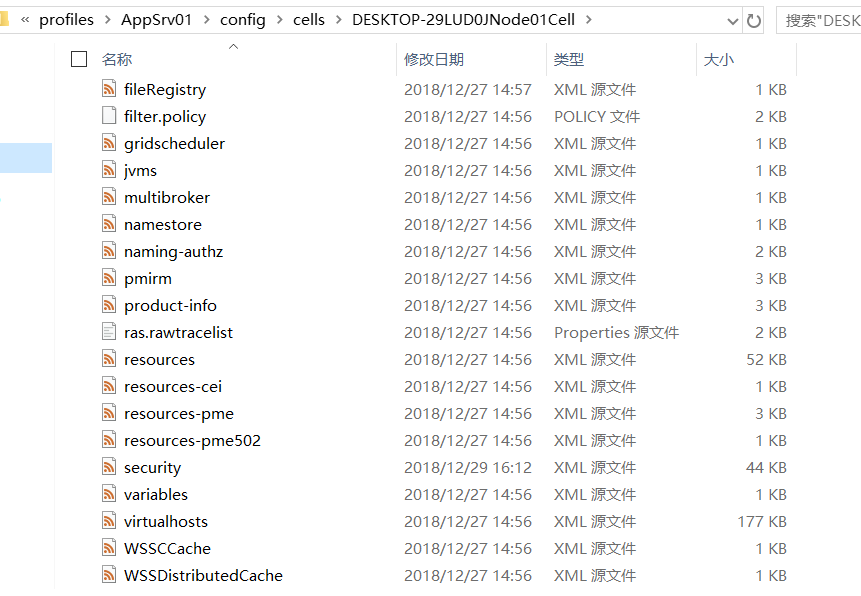 2)再深入节点作用域则是在单元作用域路径的基础上深入目录\nodes\DESKTOP-29LUD0JNode01。(DESKTOP-29LUD0JNode01意思是{SystemHostName}Node01。)
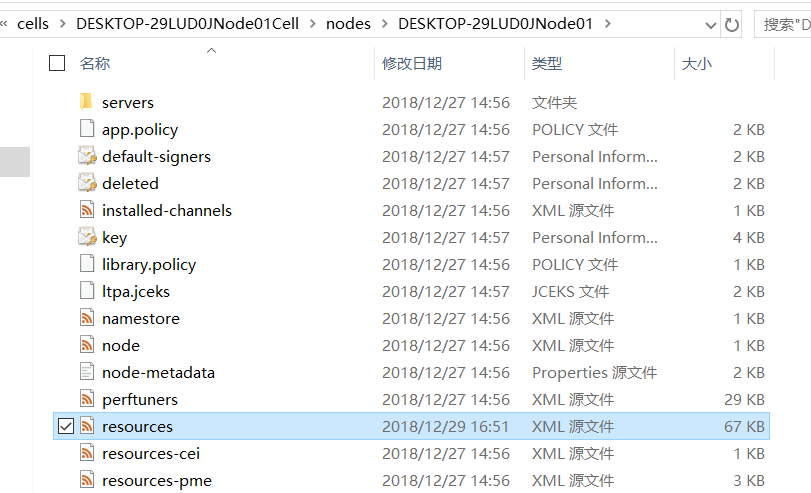 3)再再深入服务器作用域则是在节点作用域的基础上深入目录\servers\server1。
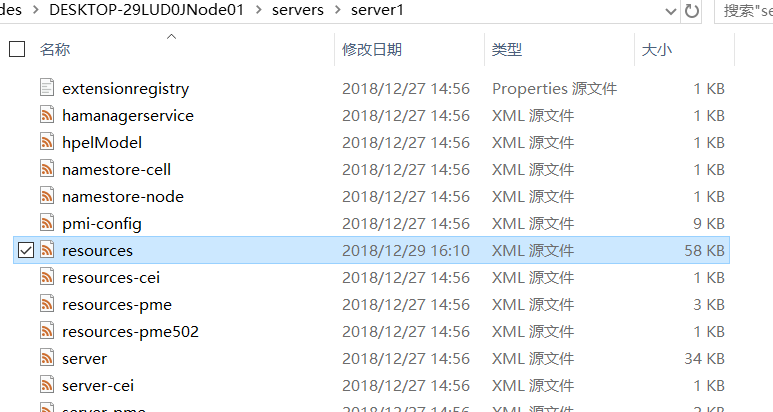 4)那么根据配置的作用域打开对应的resources.xml就可以了,然后在文件中搜索我们的jndi名称。我上面2.3的配置是设置在节点作用域下,故打开节点作用域的resources.xml。这里离目标更近一步了,我们获得了authDataAlias和数据库连接地址,接下来是找到真实的认证信息。


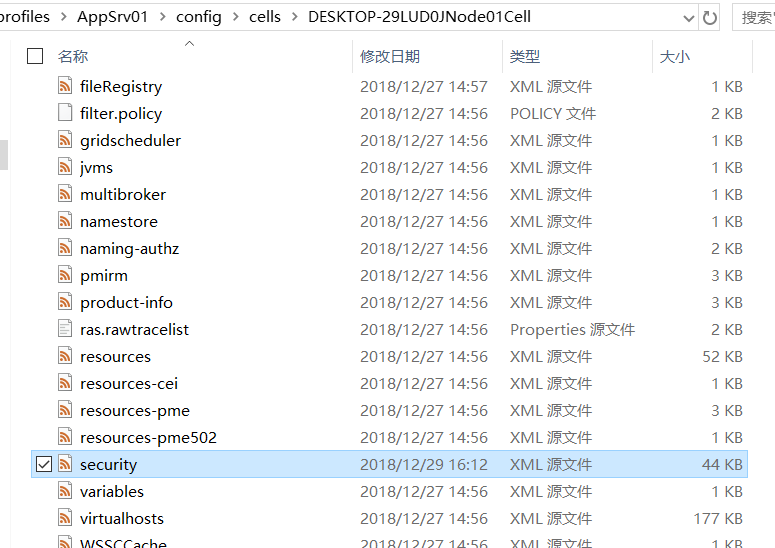
5)authDataAlias的值是保存在单元作用域下的security.xml文件中,打开security.xml搜索我们的别名。userId是数据库用户名,password则是数据库口令。
 6)又是一个处理过后的密码,这里有个网页工具可以一试http://strelitzia.net/wasXORdecoder/wasXORdecoder.html,就可以获得密码了。

四、总结
1、配置Tomcat需要通过文件编辑实现,而WebLogic和WebSphere提供了网页控制台配置方式。
2、Tomcat重点关注servers.xml、context.xml和\conf\Catalina\{servername}\{appname}.xml。
3、Weblogic配置藏在config\jdbc下,WebSphere分散保存在resources.xml和security.xml中。
4、代码审计时往往会遇上硬编码问题,可以将该风险转嫁规避。
*本文作者:wexiaojiu,转载请注明来自 FreeBuf.COM
来源:freebuf.com 2019-01-10 08:30:21 by: 漏洞盒子